Repairing 5/8 Type X Gypsum Board: Fixing Cracks, Sags, and Fire Gaps
Learn how to diagnose and repair common 5/8 Type X gypsum board issues like sagging, joint cracking, and compromised fire ratings with expert fixes.

The Unique Physics of 5/8 Type X Gypsum Board Failures
Standard 1/2-inch drywall is forgiving; 5/8 Type X gypsum board is not. Engineered with glass fibers and non-combustible additives to meet the rigorous ASTM E119 fire-resistance standard, Type X panels are significantly denser. A standard 4x8 sheet of 1/2-inch drywall weighs roughly 51 pounds, while a 5/8-inch Type X sheet (such as USG Sheetrock Brand Firecode X or CertainTeed Firestop C) weighs between 70 and 74 pounds. This 40% increase in mass fundamentally alters how the material interacts with framing, fasteners, and ambient moisture.
When troubleshooting failures in 5/8 Type X assemblies, contractors cannot simply apply standard drywall repair logic. The added weight exacerbates ceiling sag, the rigid core transfers structural stress directly to taped joints, and any improper repair instantly voids the assembly's fire-resistance rating. This guide provides field-tested diagnostic frameworks and code-compliant repair protocols for the most common failures encountered in fire-rated gypsum systems in 2026.
Troubleshooting Ceiling Sag and Fastener Popping
Sagging in 5/8-inch ceilings is rarely a material defect; it is almost always a framing or environmental failure. Because Type X panels are hygroscopic, they absorb ambient moisture during the construction phase. If installed on 24-inch on-center (OC) ceiling joists and exposed to high humidity before the joint compound cures, the panel's weight causes it to bow between the joists.
Diagnosing the Sag
- Visual Symptom: A visible belly or wave between joists, most prominent when light hits the ceiling at a grazing angle.
- Fastener Popping: As the board sags, it pulls away from the center of the joist, putting extreme shear stress on the perimeter screws, causing the gypsum core to crush and the screw heads to 'pop' through the paper face.
The Repair Protocol
If the sag exceeds 1/8-inch across a 4-foot span, the panel must be re-secured. Drive 1-5/8-inch Type S fine-thread drywall screws (for steel) or 1-1/4-inch coarse-thread screws (for wood) directly adjacent to the popped fasteners. Space these new fasteners no more than 12 inches OC along the ceiling joists. If the framing is 24 inches OC and the sag persists, you must install 1x3 wood furring strips or resilient channel perpendicular to the joists at 16 inches OC to provide intermediate support, then re-attach the board. For future replacements in high-humidity zones, specify USG Sheetrock Brand Ultralight Firecode X, which reduces panel weight by 20% while maintaining the 1-hour fire rating.
Diagnosing and Repairing Joint Cracking
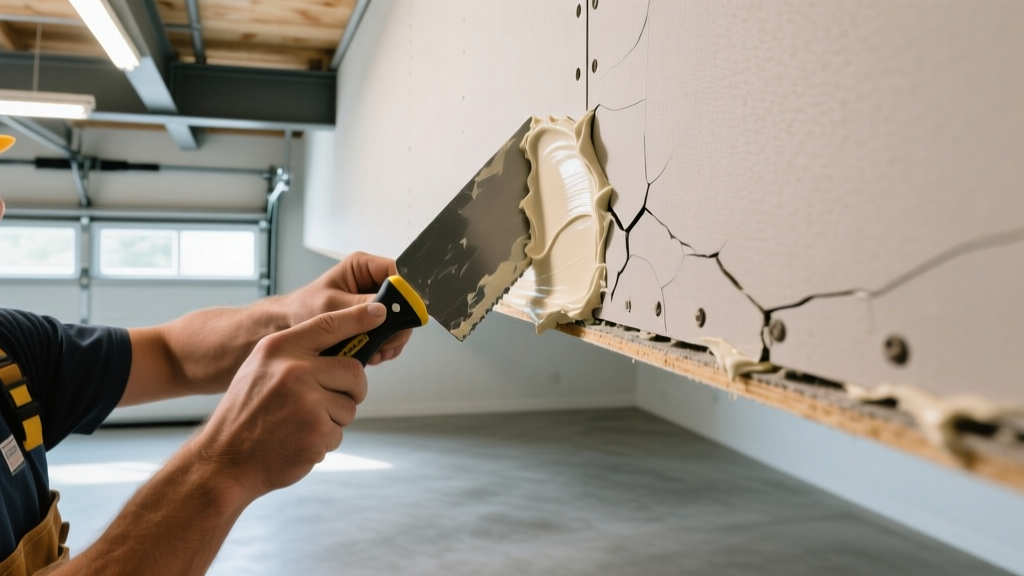
Cracks in 5/8-inch Type X walls and ceilings are typically symptoms of structural deflection or truss uplift, not poor taping technique. The dense, fiberglass-reinforced core of Type X makes the board highly rigid. When the building frame moves, the board does not flex; instead, the kinetic energy concentrates at the weakest points—the taped joints and inside corners.
| Crack Location | Probable Root Cause | Code-Compliant Repair Method |
|---|---|---|
| Ceiling-to-Wall Inside Corner | Truss uplift (bottom chord bowing upward in winter) | Cut out cracked tape. Re-tape using a flexible polymer tape (e.g., Strait-Flex) and float the ceiling edge. Do not fasten ceiling board within 16 inches of the wall. |
| Mid-Panel Field Joint (Straight Line) | Framing deflection or undersized joists | Route out the crack to a V-groove. Fill with setting-type compound. Apply paper tape and finish. Add structural blocking behind the joint if deflection continues. |
| L-Shaped Wall Intersections | Differential settling of intersecting shear walls | Remove rigid compound. Install a pre-formed vinyl expansion joint (e.g., Trim-Tex) to absorb lateral movement without tearing the paper face. |
Restoring Compromised Fire Ratings (ASTM E119 Compliance)
The most critical aspect of repairing 5/8 Type X gypsum board is preserving the fire-resistance rating. When you cut an access hole for plumbing or electrical work in a garage ceiling or multi-family demising wall, the patch must restore the continuous fire barrier. Standard drywall patching methods will fail a fire inspection and violate building codes.
The 5-Step Fire-Rated Patch Protocol
- Cut Geometric Openings: Never patch irregular or jagged holes in a fire-rated assembly. Cut the damaged area into a clean square or rectangle using a drywall router or keyhole saw. Symmetrical cuts ensure uniform compound thickness and predictable fire performance.
- Install Code-Compliant Backing: Use steel patch clips (e.g., Clip-Span) or screw 1x4 wood cleats to the existing framing inside the cavity. The backing must provide a solid nailing surface that mimics the original stud or joist support.
- Cut the Patch with Precision: Cut your 5/8-inch Type X patch exactly 1/8-inch smaller than the opening on all four sides. This gap is mandatory; it allows the setting-type compound to flow behind the patch, creating a dense, fire-resistant seal that mimics the original monolithic core.
- Fasten to Specification: Secure the patch using the correct fasteners. For wood framing, use 1-1/4-inch coarse-thread screws; for steel, use 1-5/8-inch Type S screws. Fasteners must be placed no more than 12 inches OC for ceilings and 16 inches OC for walls, with no fastener closer than 3/8-inch from the paper edge.
- Use Setting-Type Compound Only: This is where most contractors fail. Do not use all-purpose premixed drying compound for the base coat of a fire-rated patch. Drying compounds shrink as water evaporates, leaving microscopic voids that allow superheated gases to penetrate during a fire. You must use a chemical-setting compound (like USG Durabond 45 or 90) for the gap-fill and taping coats. Setting compounds undergo a crystallization process that achieves a density matching the Type X gypsum core.
For detailed assembly specifications and approved material combinations, always cross-reference your repair method with the UL Fire Resistance Directory to ensure the specific patch configuration maintains the 1-hour or 2-hour rating of the original wall or ceiling.
Water Damage: When to Patch vs. Replace
Standard 5/8-inch Type X gypsum board has zero moisture resistance. The dense core acts like a sponge, and the fiberglass mesh embedded within the core loses its binding integrity when saturated. If a plumbing leak or roof failure exposes a fire-rated ceiling to water, you must evaluate the damage critically.
The 48-Hour Replacement Rule
If the 5/8 Type X board has been wet for more than 48 hours, or if the paper facing shows signs of delamination (bubbling or peeling away from the gypsum core), the panel must be cut out and replaced. Attempting to dry out and patch severely water-damaged Type X compromises both its structural shear strength and its fire-resistive properties. The calcined gypsum core relies on chemically combined water (calcium sulfate dihydrate) to retard heat transfer during a fire; uncontrolled liquid water exposure disrupts this crystalline matrix.
Upgrading for Moisture Prone Zones
When replacing water-damaged 5/8-inch panels in areas prone to recurring humidity (such as unconditioned garage spaces, mechanical rooms, or basement ceilings), do not reinstall standard Type X. Instead, specify a moisture-and-fire-rated hybrid panel. Products like USG Securock or CertainTeed's Fiberock Aqua-Tough Firecode provide the same ASTM E119 fire-resistance and UL listings as standard Type X, but feature a water-resistant core and treated face paper that prevents mold growth and moisture degradation. In 2026, these hybrid panels typically cost $22 to $28 per 4x8 sheet, compared to $14 to $18 for standard 5/8 Type X, a worthwhile premium for preventing future catastrophic failures.
Proper troubleshooting of 5/8 Type X gypsum board requires looking past the surface finish to understand the structural and chemical demands of fire-rated assemblies. By respecting the material's weight, using setting-type compounds for fire barriers, and adhering strictly to GA-216 fastening schedules, you ensure the safety and longevity of the building's fire-resistance infrastructure.
Written by
Marcus ChenMarcus Chen is a licensed structural engineer (PE) and building materials analyst with over 12 years of experience across residential, commercial, and industrial construction. He holds a Master of Science in Civil Engineering from UC Berkeley and spent six years at Thornton Tomasetti before transitioning to independent consulting and technical writing. Marcus specializes in material selection for seismic-prone regions, concrete reinforcement strategies, and lifecycle cost analysis. His work has been cited by the American Concrete Institute (ACI) and the Structural Engineers Association of California (SEAOC). When he is not on a job site or at his desk, you will find him hiking the Sierra Nevada or restoring a 1920s craftsman bungalow in Oakland, CA.
More from Marcus Chen
View all
Construction Cost
How Much Did the Eiffel Tower Cost to Build?
How much did the Eiffel Tower cost to build in 1889? We adjust for inflation and compare its budget to modern skyscraper construction.
Aug 4, 2026

Fire Resistance
What Is a Fire Resistant Material? Testing & Certification Guide
Discover what is a fire resistant material through ASTM and UL testing. Learn how fire ratings, certifications, and assemblies work in construction.
Aug 4, 2026

Construction Cost
How Much Did the Burj Khalifa Cost to Build?
How much did the Burj Khalifa cost to build? We break down the $1.5B project and extract 5 money-saving strategies for your next build.
Jul 30, 2026