Plaster vs Gypsum Board Repair: Troubleshooting Wall Cracks
Master plaster vs gypsum board repair. Learn to identify wall types, diagnose structural cracks, and execute expert patches for lath and drywall.

The Diagnostic Phase: Identifying Your Wall System
Before mixing a single batch of joint compound, you must accurately identify the wall substrate. The debate of plaster vs gypsum board extends far beyond aesthetics; the two materials possess entirely different structural behaviors, thicknesses, and failure modes. Misdiagnosing the substrate is the primary reason wall repairs fail within six months.
Historic plaster systems typically consist of three coats (scratch, brown, and finish) applied over dimensional wood lath, resulting in a total thickness of 7/8-inch to 1-inch. Modern gypsum board, governed by The Gypsum Association standards, is a factory-cured gypsum core encased in paper, uniformly manufactured at 1/2-inch or 5/8-inch. This 3/8-inch thickness discrepancy is the most critical variable when executing transitional repairs.
Troubleshooting Matrix: Failure Modes and Root Causes
Cracks and surface defects manifest differently depending on the substrate. Use this diagnostic matrix to pinpoint the exact failure mode before selecting your repair methodology.
| Symptom | Wall System | Root Cause | Expert Repair Strategy |
|---|---|---|---|
| Diagonal cracks radiating from door/window corners | Plaster | Structural settling or framing shrinkage | V-groove the crack, fill with elastomeric caulk, and bridge with Fibafuse mesh tape |
| Bubbling or peeling tape at flat joints | Gypsum Board | Moisture intrusion or improper compound embedding | Cut out bubbled tape, pre-fill gap with setting compound, re-tape with paper tape |
| Map cracking (alligatoring) or bulging | Plaster | Broken plaster keys separating from lath | Secure with plaster washers, then apply a veneer plaster skim coat |
| Circular drywall pops or ridging | Gypsum Board | Lumber twisting or fastener backing out | Drive a new 1-1/4" coarse-thread screw 2 inches away, dimple and spackle |
Repairing Plaster: Saving the Keys and Lath
When dealing with historic plaster, the goal is preservation rather than demolition. The National Park Service Preservation Brief 21 emphasizes that plaster is an integral structural diaphragm in older homes; removing it compromises wall rigidity and acoustic dampening.
Fixing Delamination with Plaster Washers
When the 'keys' (the plaster that squeezed through the lath and hardened) break, the finish coat bulges away from the wall. Do not use standard drywall screws to pull it back; the screw heads will punch right through the brittle finish coat.
- Acquire specialized hardware: Use perforated zinc plaster washers (available from specialty suppliers like Charles Street Supply).
- Locate the framing: Use a stud finder or magnetic scanner to find the wood lath and underlying studs.
- Secure the wall: Drive 1-1/4-inch drywall screws through the washers into the studs. The wide, perforated flange distributes the clamping force, pulling the loose plaster tight against the lath without cracking it.
- Skim coat: Cover the washers and any remaining cracks with a high-adhesion veneer plaster or a setting-type joint compound like USG Durabond 45.
Bridging Structural Cracks
Hairline cracks in plaster will telegraph through standard joint compound if simply spackled. You must rout the crack into a 'V' shape using a utility knife or rotary tool, vacuum the dust, and fill the void with a paintable, high-elasticity acrylic caulk. Once cured, apply a self-adhesive fiberglass mesh tape (such as FibaTape) and embed it with a setting-type compound to create a flexible, monolithic bridge.
Repairing Gypsum Board: Joints, Pops, and Blown Tape
Gypsum board repairs are straightforward but frequently botched by using the wrong compounds. The most common mistake is using pre-mixed 'all-purpose' joint compound out of a bucket for deep fills or structural patches.
Pre-mixed compounds cure by evaporation. A deep fill in a drywall patch will shrink, crack, and pull away from the edges as the water evaporates. Always use a chemical-setting compound (like USG Easy Sand 45 or Durabond 90) for the base coats of any repair deeper than 1/8-inch.
For blown tape, slice the bubble open with a razor, remove the loose paper, and pre-fill the void with setting compound. Let it cure, then apply a fresh layer of compound and embed standard paper tape. Paper tape provides superior tensile strength at butt joints compared to self-adhesive mesh, which relies entirely on the compound's shear strength.
The Expert Challenge: Patching Drywall into Existing Plaster
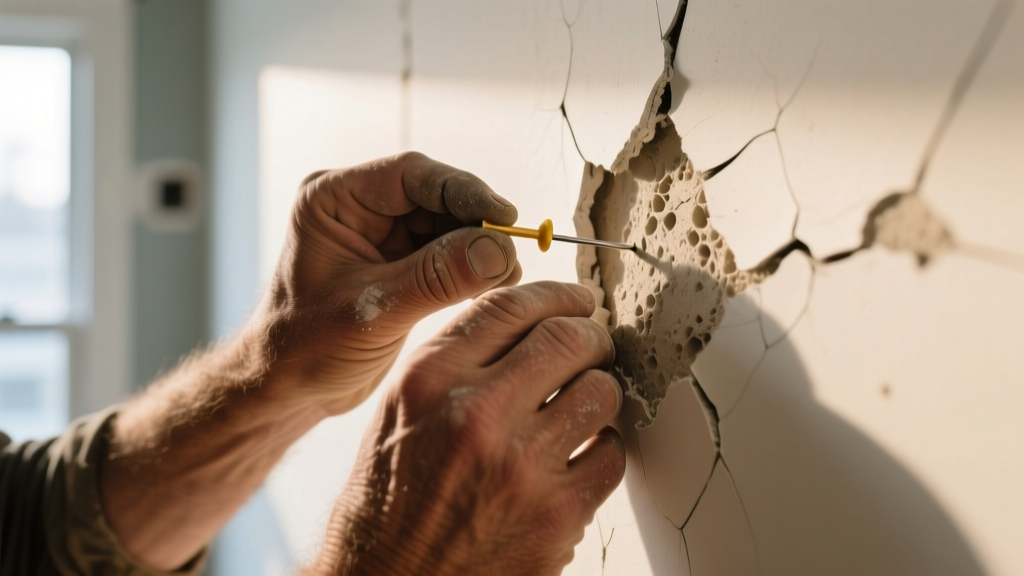
The ultimate test of a finisher's expertise occurs when repairing a severely damaged plaster wall by patching in modern gypsum board. This is where the 'plaster vs gypsum board' thickness mismatch causes disastrous results for amateurs. If you screw a standard 1/2-inch drywall patch directly into a plaster wall's studs, the patch will sit 3/8-inch below the existing plaster surface. Attempting to feather a 3/8-inch layer of joint compound over a small patch will result in massive shrinkage, cracking, and an unhideable hump.
Method A: The Shim Approach (Best for Large Patches)
- Rip 3/8-inch thick wood furring strips on a table saw.
- Screw the furring strips to the exposed studs where the plaster was removed.
- Screw your 1/2-inch drywall patch to the furring strips. The patch will now sit perfectly flush with the surrounding 7/8-inch plaster.
- Tape and finish the perimeter joints using paper tape and a setting-type base coat.
Method B: The 1/4-Inch Board Build-Up (Best for Small Patches)
- Screw 1/4-inch gypsum board (such as USG SheetRock 1/4") directly to the studs. It will sit 5/8-inch below the plaster surface.
- Fill the 5/8-inch recess with a heavy, shrink-resistant base coat like USG Structolite or a deep-fill setting compound.
- Score the surface of the wet base coat to provide mechanical tooth for the final layer.
- Once cured, apply a final 1/8-inch skim coat of finishing compound, feathering it seamlessly into the existing plaster.
Material and Cost Breakdown
Understanding the financial scope of your repair helps dictate whether a DIY approach or professional restoration is warranted.
| Repair Type | Primary Materials Required | DIY Cost (per sq. ft.) | Pro Cost (per sq. ft.) |
|---|---|---|---|
| Drywall Joint/Tape Repair | Setting compound, paper tape, 120-grit sanding sponge | $0.50 - $1.00 | $2.50 - $4.50 |
| Plaster Washer Reattachment | Zinc washers, 1-1/4" screws, veneer plaster | $2.00 - $3.50 | $8.00 - $12.00 |
| Full Plaster Skim Coat | Bonding agent, veneer plaster, stainless trowel | $4.00 - $6.00 | $15.00 - $25.00 |
| Transitional Drywall Patch | 1/2" drywall, wood shims, setting compound | $1.50 - $2.50 | $6.00 - $10.00 |
Whether you are stabilizing a century-old lime plaster ceiling or fixing a botched drywall seam in a modern addition, respecting the physical properties of the substrate is non-negotiable. By accurately diagnosing the failure mode and utilizing chemical-setting compounds and proper shimming techniques, you ensure a repair that remains invisible and structurally sound for decades.
Written by
Elena RodriguezElena Rodriguez is a civil engineer and technical writer specializing in concrete technology, masonry systems, and ASTM/ACI compliance. She earned her B.S. in Civil Engineering from Texas A&M University and spent a decade at a materials testing laboratory, performing over 2,000 concrete compressive strength tests and masonry prism evaluations. Elena is an ACI-certified Field Testing Technician (Grade I) and a member of ASTM Committee C12 on Natural Building Stone. She currently consults on forensic engineering cases involving concrete failures and moisture intrusion. Based in San Antonio, TX, Elena is a proud member of the Society of Women Engineers (SWE) and coaches her daughter's FIRST Robotics team.
More from Elena Rodriguez
View all
Walls & Panels
Cost Analysis: Light Gauge Steel Framing Advantages and Disadvantages
Evaluate light gauge steel framing advantages and disadvantages through a strict cost analysis lens, comparing material, labor, and lifecycle expenses.
Aug 4, 2026

Walls & Panels
Gypsum Board Types: Exact Specifications, Thickness & Dimensions
Compare standard, Type X, and moisture-resistant gypsum board types. Get exact specifications, thicknesses, dimensions, and ASTM standards for your project.
Aug 4, 2026

Fire Resistance
Best Fire-Resistant Outdoor Decking Materials: 2026 Buyer Guide
Discover the best fire-resistant outdoor decking materials for 2026. Compare Class A PVC, aluminum, and hardwood options for WUI compliance and safety.
Aug 4, 2026