Mastering Aluminum Composite Panel Installation for Exterior Facades
Learn precise aluminum composite panel installation procedures, from subframe routing and tray folding to weather-sealing exterior facades.
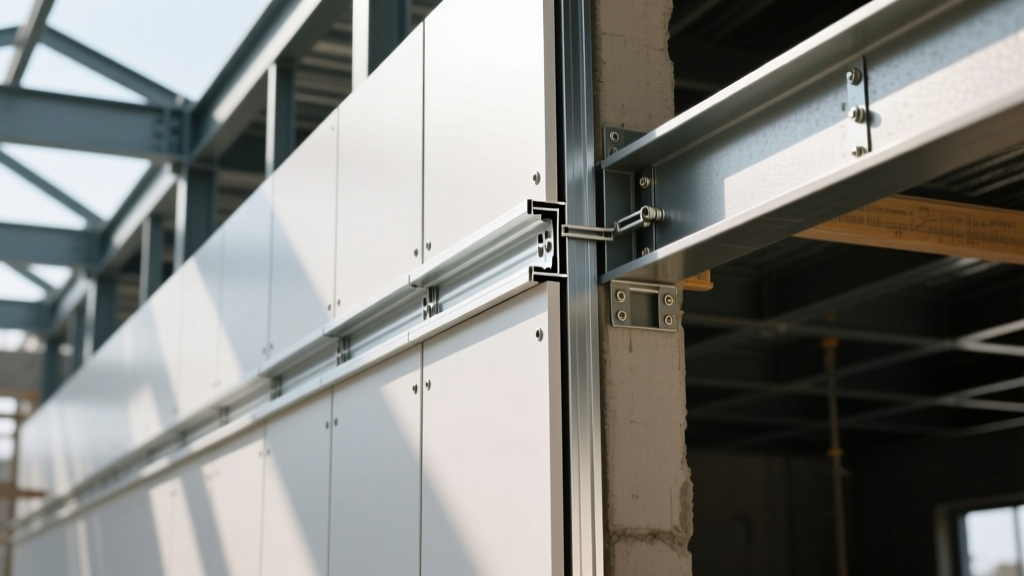
Pre-Installation Engineering and Subframe Alignment
The structural integrity and visual flatness of an aluminum composite panel (ACP) facade rely entirely on the precision of the underlying subframe. Modern architectural standards dictate that ACP subframes be constructed from either extruded aluminum structural tubing (minimum 6061-T6 alloy) or hot-dipped galvanized steel. When utilizing steel subframes, direct contact between the steel and the aluminum panel or aluminum clips must be strictly prohibited to prevent galvanic corrosion.
Subframe grid spacing is determined by the panel thickness and local wind load calculations. For standard 4mm ACP (with a 0.5mm aluminum skin), vertical mullions are typically spaced at 24 inches (600mm) on center, while horizontal transoms are spaced at 16 inches (400mm) on center. All subframe members must be plumbed and aligned to a tolerance of +/- 1/16 inch over a 10-foot span. Any deviation beyond this tolerance will telegraph through the ACP, causing visible 'oil-canning' or rippling effects on the finished facade.
Routing and Grooving: Cassette vs. Tray Method
Fabricating aluminum composite panels requires precise CNC routing to allow the flat sheet to fold into a three-dimensional cassette or tray. The routing process removes the polyethylene or mineral-filled core material, leaving the inner aluminum skin intact to act as a hinge. According to the 3A Composites Technical Guidelines, the router bit must never penetrate the inner aluminum skin; doing so reduces the panel's structural rigidity and creates a direct pathway for moisture ingress.
Installers typically use solid carbide V-groove router bits, available in 90-degree and 135-degree profiles. The depth of cut must be calibrated to leave exactly 0.2mm to 0.3mm of the inner aluminum skin and core material intact. For high-volume fabrication, automated CNC routers with sonic depth sensors are preferred over manual hand routers to maintain this microscopic tolerance.
| Method | Routing Profile | Edge Treatment | Primary Application |
|---|---|---|---|
| Cassette (Routed & Folded) | 90° V-Groove | Folded corners, sealed with structural silicone | Commercial high-rises, large continuous facades |
| Tray (Routed & Folded) | 135° V-Groove or U-Groove | Open edges capped with aluminum extrusions | Low-rise commercial, retail storefronts, soffits |
| Flat Cut (Sawed) | N/A (Cut to size) | Edges hidden behind H-channels or U-channels | Interior cladding, signage, column covers |
Step-by-Step Fixing and Structural Anchoring
Once the ACP cassettes are folded and the corners are reinforced with structural silicone and aluminum corner keys, they are ready for anchoring to the subframe. The ALPOLIC Installation Manuals specify that mechanical fastening must accommodate the significant thermal expansion inherent to aluminum-faced materials.
Thermal Expansion Calculations
Aluminum expands at a coefficient of approximately 13 x 10^-6 in/in/°F. For a standard 10-foot (120-inch) panel experiencing a 100°F seasonal temperature swing, the panel will expand or contract by roughly 0.156 inches. If panels are rigidly pinned without allowing for this movement, the resulting compressive stress will cause severe buckling.
- Fastener Selection: Use 5/32-inch (4mm) diameter stainless steel or Monel blind rivets with a minimum 1/2-inch (12mm) edge distance. Do not use carbon steel fasteners, even if plated.
- Hole Oversizing: Drill panel fixing holes to 5/16-inch or 3/8-inch to create a slip plane. The rivet shank must not bind against the edge of the hole.
- Fixing Sequence: Anchor the top center of the panel first (the fixed point). Proceed to the bottom corners (sliding points), ensuring the panel hangs plumb before securing the remaining perimeter fasteners.
- Torque and Setting: When using screws instead of rivets into threaded aluminum extrusions, apply a torque of 15 to 20 in-lbs. Over-torquing will strip the extrusion threads or dimple the ACP face.
Weatherproofing and Joint Sealing Protocols
The longevity of an exterior ACP facade depends heavily on the weather-sealing system. Routed edges, where the core material is exposed, are highly susceptible to water absorption if left unsealed, which can lead to core delamination over time. Before folding a routed panel, a continuous bead of neutral-cure silicone must be applied inside the V-groove.
For the exterior joints between adjacent cassettes, a wet-sealed system using structural silicone is the industry standard. Acidic (acetoxy) or alkaline sealants must be strictly avoided, as they will chemically attack the aluminum skin and degrade the PVDF (Kynar 500) fluoropolymer paint finish.
Sealant Joint Sizing Rule: Maintain a 2:1 width-to-depth ratio for horizontal joints and a 1:1 ratio for vertical joints. For a standard 1/2-inch wide joint, the sealant depth must be exactly 1/4-inch. Always use a closed-cell polyethylene backer rod to control depth, prevent three-sided adhesion, and provide a firm surface for tooling the sealant.
Before applying sealant, all aluminum contact surfaces must be cleaned using a two-wipe solvent method with isopropyl alcohol or a dedicated architectural cleaner like Dow Corning 1200 OS Cleaner. Following the cleaning, a specialized silicone primer (e.g., Dow Primer-G) must be applied to the edges of the ACP to ensure maximum adhesion to the painted aluminum surface.
Common Failure Modes and Edge Cases
Even with high-quality 4mm mineral-core ACP, improper installation techniques will manifest in visible and structural failures. Understanding these edge cases allows installers to troubleshoot issues before the scaffolding comes down.
| Failure Mode | Primary Cause | Corrective Action / Prevention |
|---|---|---|
| Oil-Canning (Rippling) | Subframe out of plumb; insufficient thermal expansion gaps; adhesive bonding used incorrectly on large panels. | Re-level subframe to 1/16' tolerance. Ensure 3/8' slip holes are used. Never use structural tape for primary exterior bonding on panels exceeding 16 sq ft. |
| Core Delamination | Water ingress into unsealed routed edges; use of incompatible solvent-based contact adhesives during fabrication. | Apply neutral-cure silicone into all V-grooves prior to folding. Seal all exposed cut edges with a brush-on polyurethane edge sealer. |
| Galvanic Staining | Direct contact between aluminum panels/clips and untreated steel subframes; runoff from adjacent copper flashing. | Install 40-mil EPDM isolation pads. Ensure copper elements higher on the facade are properly flashed to divert runoff away from ACP. |
| Sealant Adhesion Loss | Failure to use primer; three-sided adhesion due to missing backer rod; cleaning with unapproved solvents. | Implement strict two-wipe cleaning protocol. Apply manufacturer-approved primer. Verify backer rod is compressed 25% into the joint. |
Modern building codes in 2026 heavily scrutinize the combustibility of exterior cladding. When installing ACP on structures exceeding 40 feet in height, ensure the material utilizes a non-combustible, mineral-filled core (often designated as FR or A2 rated) rather than standard polyethylene. Verification of the core material should be done via batch testing and review of the manufacturer's UL or Intertek fire-rating certificates prior to panel fabrication. Proper installation of these heavier mineral-core panels requires upgraded CNC routing bits, as the mineral core is significantly more abrasive than polyethylene, dulling standard carbide bits up to three times faster.