How to Waterproof Metal Roofing: Step-by-Step Leak Prevention Guide
Learn how to waterproof metal roofing with our expert maintenance playbook. Discover the best sealants, coatings, and step-by-step leak prevention methods.
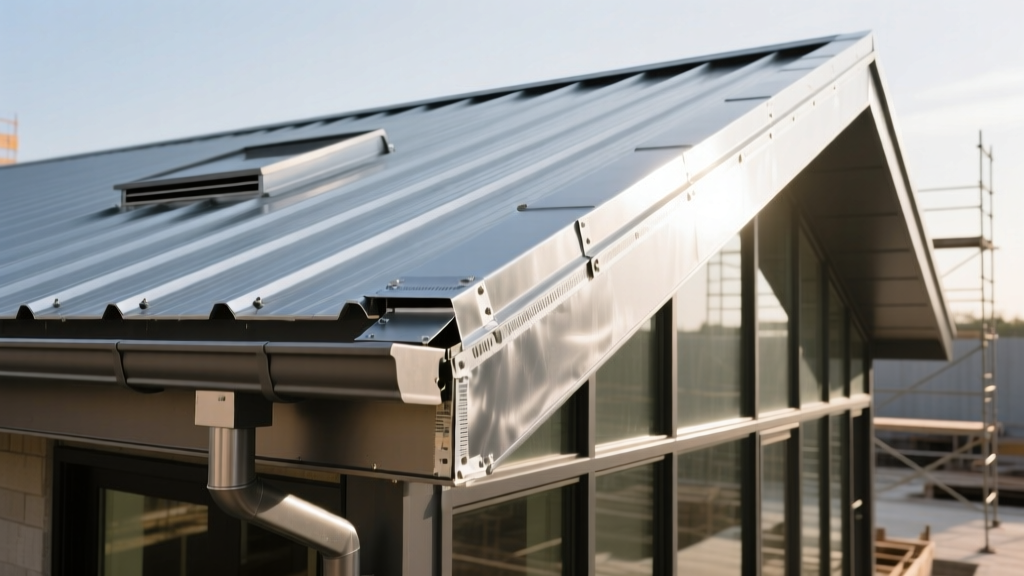
Diagnosing Metal Roof Vulnerabilities
Metal roofing systems are engineered to last 40 to 70 years, but their waterproofing integrity is frequently compromised long before the panels themselves fail. Understanding how to waterproof metal roofing requires recognizing that the metal is rarely the source of the leak; the failures occur at the intersections, fasteners, and penetrations. According to the Metal Construction Association, thermal expansion and contraction cycles cause structural movement that gradually degrades sealant joints and backs out fasteners.
The Big Three Failure Points
- Fastener Back-Out: Self-drilling screws (typically #10 or #12) loosen over time due to thermal cycling. The EPDM washers compress, crack from UV exposure, and lose their watertight seal.
- Lap Seam Capillary Action: Water can be drawn upward against gravity into overlapping panel seams if the original factory sealant tape has dried out or if the slope is less than 3:12.
- Penetration Flashing: HVAC curbs, plumbing vents, and ridge caps rely on flexible flashings that degrade under direct UV radiation, leading to micro-tears.
The Waterproofing Arsenal: Coatings vs. Sealants
Choosing the right chemistry is critical. Applying the wrong product can trap moisture against the steel substrate, accelerating galvanic corrosion. Below is a decision matrix for selecting the appropriate waterproofing materials based on the specific vulnerability you are addressing.
| Material Type | Best Application | UV Resistance | Elongation / Flexibility | Estimated Cost (per gal) |
|---|---|---|---|---|
| High-Solids Polyether Sealant | Fastener heads, small seams, penetrations | Excellent | Moderate (400%) | $45 - $65 |
| 100% Silicone Sealant | Glass-to-metal, Kynar-coated panels | Superior | High (600%) | $30 - $50 |
| Acrylic Elastomeric Coating | Full roof restorations, large field areas | Excellent | High (300-500%) | $80 - $120 (5-gal pail) |
| Polyurethane Coating | High-traffic areas, walkways | Poor (Requires topcoat) | Moderate | $150 - $200 (5-gal pail) |
Expert Insight: Avoid standard hardware-store polyurethane caulks for metal roofing. They degrade rapidly under UV exposure and will chalk, crack, and fail within 2 to 3 years. Always specify commercial-grade, high-solids polyether or 100% silicone for metal roof joints, as recommended by the National Roofing Contractors Association.
Step-by-Step Playbook: How to Waterproof Metal Roofing
A successful waterproofing project is 80% surface preparation and 20% application. Follow this exact sequence to ensure maximum adhesion and longevity.
Step 1: Aggressive Surface Preparation
Coatings and sealants will not adhere to chalky oxidation, dirt, or biological growth. Power wash the entire roof surface using a 2,500 to 3,000 PSI pressure washer equipped with a 25-degree fan tip. For areas with heavy grease or industrial fallout, scrub with a Trisodium Phosphate (TSP) solution and rinse thoroughly. Allow the roof to dry completely for at least 24 hours; moisture trapped under an elastomeric coating will cause blistering and delamination.
Step 2: Fastener and Seam Treatment
- Inspect and Replace: Check every fastener. If a screw is backing out, do not simply tighten it—the hole is likely stripped. Remove it and replace it with a fastener one size larger (e.g., upgrade from #10 to #12) featuring a fresh, oversized EPDM washer.
- Seal the Heads: Encapsulate every fastener head with a high-solids polyether sealant. Apply a dollop roughly the size of a nickel, ensuring it completely covers the metal washer and extends slightly onto the panel.
- Treat the Seams: For horizontal and vertical lap seams showing signs of separation, inject sealant deep into the joint using a specialized caulking gun tip, then tool it smooth with a putty knife to ensure full contact with both metal surfaces.
Step 3: Primer and Base Coat Application
If bare metal or rust spots are exposed after preparation, treat them immediately. Wire-brush the rust down to bright metal and apply a zinc-rich epoxy primer or a specialized rust-inhibitive metal primer. Once dry, apply a reinforcing polyester fabric tape over all seams, fasteners, and penetrations, embedding it in a base coat of acrylic elastomeric coating. This fabric acts as the structural reinforcement, preventing the coating from tearing when the metal expands and contracts.
Step 4: Topcoat Application
Apply the final topcoat of acrylic elastomeric coating using a 3/4-inch nap roller or an airless sprayer. To achieve a watertight, durable membrane, you must apply the coating at a rate of 1.5 to 2.0 gallons per 100 square feet per coat. This yields a final dry film thickness (DFT) of 20 to 30 mils. Applying the coating too thin will result in premature UV degradation and micro-cracking. According to the U.S. Department of Energy, achieving the proper mil thickness with highly reflective white elastomeric coatings also significantly reduces cooling loads by reflecting solar radiation.
Cost Breakdown: DIY vs. Professional Waterproofing
Budgeting for a metal roof restoration requires understanding the material-to-labor ratio. The following table outlines the average costs for a standard 2,000 square foot commercial or residential metal roof in 2026.
| Project Scope | Material Cost | Labor Cost | Total Estimated Cost |
|---|---|---|---|
| Spot Sealing (Fasteners & Flashings only) | $150 - $300 | $400 - $800 | $550 - $1,100 |
| Seam & Penetration Reinforcement | $400 - $700 | $800 - $1,500 | $1,200 - $2,200 |
| Full Elastomeric Coating Restoration | $1,200 - $1,800 | $2,500 - $4,500 | $3,700 - $6,300 |
Troubleshooting Common Edge Cases
Issue: Coating Blisters and Peeling
Cause: Moisture was trapped under the coating during application, or the roof was not adequately cleaned of chalky oxidation.
Fix: Slice the blister with a utility knife, allow the substrate to dry completely, clean the area with a solvent wipe, and patch with reinforcing fabric and a fresh layer of elastomeric coating.
Issue: Sealant Pulling Away from Kynar/PVDF Panels
Cause: Standard sealants struggle to adhere to the slick, factory-applied fluoropolymer finishes (like Kynar 500) used on premium metal panels.
Fix: Use a specialized 100% silicone sealant formulated specifically for fluoropolymer coatings, or lightly scuff the panel edge with a Scotch-Brite pad and apply a specialized adhesion promoter before sealing.
Issue: Persistent Leaks at Ridge Caps
Cause: Wind-driven rain is bypassing the closure strips under the ridge cap, or the closure strips have degraded and shrunk.
Fix: Remove the ridge cap screws, lift the cap, and replace the old foam closure strips with high-density, UV-resistant expanding foam closures that match the exact profile of your metal panels. Re-secure the cap using oversized fasteners with fresh EPDM washers.