Best Type of Wood for Cutting Board Countertops & Installation
Discover the best type of wood for cutting board countertops. Learn installation, sealing, and grain-orientation best practices for built-in kitchens.

Why Wood Selection Matters for Built-In Cutting Surfaces
When specifying materials for integrated kitchen islands, commercial food prep stations, or residential butcher block countertops, the stakes are significantly higher than selecting a standalone accessory. Determining the best type of wood for cutting board applications in a built-in capacity requires satisfying three rigorous demands: structural stability across wide spans, resistance to biological contamination, and tolerance to extreme moisture fluctuations near sinks and dishwashers.
Unlike standalone boards that can be easily moved or replaced, built-in butcher block surfaces are subject to the structural constraints of cabinetry, plumbing cutouts, and ambient humidity changes. A failure in material selection or installation mechanics can lead to catastrophic cupping, seam splitting, or bacterial harboring. This guide details the exact species, grain orientations, and mechanical installation protocols required for permanent cutting surfaces in 2026.
Species Selection: The Best Type of Wood for Cutting Board Surfaces
The fundamental rule for any food-contact wood surface is the use of closed-grain hardwoods. Open-grain woods like Red Oak or Ash possess large, exposed pores that trap food particles and moisture, creating an ideal environment for bacterial growth. The USDA Food Safety and Inspection Service explicitly recommends hard, closed-grain woods for cutting surfaces to prevent cross-contamination and ensure proper sanitation (USDA FSIS, Cutting Boards).
| Wood Species | Janka Hardness | Grain Structure | Tangential Shrinkage | Avg. Cost (per sq. ft.) |
|---|---|---|---|---|
| Hard Maple (Sugar Maple) | 1,450 lbf | Closed, Fine | 9.9% | $85 - $120 |
| Black Walnut | 1,010 lbf | Closed, Medium | 7.8% | $110 - $150 |
| Teak (Plantation) | 1,155 lbf | Closed, Oily | 5.9% | $180 - $260 |
| Cherry (American) | 950 lbf | Closed, Fine | 9.2% | $95 - $130 |
Hard Maple remains the undisputed industry standard. Its high Janka hardness (Wood Database, Janka Scale) resists deep knife scarring, while its tight grain prevents moisture ingress. Teak offers superior dimensional stability due to its high natural silica and oil content, making it highly resistant to water rot near sink cutouts, though it dulls carbon-steel knives faster than maple.
Edge-Grain vs. End-Grain: Structural Implications
While end-grain maple is often touted as the ultimate standalone cutting board surface (as it allows knife blades to pass between wood fibers rather than severing them), it is structurally disastrous for wide-span countertops. End-grain panels expand and contract vertically, and gluing wide end-grain panels introduces massive shear stress. For built-in countertops and integrated island surfaces, edge-grain orientation is mandatory. Edge-grain provides the necessary longitudinal structural rigidity to span across base cabinets without sagging, while still offering a highly durable, closed-pore cutting surface.
Installation Best Practices for Butcher Block Countertops
Wood is a hygroscopic material; it continuously exchanges moisture with the surrounding environment. Dimensional shrinkage and swelling are inevitable (Wood Database, Dimensional Shrinkage). If a 30-square-foot maple countertop is pinned rigidly to the cabinet base, the internal tension generated by seasonal humidity shifts will cause the wood to split, usually radiating from sink cutouts or corner joints.
Step 1: Substrate Preparation and Moisture Barriers
Never install butcher block directly over an unsealed plywood sub-base or particleboard cabinet frames. Off-gassing and trapped moisture from the substrate will cause the underside of the countertop to absorb water, leading to upward cupping.
- Seal the top edge of all base cabinets with a water-based polyurethane or apply a 6-mil polyethylene slip sheet.
- Ensure the kitchen's HVAC system is operational and maintaining an interior relative humidity between 35% and 45% for at least 14 days prior to installation to acclimate the lumber.
Step 2: Mechanical Fastening and Expansion Gaps
The golden rule of wood installation is: secure it, but let it move.
Use figure-8 fasteners or Z-clips routed into the top rails of the cabinetry. These fasteners pivot, allowing the wood to expand and contract laterally across the grain while holding it securely down. Maintain a strict 1/8-inch expansion gap between the countertop and any adjoining walls, tile backsplashes, or rigid appliances. This gap must be concealed with a flexible silicone caulk or a scribed molding strip.
Step 3: Plumbing Cutouts and Sink Integration
Sink cutouts represent the highest risk for failure. The exposed end-grain inside a cutout acts like a bundle of straws, wicking water directly into the core of the countertop.
- Route the cutout with a minimum 1/8-inch radius on all interior corners to prevent stress concentration and cracking.
- Seal the exposed end-grain inside the cutout with a two-part marine-grade epoxy (e.g., West System 105/206) before the sink is dropped in.
- Apply a continuous bead of 100% silicone sealant between the sink flange and the wood to prevent capillary action from drawing standing water under the rim.
Sealing Protocols: Food-Safe Finishes for Heavy Use
The finish on a built-in cutting surface must comply with FDA 21 CFR 175.300 for indirect food additives, while also providing a robust moisture barrier. Standard film-building finishes like polyurethane or lacquer are strictly prohibited for active cutting zones, as knife impact will fracture the film, introducing micro-plastics into food and creating peeling hazards.
Mineral Oil vs. Polymerizing Oils
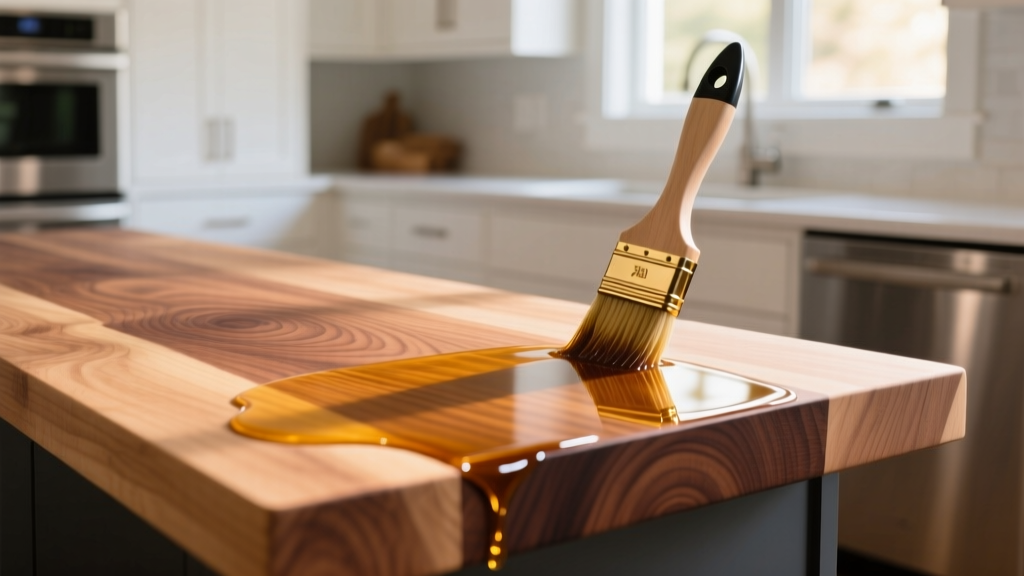
Food-grade mineral oil is the traditional choice, but it is a non-drying oil. It requires monthly reapplication and offers minimal protection against standing water or acidic spills (like lemon juice or wine). For high-traffic built-in surfaces, modern hardwax oils or polymerized tung oils are vastly superior.
Products like Osmo TopOil or pure polymerized tung oil undergo a chemical cross-linking process (polymerization) when exposed to oxygen. They cure into a solid, flexible matrix within the wood fibers rather than sitting on top as a brittle film. This provides deep moisture resistance while maintaining the natural, matte tactile feel of raw wood, and allows for spot-repairs without sanding the entire countertop.
FAQ: Troubleshooting Common Installation Failures
Why is my butcher block countertop cupping upwards at the edges?
Cupping occurs when the underside of the wood absorbs more moisture than the top surface, causing the bottom fibers to expand and push the edges upward. This is almost always caused by installing the wood over an unsealed, moisture-emitting substrate (like a damp dishwasher cavity or unsealed plywood), or failing to apply an equal number of finish coats to the top and bottom faces of the slab during fabrication. Always finish all six sides of a built-in wood panel.
Can I install an undermount sink with a wood countertop?
Yes, but it requires meticulous detailing. The exposed end-grain of the cutout must be sealed with penetrating epoxy, and the sink must be mechanically supported by a specialized undermount sink harness or structural framing. Relying solely on adhesive clips to hold a heavy cast-iron or fireclay sink to a wood substrate will result in the sink tearing away as the wood expands and contracts seasonally.
How do I sanitize a built-in wood cutting surface without damaging it?
Avoid bleach or harsh alkaline cleaners, which break down the lignin in the wood and cause surface fuzzing. The USDA recommends using a solution of 1 tablespoon of unscented liquid chlorine bleach per gallon of water for sanitizing after raw meat contact. Apply, let stand for 3 minutes, rinse thoroughly with hot water, and immediately towel dry. Once dry, apply a maintenance coat of your chosen hardwax or mineral oil.
Written by
Elena RodriguezElena Rodriguez is a civil engineer and technical writer specializing in concrete technology, masonry systems, and ASTM/ACI compliance. She earned her B.S. in Civil Engineering from Texas A&M University and spent a decade at a materials testing laboratory, performing over 2,000 concrete compressive strength tests and masonry prism evaluations. Elena is an ACI-certified Field Testing Technician (Grade I) and a member of ASTM Committee C12 on Natural Building Stone. She currently consults on forensic engineering cases involving concrete failures and moisture intrusion. Based in San Antonio, TX, Elena is a proud member of the Society of Women Engineers (SWE) and coaches her daughter's FIRST Robotics team.
More from Elena Rodriguez
View all
Walls & Panels
Cost Analysis: Light Gauge Steel Framing Advantages and Disadvantages
Evaluate light gauge steel framing advantages and disadvantages through a strict cost analysis lens, comparing material, labor, and lifecycle expenses.
Aug 4, 2026

Walls & Panels
Gypsum Board Types: Exact Specifications, Thickness & Dimensions
Compare standard, Type X, and moisture-resistant gypsum board types. Get exact specifications, thicknesses, dimensions, and ASTM standards for your project.
Aug 4, 2026

Fire Resistance
Best Fire-Resistant Outdoor Decking Materials: 2026 Buyer Guide
Discover the best fire-resistant outdoor decking materials for 2026. Compare Class A PVC, aluminum, and hardwood options for WUI compliance and safety.
Aug 4, 2026