Best Wood Filler for Hardwood Floors: Brand Deep-Dive 2026
Deep-dive into the best wood filler for hardwood floors in 2026. Compare Timbermate, Bona, and DAP with pricing, drying times, and pro application tips.
The Chemistry of Hardwood Floor Fillers: Why Brand Matters
Selecting the right wood filler for hardwood floors is not merely a matter of picking a matching color; it is a chemical decision that dictates the longevity of your floor's finish. In 2026, the market is strictly divided into two chemical categories: solvent-based (cellulose or alkyd binders suspended in acetone or toluene) and water-based (acrylic or latex binders suspended in water). According to the National Wood Flooring Association (NWFA), the shift toward low-VOC, waterborne polyurethane finishes has fundamentally changed filler compatibility requirements. Using a high-solvent filler beneath a modern waterborne topcoat can lead to solvent entrapment, resulting in cloudy finishes or adhesion failure. This deep-dive evaluates the top professional brands, analyzing their chemical makeup, shrinkage rates, and ideal use cases.
Top Tier Brand Deep-Dives for 2026
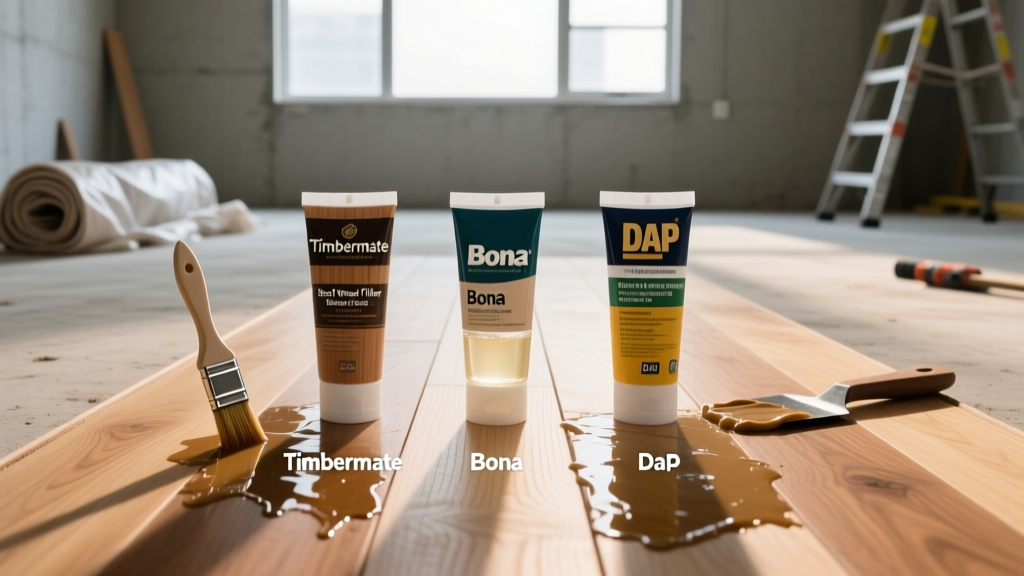
Timbermate: The Water-Based Industry Standard
Timbermate has dominated the professional water-based filler market for years, and its 2026 formulation remains the benchmark for non-shrinking, non-cracking performance. Unlike solvent-based fillers that cure through evaporation (which causes severe shrinkage), Timbermate cures via water evaporation but utilizes a high-density wood flour and acrylic binder matrix that maintains its volume. It is available in 14 pre-mixed colors, though most professionals purchase the "Natural" base and tint it on-site using universal colorants or by mixing in actual sanding dust from the floor.
- Pricing: $18 to $22 per 8 oz jar; $65 for a 2.2 lb tub.
- Dry Time: 15 to 30 minutes for a 1/8-inch deep nail hole.
- Pros: Zero VOCs, completely safe under waterborne finishes, takes stain exceptionally well, infinite shelf life (reconstitutes with water if it dries out in the tub).
- Cons: Can raise the grain of the surrounding wood slightly due to water content; requires a light sanding pass immediately after drying.
Bona Mix & Fill Powder: The Dust-Match Specialist
Bona approaches floor filling from a systems-integration perspective. Their Mix & Fill Powder is a proprietary water-based binder designed specifically to be mixed with the fine sanding dust generated during the floor's initial drum sanding. Because the dust is literally from the floor being repaired, the color match is flawless without the need for artificial dyes. The 2026 "Plus" formulation includes enhanced sag-resistance agents, making it viable for filling gaps between the floor and baseboards without dripping.
- Pricing: $28 to $32 for a 2.2 lb (1 kg) shaker container.
- Dry Time: 20 to 40 minutes depending on ambient humidity and dust-to-liquid ratio.
- Pros: Perfect, guaranteed color match when using site dust; sands incredibly smooth without gumming up abrasive screens; highly compatible with Bona's waterborne finish line.
- Cons: Requires active mixing on-site; if the dust is too coarse (from a 40-grit pass), the filler will have a gritty texture. You must use dust from 80-grit or 100-grit passes.
DAP Plastic Wood: The Solvent-Based Heavy Duty Option
For deep structural gouges or exterior-rated threshold transitions where moisture resistance is paramount, DAP Plastic Wood remains a heavy-duty contender. It is a solvent-based cellulose filler that dries to a rock-hard, almost plastic-like consistency. Because it relies on aggressive solvents, it has a potent odor and requires extensive ventilation. It is strictly recommended for use only when the final topcoat will be an oil-modified polyurethane or a penetrating oil finish, as the residual solvents can interfere with waterborne topcoats.
- Pricing: $8 to $11 for a 6 oz squeeze tube.
- Dry Time: 1 to 2 hours for shallow fills; up to 8 hours for deep gouges.
- Pros: Extreme hardness, excellent moisture resistance, highly resistant to indentations from heavy furniture legs.
- Cons: High shrinkage (requires overfilling and secondary topping-off); strong VOC odor; skins over rapidly in the tube if not sealed perfectly; incompatible with most modern waterborne finishes.
Head-to-Head Product Comparison Matrix
| Brand & Product | Base Type | Dry Time (1/8" depth) | Shrinkage Factor | Est. Price (2026) | Best Use Case |
|---|---|---|---|---|---|
| Timbermate Natural | Water/Acrylic | 15 - 30 mins | Negligible (<2%) | $18 / 8 oz | Standard nail holes, minor checks, waterborne finishes |
| Bona Mix & Fill Plus | Water/Latex | 20 - 40 mins | Low (3-5%) | $30 / 2.2 lb | Seamless color matching via site dust, full-floor trowel filling |
| DAP Plastic Wood | Solvent/Cellulose | 1 - 2 hours | High (15-20%) | $9 / 6 oz | Deep gouges, structural edge repairs, oil-modified finishes |
| Minwax High Performance | Two-Part Epoxy | 30 - 45 mins | Zero (0%) | $16 / 12 oz | Severe structural rot, exterior thresholds, high-impact zones |
Application Framework: Matching Filler to Floor Condition
- Standard Nail Holes & Staple Marks: Use Timbermate or Bona Mix & Fill. Apply with a flexible 3-inch steel putty knife, pressing the material firmly into the void and striking it off flush with the grain direction.
- Micro-Checks & End-Grain Splits: End-grain absorbs moisture and filler rapidly. Thin your water-based filler with 5-10% water to increase penetration, forcing it into the checks with a stiff-bristled brush before wiping flush.
- Deep Gouges & Pet Urine Burns: Scrape out all compromised, blackened wood fibers. If the depth exceeds 1/4-inch, fill the bottom half with a two-part epoxy (like Minwax High Performance) for structural stability, then cap the top 1/8-inch with Timbermate to ensure it accepts stain evenly.
Critical Failure Modes and How to Avoid Them
If you use a solvent-based filler like DAP Plastic Wood and apply a waterborne polyurethane topcoat before the filler has fully off-gassed (which can take up to 72 hours in high humidity), the trapped solvents will push through the waterborne finish. This creates permanent milky-white halos around every filled nail hole. Always verify the chemical base of your filler against your topcoat.
"The most common mistake DIYers make is sanding the filler too aggressively. Wood filler is softer than the surrounding oak or maple. If you use a heavy drum sander over filled areas, the filler will dish out, leaving a depressed crater that becomes glaringly obvious once the finish is applied." — NWFA Certified Sanding Specialist Guidelines
Sanding and Finishing Protocols
To ensure the wood filler for hardwood floors anchors properly and finishes flush, you must integrate the filling step into the correct phase of the abrasive sequence.
- Initial Sanding (40 to 60 Grit): Remove the old finish and level the floor. Do not fill at this stage; the open pores are too deep and will waste filler.
- Fill Phase (80 to 100 Grit): After the first drum and edger passes at 80 or 100 grit, the wood pores are open enough to accept the filler binder, but the surface is smooth enough to strike off cleanly. Apply your chosen filler across the entire floor or spot-fill as needed.
- Drying & Buffing: Allow the filler to dry completely. Use a multi-disc buffer with a 100-grit or 120-grit screen to knock down any high spots of dried filler. Do not use a drum sander, as it will dish out the filler.
- Final Prep (120 Grit): Perform your final edging and screening. Vacuum thoroughly with a HEPA-filter vac to remove filler dust, which can contaminate the finish and create a cloudy appearance.