Herringbone Wood Floor Specs: Janka Ratings & Stability
Technical specifications for herringbone wood floor installations, covering Janka hardness, dimensional stability, moisture limits, and subfloor tolerances.
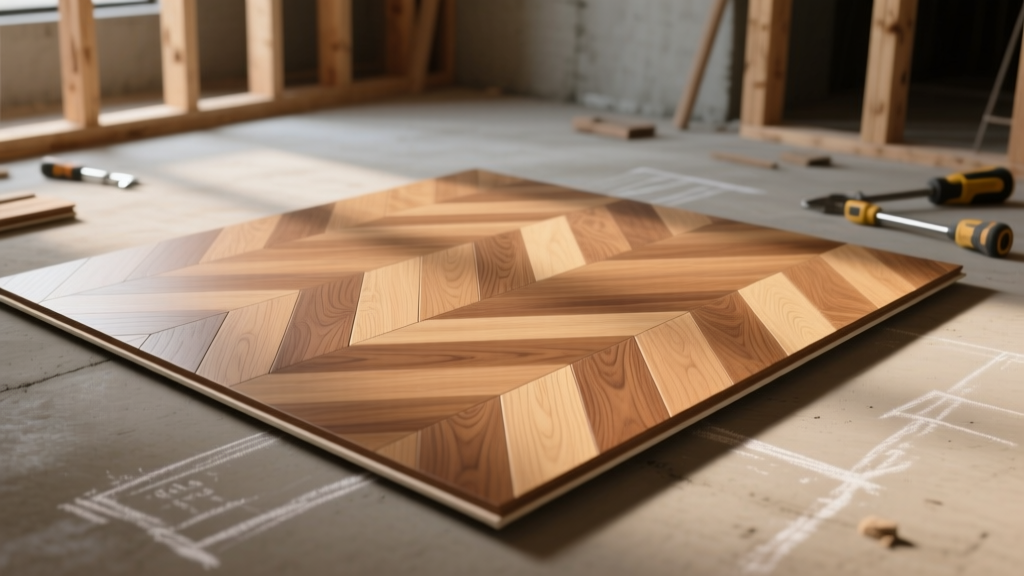
The Structural Mechanics of Herringbone Interlocking
Unlike parallel strip flooring where seasonal expansion pushes uniformly against adjacent boards, a herringbone wood floor creates a complex structural grid. The 90-degree intersecting grains of the parquet blocks lock the floor in place, reducing overall lateral expansion by up to 18% compared to straight-strip layouts. However, this interlocking geometry concentrates shear stress at the mitered ends and block intersections. When wood expands tangentially, the perpendicular restraint of the adjacent block can cause end-joint compression failures or surface checking if the species lacks dimensional stability. Therefore, selecting materials based purely on surface hardness (Janka rating) is insufficient; the Tangential-to-Radial (T/R) shrinkage ratio is the critical performance metric for herringbone configurations.
Species Selection Matrix: Hardness vs. Dimensional Stability
The USDA Forest Products Laboratory Wood Handbook defines the T/R ratio as the primary indicator of a wood species' tendency to warp or check. A lower T/R ratio indicates more uniform shrinkage, which is mandatory for the intersecting geometry of a herringbone wood floor. Below is the performance matrix for the most common species used in parquet and herringbone applications.
| Wood Species & Cut | Janka Hardness (lbf) | T/R Shrinkage Ratio | Herringbone Performance Rating |
|---|---|---|---|
| White Oak (Quartersawn) | 1,360 | 1.5 | Excellent (Gold Standard) |
| White Oak (Plainsawn) | 1,360 | 1.9 | Good (Limit width to 3-1/4') |
| Hard Maple (Plainsawn) | 1,450 | 2.1 | Poor (High checking risk) |
| Hickory (Plainsawn) | 1,820 | 1.6 | Moderate (High overall shrinkage) |
| American Walnut (Plainsawn) | 1,010 | 1.8 | Good (Requires strict humidity control) |
Engineered vs. Solid Core Specifications
While solid wood herringbone has historical precedence, modern building envelopes and HVAC systems demand the structural predictability of engineered cores for block widths exceeding 3 inches. The cross-ply construction neutralizes the tangential expansion forces that cause solid parquet blocks to cup.
Engineered Herringbone Block Specs
- Total Thickness: 5/8' (15mm) to 3/4' (19mm).
- Core Construction: 9-ply to 11-ply cross-banded Baltic birch or high-density fiberboard (HDF). Avoid softwood pine cores for herringbone, as they lack the shear strength required at the tongue-and-groove intersections.
- Wear Layer: 3mm to 4mm sawn veneer. A 4mm wear layer allows for up to three full sanding cycles over the floor's lifespan, matching the longevity of solid 3/4' wood.
- Maximum Block Width: Up to 7' wide blocks can be manufactured and installed without lateral cupping, provided the T/R ratio of the top veneer is mitigated by the plywood core.
Solid Herringbone Block Specs
- Thickness: 5/16' (8mm) for glue-down parquet, or 3/4' (19mm) for nail-down solid blocks.
- Maximum Width: Strictly limited to 3-1/4' to prevent differential shrinkage from breaking the mitered end-joints.
- Moisture Content (MC): Must be acclimated to 6% - 9% prior to installation, matching the interior Equilibrium Moisture Content (EMC).
Subfloor Tolerances and Moisture Limits
The National Wood Flooring Association (NWFA) Technical Guidelines mandate strict subfloor preparation for herringbone layouts. Because the pattern relies on continuous, interlocking sightlines, even minor subfloor deviations result in 'lippage' (vertical misalignment) at the block intersections, which accelerates wear on the protruding edges.
Moisture Testing Protocols
Before any adhesive or fastener is applied, moisture testing must verify the subfloor is within acceptable limits. Failure to test is the leading cause of herringbone block delamination and adhesive failure.
- Concrete Subfloors: Perform a Calcium Chloride test (ASTM F1869). The maximum allowable emission rate is 3 lbs per 1,000 square feet per 24 hours. Alternatively, use an in-situ Relative Humidity (RH) probe test (ASTM F2170); the reading must not exceed 75%.
- Wood Subfloors: Use a pin-type moisture meter. The subfloor MC must not exceed 12%. The differential between the subfloor and the engineered herringbone blocks must be less than 4% for blocks up to 3' wide, and less than 2% for blocks wider than 3'.
- Vapor Retarders: If concrete emissions are between 3 lbs and 8 lbs, apply a two-part liquid epoxy vapor retarder (e.g., Bostik MVP4 or Mapei Eco Prim PU) to seal the slab before applying urethane adhesive.
Fastening and Adhesive Specifications
The installation method dictates the long-term acoustic and structural performance of the herringbone wood floor.
Glue-Down Method (Concrete & Radiant Heat)
Glue-down is the mandatory method for engineered herringbone over concrete and the preferred method over radiant heating systems. The adhesive acts as both a bond and a vapor barrier.
- Adhesive Type: 100% solids silane-modified polymer (SMP) or high-tack urethane adhesive. Avoid water-based acrylic adhesives, which can cause the bottom ply of engineered blocks to swell.
- Trowel Size: Use a 3/16' x 5/32' V-notch trowel for blocks up to 5' wide. For blocks 6' to 7' wide, upgrade to a 1/4' x 1/4' x 1/4' square-notch trowel to ensure 90% minimum adhesive transfer to the block backing.
- Open Time: SMP adhesives typically have a 30-45 minute open time. Do not spread adhesive beyond what can be covered in 20 minutes to prevent skinning, which destroys the bond strength.
Nail-Down Method (Wood Subfloors)
- Fastener Type: 1-1/2' to 2' 18-gauge cleats. Staples are not recommended for herringbone as the dual-prong entry can split the tongues at the 90-degree intersecting joints.
- Spacing: Blind nail at a 45-degree angle through the tongue every 4 to 6 inches along the length of the block, with a minimum of two fasteners per block regardless of size.
Acoustic Performance Ratings (STC / IIC)
In multi-family residential and commercial projects, the acoustic rating of the floor assembly is a strict code requirement. The interlocking mass of a herringbone wood floor provides a slight acoustic advantage over parallel planks, but the underlayment dictates the final rating.
| Floor Assembly | STC Rating (Airborne) | IIC Rating (Impact) |
|---|---|---|
| Herringbone Glue-Down over 6' Concrete (No Underlayment) | 52 | 48 |
| Herringbone over 2mm Rubber-Cork Underlayment (Floating) | 56 | 55 |
| Herringbone over 5mm Acoustic Foam + Concrete | 58 | 62 |
Note: Floating engineered herringbone requires a specialized click-lock profile designed for parquet blocks. Traditional tongue-and-groove engineered blocks cannot be floated without full-spread glue-down to the underlayment.
FAQ: Herringbone Performance Edge Cases
Can herringbone wood floors be installed over hydronic radiant heat?
Yes, but only engineered blocks with a maximum width of 5 inches and a maximum surface temperature limit of 85°F (29°C). The system must be operational for at least 14 days prior to installation to drive out subfloor moisture. Solid wood herringbone should never be installed over radiant heat due to the high risk of end-joint checking.
How do I handle expansion gaps in a large herringbone layout?
Because the herringbone pattern locks the floor laterally, expansion is redirected to the perimeter. You must maintain a 1/2-inch expansion gap at all vertical obstructions (walls, islands, cabinets). For rooms exceeding 30 feet in any direction, insert a flush T-molding transition to break the structural grid and allow independent expansion zones.