Installing Decorative Wood Panels for Walls: A Pro Guide
Master the installation of decorative wood panels for walls. Learn substrate prep, adhesive selection, cutting techniques, and pro finishing tips.
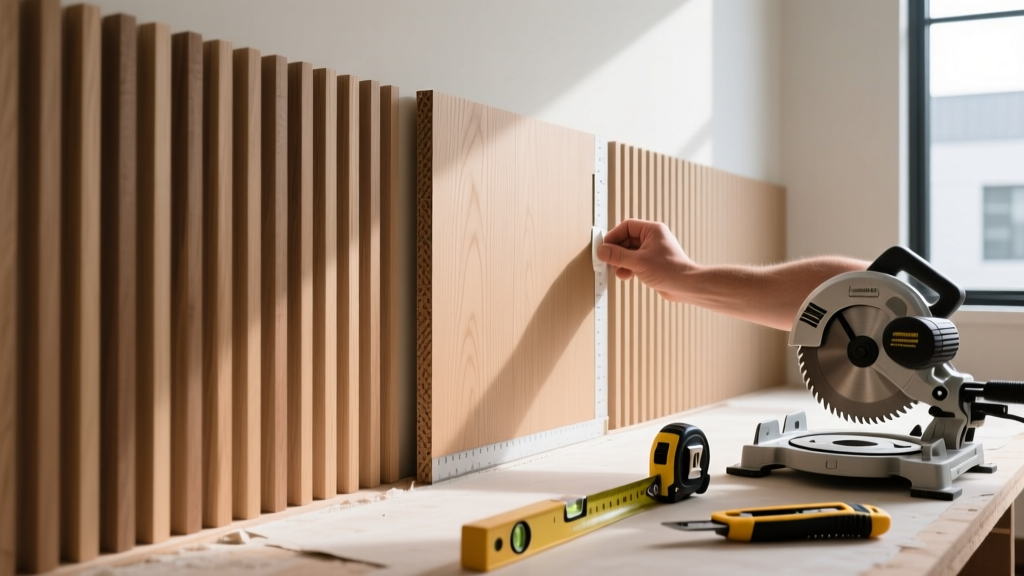
Substrate Preparation and Moisture Testing
The longevity of decorative wood panels for walls relies entirely on the stability of the substrate. Whether you are installing 3D carved panels, reclaimed shiplap, or modern acoustic slat wood panels (which feature a PET felt backing), the wall must be rigid, flat, and dry. For drywall substrates, a Level 4 finish is the absolute minimum; Level 5 is preferred for thin veneer panels to prevent telegraphing of joint compound imperfections.
Moisture Thresholds and Testing
Wood is hygroscopic. Installing decorative wood panels over a damp substrate will cause the wood veneer to delaminate from its MDF or plywood core within months. According to the National Wood Flooring Association (NWFA) Installation Guidelines, which apply equally to wall-mounted wood products, substrate moisture content (MC) must not exceed 12%. Use a pinless moisture meter (such as a Tramex or Wagner) to scan the wall. If installing over masonry or concrete, you must first frame out the wall with pressure-treated furring strips and apply a 6-mil polyethylene vapor barrier to prevent alkaline moisture migration.
Fastening Methods: Adhesive vs. Mechanical
Choosing the right fastening system depends on the panel weight, substrate type, and whether the installation is permanent or temporary. As of 2026, hybrid installations using both construction adhesive and concealed mechanical fasteners represent the industry standard for heavy decorative wood panels.
| Fastening Method | Best Application | Pros | Cons | Est. Cost / Sq Ft |
|---|---|---|---|---|
| Polyurethane Adhesive (e.g., Loctite PL Premium 3x) | PET felt-backed slat panels, lightweight MDF veneers | Flexible, fills minor wall gaps, strong permanent bond | Requires 24-48 hr curing time, messy squeeze-out | $0.15 - $0.25 |
| Pneumatic Pin Nails (23-gauge) | Trim, edge banding, securing panels while adhesive cures | Leaves nearly invisible holes, no splitting | Low shear strength, cannot hold heavy panels alone | $0.05 - $0.10 |
| Brad Nails (18-gauge, 1.5') | Solid wood shiplap, thick 3D carved panels into studs | High holding power, immediate grab | Visible nail heads require wood filler and touch-up | $0.08 - $0.12 |
| Z-Clip / French Cleat Systems | Heavy commercial panels, demountable architectural walls | Perfectly plumb, easily removable, no face fasteners | Requires precise routing, adds 1/2' to wall depth | $1.50 - $3.00 |
Critical Warning: Never use solvent-based contact cements or high-VOC liquid nails on PET felt-backed decorative wood panels. The solvents will melt the recycled plastic felt, destroying the acoustic properties and causing the panel to slide off the wall before curing. Stick to 100% polyurethane or advanced polymer adhesives.
Step-by-Step Installation Procedure
Step 1: Acclimation and Layout Math
Before unboxing, bring the decorative wood panels into the installation environment for a minimum of 48 to 72 hours. The room must be maintained at 65°F to 75°F with a relative humidity (RH) between 30% and 50%, matching the Architectural Woodwork Institute (AWI) Standards for interior architectural woodwork.
For layout, never start blindly from a corner, as corners are rarely perfectly plumb. Measure the total wall width and divide by the panel width (typically 24 inches for slat panels). If the remaining cut at the end of the wall is less than 6 inches, rip 2 inches off your starting panel so you end up with two balanced, visually pleasing cuts on either side of a focal point (like a TV or fireplace).
Step 2: Precision Cutting Techniques
Cutting decorative wood panels requires a dual-blade approach to prevent tear-out on both the wood veneer and the backing material.
- Cutting the Wood Slats: Use a track saw or table saw equipped with a 60-tooth or higher carbide-tipped blade. Score the veneer face first with a utility knife along your cut line to eliminate micro-chipping.
- Cutting the Felt/Backing: Flip the panel over. Use a jigsaw with a fine-tooth down-cut blade or a heavy-duty carpet knife to slice through the PET felt or MDF core. Down-cut blades push the material down, preventing the felt from fraying upward.
- Cutting for Outlets: Use a multi-tool (oscillating saw) with a wood-plunge blade to cut out electrical boxes. Always measure from the finished floor and the adjacent panel edge, not the raw drywall corner.
Step 3: Panel Application and Alignment
Apply the polyurethane adhesive in a continuous serpentine pattern on the back of the panel, keeping the bead at least 2 inches away from the edges to prevent squeeze-out. Press the panel firmly against the wall. Use a 4-foot spirit level to ensure absolute plumb. While the adhesive is tacky, secure the panel by driving 23-gauge pin nails through the felt backing (never through the visible wood slats) into the drywall or studs. Use a seam roller wrapped in a microfiber cloth to apply even pressure across the face of the panel, ensuring full adhesive contact.
Edge Detailing and Outside Corners
The hallmark of a professional installation is how the outside corners and terminal edges are handled. Decorative wood panels are not designed to wrap tightly around a 90-degree outside corner. Instead, you have two premium options:
- Mitered Edge Banding: Rip a solid wood edge banding strip (matching the veneer species) to the exact thickness of the panel. Miter both the panel edge and the banding at 45 degrees, join with wood glue and V-nails, and apply to the corner. This requires advanced woodworking skills but yields a seamless, high-end look.
- Shadowline Reveal: Install a 1/2-inch black anodized aluminum L-channel or a painted MDF reveal strip at the outside corner. Terminate the wood panels into the channel. This creates a deliberate, modern shadow gap that hides minor drywall imperfections and accommodates wood expansion.
Always leave a 3/8-inch expansion gap at the floor and ceiling lines. Wood expands and contracts across the grain with seasonal humidity shifts. Cover these gaps with baseboards and crown molding, ensuring the trim is nailed to the wall studs, not to the decorative panels themselves.
Troubleshooting Common Installation Failures
Cause: Skipping the 48-hour acclimation period or installing in a room where the HVAC system is not yet operational. The wood veneer absorbs ambient moisture faster than the MDF core, causing differential expansion.
Fix: Once cupped, panels cannot be flattened. They must be removed, discarded, and replaced. Always verify HVAC operation before delivery.
- Adhesive Bleed-Through: If adhesive squeezes out between narrow slats, do not wipe it with a wet rag, which will smear it into the wood grain. Allow the polyurethane to cure to a rubbery state (usually 4-6 hours), then roll it off the veneer with a dull plastic putty knife.
- Visible Fastener Shadows: If you must face-nail solid wood panels, never use standard wood filler, which shrinks and changes color over time. Use a wax-based repair stick (like Konig or Mohawk) color-matched exactly to the stained veneer, applied after the final coat of polyurethane topcoat.
- Acoustic Short-Circuiting: For acoustic slat panels to achieve their rated NRC (Noise Reduction Coefficient), they must not be installed directly over hard, reflective surfaces without an air gap. If maximum sound absorption is required, mount the panels on 1-inch wood furring strips to create a plenum behind the felt, allowing low-frequency sound waves to dissipate.
By adhering to strict moisture controls, utilizing advanced polymer adhesives, and executing precise layout mathematics, decorative wood panels for walls will deliver both stunning architectural aesthetics and long-term structural integrity.