Installing Different Types of Wooden Fences: Expert Best Practices
Master installing different types of wooden fences with expert best practices for post-setting, rail alignment, and wood species selection.

The longevity and structural integrity of a timber perimeter rely entirely on precision during installation. When evaluating and installing different types of wooden fences, contractors and homeowners must adapt their techniques to the specific wood species, fence style, and local soil conditions. A board-on-board privacy fence built with green Southern Yellow Pine requires entirely different fastening and spacing protocols than a spaced-picket fence milled from Western Red Cedar. This guide details the structural engineering, material science, and field-tested installation best practices required to prevent premature rot, warping, and hardware failure.
Material Matrix: Matching Wood Species to Fence Styles
Selecting the correct lumber grade and species is the first critical installation decision. The USDA Forest Products Laboratory categorizes wood durability based on heartwood extractives and treatment retention levels. Below is a specification matrix for the most common fencing lumbers used in residential and light commercial applications.
| Wood Species / Treatment | Janka Hardness (lbf) | Natural/Treated Rot Resistance | Optimal Fence Application | 2026 Avg Material Cost (per LF) |
|---|---|---|---|---|
| Pressure-Treated SYP (Ground Contact) | 690 | High (0.40 PCF retention) | Structural posts, horizontal rails | $8.50 - $11.00 |
| Western Red Cedar (Clear Heart) | 350 | High (Natural thujaplicins) | Privacy panels, spaced pickets | $14.00 - $18.50 |
| Redwood (Construction Heart) | 420 | Very High (Natural tannins) | High-end privacy, estate borders | $19.00 - $24.00 |
| Black Locust (Untreated) | 1,700 | Extreme (50+ year lifespan) | Split rail, post-and-rail, posts | $22.00 - $28.00 |
The Universal Foundation: Post-Setting Protocols
Regardless of the aesthetic style above ground, the subsurface foundation dictates the fence's lifespan. The most common point of failure in wooden fencing is post rot at the grade line, caused by improper concrete encapsulation.
Depth and Diameter Specifications
For a standard 6-foot-tall fence, use 8-foot posts. The buried depth must be a minimum of 36 inches (or below the local frost line, whichever is deeper). The hole diameter should be exactly three times the width of the post—typically 12 inches for a 4x4 post. This provides adequate lateral resistance against wind loads.
The Gravel Base and Concrete Collar Method
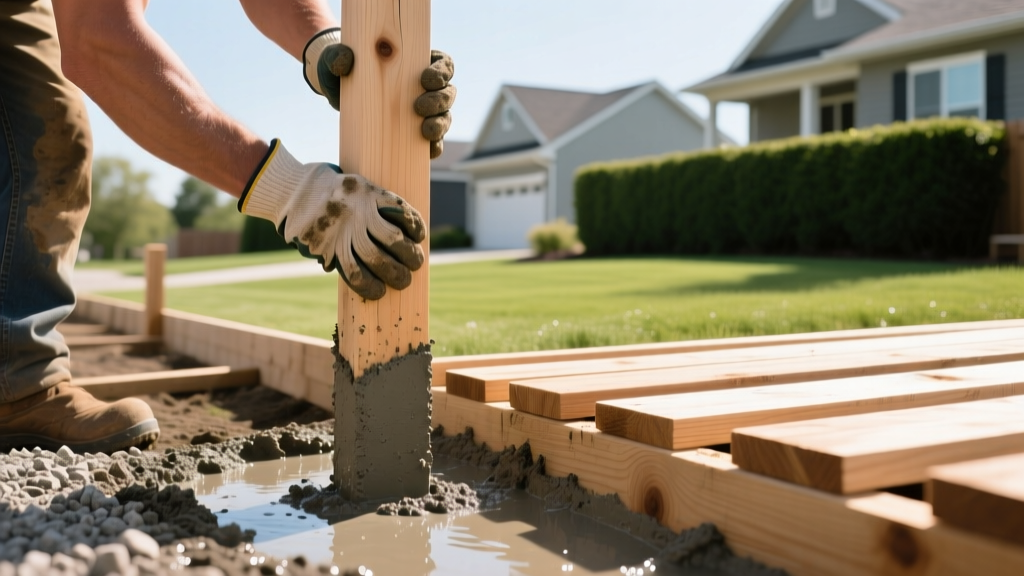
Never drop a wooden post directly onto bare soil or encase the bottom of the post in concrete. This creates a "concrete boot" that traps water against the end grain, accelerating decay.
- Gravel Base: Pour 4 to 6 inches of 3/4-inch crushed angular gravel into the bottom of the hole. Tamp firmly. This allows hydrostatic pressure and surface water to drain away from the post's end grain.
- Plumb and Brace: Set the post on the gravel, plumb it perfectly on two adjacent sides, and secure with temporary 2x4 braces.
- Concrete Collar: Pour concrete only in the upper 24 inches of the hole.
- Slope the Crown: Trowel the top of the concrete collar to a 45-degree slope away from the post to shed surface runoff.
Encasing the bottom third of a pressure-treated post in solid concrete prevents subsurface drainage. As the wood expands and contracts with seasonal moisture changes, it breaks the bond with the concrete, creating a micro-gap. Water pools in this gap, leading to catastrophic rot at the ground line within 5 to 7 years. Always rely on a gravel base for end-grain drainage.
Style-Specific Installation Nuances
The American Fence Association emphasizes that different types of wooden fences require distinct framing and fastening approaches to accommodate wood movement and structural loads.
Board-on-Board (Shadowbox) Privacy Fences
Board-on-board designs require overlapping vertical boards on alternating sides of the horizontal rails. Shrinkage Calculation: If installing green (un-dried) Pressure-Treated Southern Yellow Pine, a 6-inch-wide board will shrink up to 3/8 of an inch as it acclimates to local humidity. If you install the boards tightly butted, they will tear the fasteners out or warp as they dry. Best Practice: Overlap the boards by a minimum of 1.5 inches. This ensures that even after maximum shrinkage, no gaps will appear in the privacy screen. Always use three horizontal 2x4 rails (top, middle, bottom) for 6-foot spans to prevent the center of the boards from bowing outward.
Spaced Picket Fences
Uniformity is the primary metric of quality for picket fences. Best Practice: Do not rely on measuring tape for every gap. Cut a 3.5-inch spacer block from a scrap piece of 2x4 (which actually measures 3.5 inches wide). Use this block to set the gap between pickets. This specific width accommodates the seasonal expansion of cedar and redwood without causing the pickets to buckle against one another during high-humidity summer months.
Split Rail and Post-and-Rail Fences
Often used for agricultural or perimeter demarcation, these fences rely on mass and joinery rather than fasteners. Best Practice: When setting line posts for split rail, do not use concrete. Instead, backfill with native soil and crushed stone, tamping every 4 inches. The flexibility of a tamped soil base allows the fence to absorb impacts (such as falling branches or leaning livestock) without snapping the rigid mortise-and-tenon joints. Apply a heavy coat of copper naphthenate end-grain sealer to the tips of the rails before inserting them into the post mortises.
Fastener Engineering and Corrosion Resistance
Modern wood preservatives, specifically Alkaline Copper Quaternary (ACQ) and Copper Azole (CA-C), are highly corrosive to standard metals. Using the wrong fastener will result in black streaking and structural failure as the fastener dissolves.
- Hot-Dipped Galvanized (HDG): The absolute minimum requirement for ACQ and CA-C treated lumber. Look for ASTM A153 compliance. Electro-galvanized nails will fail within 24 months.
- Type 304 Stainless Steel: Required for Western Red Cedar and Redwood. These woods contain natural tannic acids that will rapidly corrode standard galvanized steel, causing unsightly black weeping stains down the face of the fence.
- Type 316 Stainless Steel: Mandatory for any wooden fence installed within 1 mile of a saltwater coastline. The molybdenum in 316 SS prevents pitting from salt aerosols.
- Fastener Sizing: Use 2-1/2 inch or 3-inch ring-shank nails for rail-to-post connections (shear strength), and #9 x 2-1/2 inch ceramic-coated or stainless steel exterior deck screws for picket-to-rail connections (withdrawal resistance).
Moisture Management and Ground Clearances
Capillary action and splash-back are the primary enemies of fence longevity. Proper ground clearance during installation prevents wicking and soil-borne fungal infections.
Grade Clearance Rules
Vertical pickets and privacy boards must never touch the soil. Maintain a strict minimum clearance of 2 inches from the highest point of the finished grade to the bottom of the picket. In areas with heavy mulch or dense groundcover, increase this clearance to 4 inches to allow for air circulation and prevent string-trimmer damage to the wood fibers.
End-Grain Sealing
Wood absorbs moisture up to 50 times faster through the end grain than through the face grain. Every time a board is cut in the field, the protective treatment or natural extractive barrier is breached. Keep a brush and a can of copper naphthenate or specialized end-grain sealer on the job site. Immediately coat the bottom 2 inches and any field cuts of cedar or redwood pickets before installation. This single step reduces bottom-edge checking and rot by over 60%.
Post Cap Integration
Flat-topped 4x4 posts act as water collectors, leading to top-down rot and radial checking. Install sloped metal or angled wooden post caps immediately after the rails are secured. If using wooden caps, ensure they overhang the post by at least 1/2 inch on all sides to act as a drip edge, shedding water away from the critical post-to-rail connection joints.
Written by
James ThorntonJames Thornton is a construction industry veteran with 25 years of hands-on experience in wood framing, lumber grading, and residential building codes. He started as a framing carpenter in rural Oregon, earned his ICC Residential Building Inspector certification, and eventually became a senior plan reviewer for the City of Portland Bureau of Development Services. James holds a B.S. in Wood Science & Technology from Oregon State University and is a certified lumber grader through the West Coast Lumber Inspection Bureau (WCLIB). He has inspected over 3,000 residential construction sites and authored the city's internal guide on advanced framing techniques (2x6 at 24" O.C.). James lives in Bend, OR, where he builds custom timber-frame cabins and competes in lumberjack sports.
More from James Thornton
View all
Insulation
Best Home Insulation Materials: Complete 2026 Guide
Compare top home insulation materials for 2026. Find R-values, installed costs per square foot, and best uses for fiberglass, spray foam, and mineral wool.
Aug 4, 2026

Sustainable Building
Certify Your Green Building Material for LEED and WELL
Step-by-step guide to certifying a green building material for LEED v5 and WELL v2. Master EPDs, HPDs, and VOC limits for 2026 project specifications.
Aug 4, 2026

Stone & Masonry
Veneer Stacked Stone Panels: Interior Design & Style Showcase
Discover how veneer stacked stone panels transform interiors. Explore modern design profiles, material pairings, and technical installation specs.
Aug 4, 2026