How to Install Heavy-Duty Wood Fence Gates Without Sagging
Learn exact framing techniques, anti-sag hardware, and post-setting procedures to install wood fence gates that stay square and functional for decades.
The Physics of Gate Failure: Why Wood Fence Gates Sag
Most wood fence gates fail within three to five years, not because the wood rots, but because the structural geometry cannot withstand gravity. A standard rectangular gate frame is inherently unstable. When hung on hinges, the unsupported latch side acts as a lever. Gravity pulls this side downward, transforming the rectangle into a parallelogram. This racking effect strips screws, warps pickets, and ultimately causes the gate to drag on the ground.
To install wood fence gates that remain square and functional, you must counteract this lateral shear force through precise diagonal bracing, metallurgically compatible hardware, and deeply anchored hinge posts. The following procedures outline the professional standards for heavy-duty gate installation.
When measuring the rough opening between your gate posts, always deduct exactly 3/4 inch for the actual gate width. This provides 3/8 inch of clearance on the hinge side (for hinge swing radius) and 3/8 inch on the latch side (for the latch mechanism and seasonal wood expansion). For the bottom clearance, maintain a minimum of 1.5 inches in temperate climates, or 3 inches in regions with heavy snow accumulation, to prevent the gate from binding against ice buildup.
Material Selection: Lumber Species and Hardware Compatibility
The most common installation failure occurs when builders pair the wrong fasteners with specific wood species. Modern pressure-treated lumber and naturally rot-resistant woods contain chemical compounds that rapidly corrode standard zinc-plated or uncoated steel hardware.
| Wood Species | Chemical Profile | Required Fastener Metallurgy | Avg. Cost per 8ft 2x4 (2026) |
|---|---|---|---|
| Western Red Cedar | High tannic acid content | 304 or 316 Stainless Steel | $8.50 - $11.00 |
| Pressure-Treated Pine (MCQ/ACQ) | Copper-based preservatives | Hot-Dipped Galvanized (ASTM A153) or Stainless | $5.00 - $7.50 |
| Redwood | Tannins and extractives | 316 Stainless Steel (coastal) or Hot-Dipped Galv. | $12.00 - $16.00 |
According to the American Wood Protection Association (AWPA), using standard electroplated galvanized screws in ACQ-treated pine will result in severe corrosion and structural failure within 24 months. Always verify that your fasteners meet ASTM A153 Class D standards for hot-dipped galvanization when working with treated lumber. For comprehensive data on wood moisture movement and fastener withdrawal capacities, consult the USDA Forest Products Laboratory Wood Handbook.
Step-by-Step Framing: The Compression Z-Brace
The internal framing of the gate dictates its lifespan. While a simple rectangular frame with butt joints will suffice for a 2-foot garden gate, any wood fence gate wider than 36 inches requires a diagonal brace.
1. Orienting the Diagonal Brace Correctly
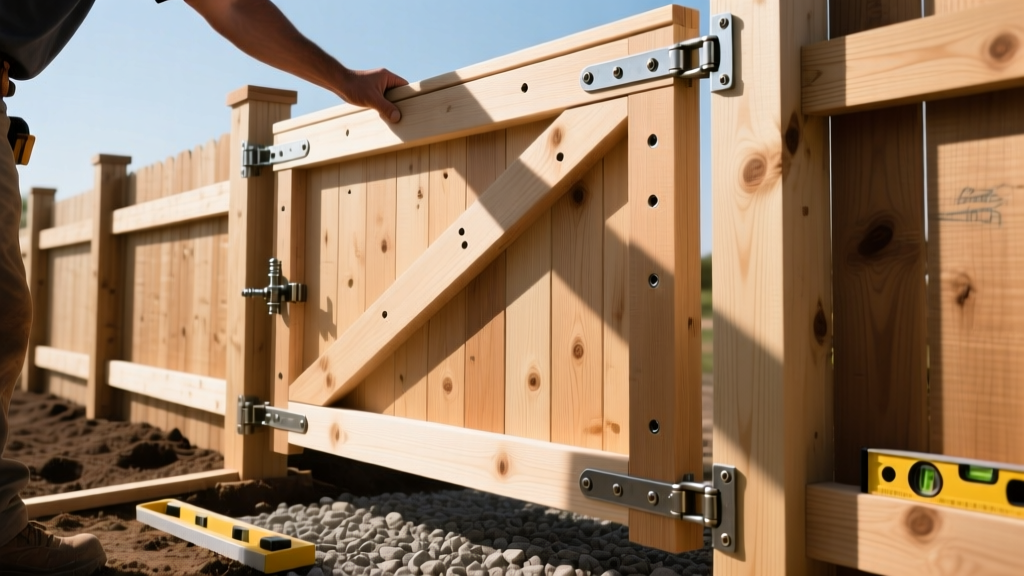
This is the most frequently misunderstood concept in gate building. The diagonal brace must run from the bottom hinge corner up to the top latch corner. Why? Wood is exceptionally strong in compression but weak in tension when relying on end-grain fasteners. When gravity pulls the top latch corner down, the diagonal brace transfers that weight as a compressive force directly into the solid bottom hinge corner, which is fully supported by the post. If you install the brace from the top hinge to the bottom latch, the gate's weight puts the brace in tension, slowly pulling the fasteners out of the wood grain until the gate sags.
2. Assembly and Fastening Protocols
- Joinery: Cut the diagonal brace with precise 45-degree or custom-mitered ends so it sits flush inside the 2x4 frame. Do not rely on toe-nailing.
- Fasteners: Use structural screws (such as GRK RSS or Simpson Strong-Tie SDWS) rather than nails. Nails lack the shear strength to resist the lateral racking forces over time. Drive 3-inch structural screws through the exterior frame into the ends of the diagonal brace.
- Picket Attachment: Stagger the picket screws. Drive two screws per picket into each horizontal rail, spacing them 1 inch from the edges to prevent splitting the cedar or pine.
Hinge Post Reinforcement and Setting
A gate will only be as stable as the post it hangs on. A standard 4x4 post set in 24 inches of concrete is insufficient for a heavy, 4-foot-wide solid wood gate. The dynamic load of a gate swinging open and closed creates massive leverage against the concrete footing.
Never set a gate hinge post in less than 36 inches of depth, regardless of the frost line. For gates exceeding 5 feet in width, upgrade the hinge post to a 6x6 timber, or install a secondary "deadman" brace—a horizontal 4x4 buried in the trench that ties the hinge post to the adjacent line post, effectively neutralizing the lateral pull of the gate.
- Excavation: Dig a hole 12 inches in diameter and 36 to 42 inches deep.
- Drainage Base: Add 4 inches of crushed gravel to the bottom of the hole. Setting the post directly on dirt traps moisture, accelerating rot at the most critical stress point.
- Plumb and Brace: Set the post and use two temporary 2x4 braces screwed to the post and staked into the ground to hold it perfectly plumb in both directions.
- Concrete Pour: Use a high-psi structural concrete mix (minimum 4,000 psi). Pour the concrete, tamping it every 6 inches with a rebar rod to eliminate air pockets. Slope the top of the concrete collar away from the post at a 15-degree angle to shed water.
Hanging the Gate: Hinge Selection and Placement
For heavy wood fence gates, abandon standard T-hinges in favor of heavy-duty strap hinges or structural pivot hinges. Strap hinges distribute the weight across a wider surface area of the gate frame, reducing the point-load stress on the wood.
Position the top hinge 8 inches down from the top rail, and the bottom hinge 8 inches up from the bottom rail. This maximizes the vertical distance between the hinges, reducing the sheer force on the lag bolts. Secure the hinges to the post using 3/8-inch x 2-inch hot-dipped galvanized or stainless steel lag screws with washers. Pre-drill the pilot holes using a 1/4-inch bit to prevent the dense heartwood of the post from splitting under the torque of the lag screws. For detailed corrosion ratings on hinge hardware, refer to the Simpson Strong-Tie corrosion guidelines.
Anti-Sag Systems: Turnbuckles vs. Wood Braces
Even with a perfect compression Z-brace, wood naturally compresses and hardware stretches over years of use. Installing a proactive anti-sag system during the initial build saves costly callbacks or DIY repairs later.
- Steel Cable and Turnbuckle: Install a stainless steel aircraft cable running from the top hinge corner to the bottom latch corner (opposite the wood compression brace). Use a middle turnbuckle to tighten the cable. This allows you to easily dial in the tension and lift the latch side if it drops by a fraction of an inch over the years.
- Anti-Sag Kits: Commercial kits (like the Adjust-A-Gate system) provide pre-cut cables and swaged fittings, which are faster to install than raw turnbuckles and offer a cleaner aesthetic.
Latch Installation and Final Adjustments
Install the latch only after the gate has been hanging on the hinges for 48 hours. Wood fence gates undergo initial settling as the hinges seat themselves and the wood adjusts to ambient humidity. Use a gravity latch or a heavy-duty thumb latch. Mount the latch receiver on the post slightly higher than the latch arm on the gate; as the gate inevitably settles a millimeter or two, the arm will drop perfectly into the receiver rather than binding against the bottom lip.
Troubleshooting Common Installation Failures
- Gate binds at the top when closing: The hinge post has leaned inward due to the gate's weight. Install a turnbuckle tension cable between the top of the hinge post and the top of the adjacent line post to pull it back to plumb.
- Gate drags on the ground when opening: The bottom clearance was insufficient, or the bottom hinge has pulled away from the post. Tighten the lag bolts on the bottom hinge or add a 1/4-inch wooden shim behind the bottom hinge leaf to push the gate outward and upward.
- Black streaks on Cedar pickets: Standard zinc or galvanized screws were used instead of stainless steel. The tannic acid in the cedar is reacting with the zinc. The only fix is to replace all fasteners with 304 stainless steel and sand the streaks.