Common Types of Mold on Wood and Installation Prevention Tips
Learn to identify common types of mold on wood and apply framing installation best practices to prevent moisture intrusion and fungal growth.

The Hidden Threat: Why Mold Identification Matters During Installation
Mold on structural lumber and finish wood is not merely an aesthetic defect; it is a critical indicator of moisture mismanagement that can compromise indoor air quality and structural longevity. For framing contractors and custom home builders, understanding the specific types of mold on wood is the first step in implementing rigorous installation best practices. Fungal spores are ubiquitous, but they require a moisture content (MC) above 19% in wood to germinate and colonize. By controlling the installation environment and recognizing early fungal signatures, builders can avoid catastrophic remediation costs that average $15 to $25 per square foot once walls are enclosed.
4 Common Types of Mold on Wood Found on Job Sites
Not all fungal growth behaves identically. Identifying the specific genus dictating the discoloration on your lumber delivery helps determine the severity of the moisture issue and the required remediation protocol.
1. Cladosporium (Olive/Brown Surface Mold)
Appearance: Olive-green, brown, or black velvety patches, typically appearing on the surface of sapwood.
Behavior: Cladosporium is the most common outdoor mold and frequently arrives on lumber straight from the mill or storage yard. It feeds on surface starches and sugars in the sapwood, not the structural cellulose.
Installation Impact: While it does not compromise the structural integrity of the stud or joist, it releases high volumes of spores. If enclosed behind drywall, it will go dormant but can reactivate if a localized leak occurs later.
2. Penicillium (Blue/Green Rapid Spreader)
Appearance: Powdery blue, green, or white colonies that spread aggressively across damp OSB, plywood sheathing, and framing.
Behavior: Penicillium thrives in high-humidity environments and can colonize wood in as little as 24 to 48 hours if the MC exceeds 22%.
Installation Impact: This mold produces strong, musty volatile organic compounds (mVOCs) that can permeate the job site. It requires immediate mechanical removal and chemical treatment before the building envelope is sealed.
3. Aspergillus (Powdery Yellow/Green)
Appearance: Dusty yellow, yellow-green, or grayish-brown spots.
Behavior: Aspergillus is highly adaptable and can grow on wood with slightly lower moisture thresholds than Penicillium.
Installation Impact: Certain species (like Aspergillus flavus) produce mycotoxins. Builders must mandate N95 respirators for crews sanding or wire-brushing affected framing members to prevent respiratory sensitization.
4. Stachybotrys Chartarum (Toxic Black Mold)
Appearance: Slimy, dark greenish-black patches.
Behavior: Unlike surface molds, Stachybotrys requires prolonged, severe saturation (wood MC consistently above 25% for several weeks). It is rarely found on fresh framing lumber unless the wood has been sitting in standing water or under a severe roof leak.
Installation Impact: If identified on site, installation must halt. The affected wood usually requires complete removal and replacement, as chemical surface treatments cannot guarantee the eradication of deeply embedded mycelium in highly saturated timber.
Mold vs. Wood-Decay Fungi: Don't Confuse the Two
A common and costly mistake on job sites is confusing surface mold with wood-decay fungi. As noted by the United States Environmental Protection Agency (EPA), mold feeds on surface nutrients, whereas decay fungi digest the wood's cellular structure. Installing decayed wood is a structural failure.
| Feature | Surface Mold (e.g., Cladosporium) | Decay Fungi (e.g., Brown Rot / Dry Rot) |
|---|---|---|
| Food Source | Starches, sugars, sap on the surface | Cellulose and lignin (structural wood fibers) |
| Structural Impact | None; purely cosmetic and air quality issue | Severe; causes checking, crumbling, and loss of load-bearing capacity |
| Physical Test | Wipes off or sands away easily; wood remains hard | Wood feels spongy, breaks into cubical chunks, or powders when poked with an awl |
| Installation Action | Clean, treat with borates, and install if MC < 19% | Reject delivery; cut out and replace affected structural members |
Installation Best Practices to Prevent Mold on Framing Lumber
Preventing mold requires a proactive approach spanning material receiving, storage, and pre-drywall treatment. Follow this sequential protocol to ensure a mold-free framing package.
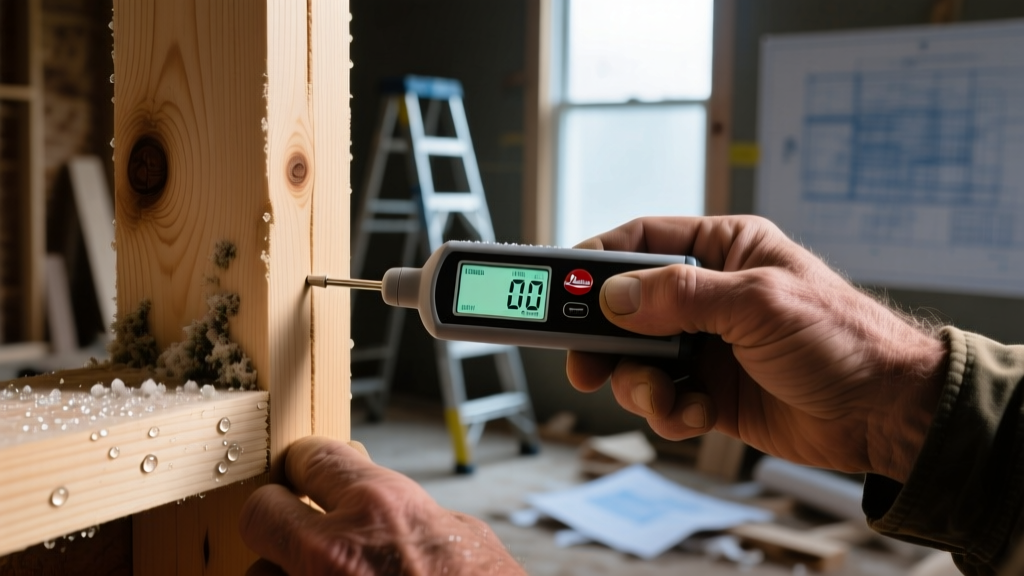
- Mandatory Moisture Metering Upon Delivery: Do not rely on visual inspections. Use a pinless moisture meter (such as the Wagner Meters Orion 910) to scan 10% of the lumber package. If readings exceed 19%, reject the load or mandate on-site sticker-stacking under a weighted, breathable tarp until the MC drops.
- Elevated and Covered Storage: Never store framing lumber or engineered I-joists directly on the ground. Use 4x4 dunnage spaced every 4 feet to allow cross-ventilation. Cover with a breathable woven tarp (not solid polyethylene, which traps condensation and creates a greenhouse effect for Penicillium).
- Pre-Enclosure Borate Treatment: For high-humidity climates (USDA Zones 1-3) or homes with slab-on-grade foundations, apply a disodium octaborate tetrahydrate (DOT) solution like Bora-Care or Tim-bor to all sill plates, rim joists, and bottom 24 inches of wall studs before insulation.
Application Rate: Mix Bora-Care 1:1 with water. One gallon of solution treats approximately 800 square feet of wood surface. Cost adds roughly $0.15 to $0.25 per board foot, a fraction of future remediation costs. - Seal the Envelope Before Insulation: As emphasized in the Building Science Corporation Builders' Guides, the building must be "dried-in" (roofing, windows, and weather-resistive barrier installed) before installing moisture-sensitive materials like OSB subflooring or interior wood trim.
Remediation Protocol: What to Do If Lumber Arrives Moldy
If surface mold (Cladosporium or Penicillium) is discovered on framing after it has been erected but before drywall installation, do not simply paint over it or seal it behind vapor barriers. Follow this decision framework:
The 3-Step Wet Remediation Process
- HEPA Vacuuming: Remove loose surface spores using a commercial HEPA vacuum.
- Wet Scrubbing with Detergent: Scrub the affected wood using a stiff bristle brush and a solution of water and unscented commercial dish detergent. Do not use bleach; bleach does not penetrate porous wood and its high water content can actually feed the deeper mycelium roots.
- Borate Encapsulation: Once the wood surface has dried back below 19% MC (verify with a pin-type meter like the Delmhorst J-2000), apply a borate-based fungicide. Borates penetrate the wood fibers, altering the pH and making the cellulose indigestible to both mold and wood-destroying insects.
Expert Insight: If mold has penetrated deeper than 1/16th of an inch into the wood grain, or if the wood remains structurally soft after drying, the member must be sistered or replaced entirely. Surface treatments cannot reverse internal hyphal damage.
Long-Term Performance: Designing for Moisture Deflection
Installation best practices extend beyond the framing stage. To ensure the types of mold on wood never become a recurring issue for the homeowner, builders must integrate capillary breaks and flashing. Install a sill sealer (such as closed-cell polyethylene foam) between the concrete foundation and the pressure-treated mudsill to prevent wicking. Flash all window and door rough openings with self-adhered butyl tape, ensuring the bottom pan flashing extends over the weather-resistive barrier. By treating moisture management as a holistic system—from the moment the lumber arrives on site to the final coat of exterior paint—builders eliminate the fundamental prerequisite for fungal growth: liquid water.
Written by
Sarah WhitfieldSarah Whitfield is a chartered quantity surveyor (MRICS) and construction cost analyst with 15 years of experience in material pricing, procurement strategy, and project budgeting. She earned her degree in Construction Management from the University of Reading (UK) and has worked on projects ranging from $2M custom homes to $180M mixed-use developments across North America and Europe. Sarah currently leads cost estimating for BuildMat Insight, maintaining a proprietary database of 4,000+ material price points updated quarterly. She is a frequent contributor to RSMeans cost data panels and has presented at the International Cost Engineering Council (ICEC) congress. Based in Denver, CO, Sarah is an avid trail runner and volunteer mentor for Women in Construction.
More from Sarah Whitfield
View all
Wood & Lumber
What Are the Different Types of Wood? A Builder's Guide
Compare structural softwoods, finish hardwoods, and engineered lumber. Analyze Janka ratings, MOE values, and 2026 pricing for construction.
Aug 4, 2026

Walls & Panels
Steel Framing vs Wood Framing: Corrosion and Moisture Defense
Compare steel framing vs wood framing for moisture resistance. Learn about galvanized coatings, condensation risks, and corrosion protection strategies.
Jul 21, 2026

Stone & Masonry
How to Cut Stone Veneer: Wet Saw vs Grinder Comparison
Compare the best tools for cutting stone veneer. We review wet saws, angle grinders, and chop saws to help you achieve clean, chip-free cuts.
Jul 21, 2026