Cleaning & Maintenance Playbook for Pine Lumber Grades
Master the care of pine lumber grades with our expert cleaning playbook. Learn resin management, prep, and maintenance for Select to #3 Common pine.
The Resin Factor: Why Pine Grades Dictate Maintenance
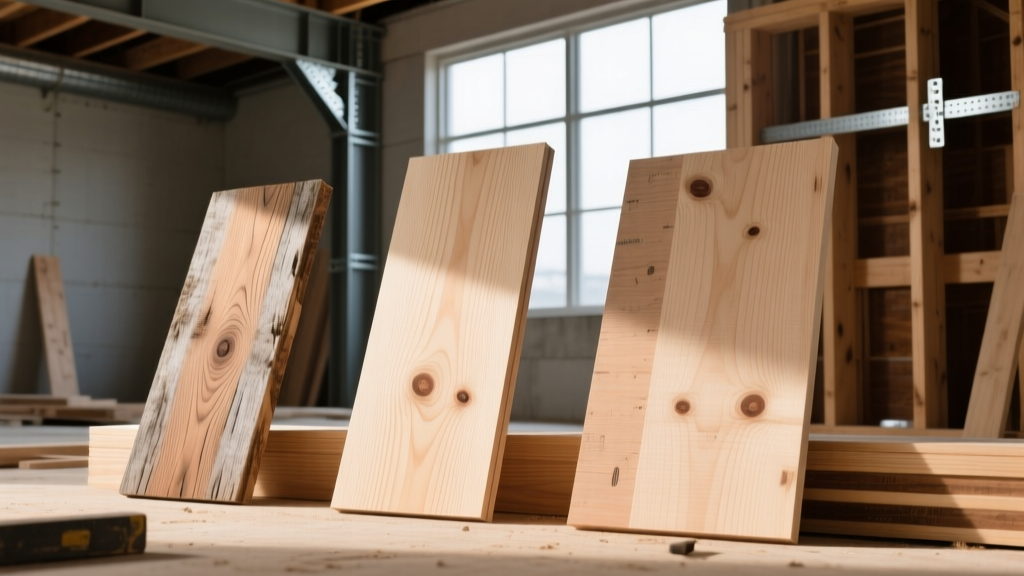
Pine is one of the most widely used softwoods in construction and interior finishing, but treating all pine lumber grades with a universal cleaning and maintenance protocol is a critical error. The fundamental difference between a clear Select grade and a heavily knotted #3 Common grade is not just visual; it is chemical. Pine contains high levels of resin (pitch) and sap, which are concentrated in and around the knots. As you move down the grading scale from Select to #3 Common, the frequency and size of knots increase, exponentially raising the risk of resin bleed-through, uneven stain absorption, and finish failure.
Never use high-heat cleaning tools like steam mops or industrial heat guns on unfinished or lightly finished pine lumber grades. Temperatures above 120°F (49°C) will liquefy hardened pitch pockets deep within the wood grain, causing immediate bleed-through that ruins surface finishes and attracts dirt.
According to the USDA Forest Products Laboratory, the anatomical structure of softwoods like pine includes resin canals that are entirely absent in hardwoods. This means your cleaning playbook must adapt to the specific grade you are working with. A Select grade pine floor requires standard polyurethane maintenance, while a #2 Common pine accent wall requires aggressive pre-sealing and specialized pH-balanced cleaning to prevent long-term ambering.
Grade-by-Grade Cleaning and Prep Matrix
Before applying any finish or beginning a maintenance routine, you must prep the wood based on its specific grading characteristics. The Southern Pine Inspection Bureau (SPIB) grading rules dictate knot size and frequency, which directly correlates to your required prep work.
| Pine Lumber Grade | Knot & Resin Profile | Initial Prep Sanding | Pre-Clean Solvent | Sealing Requirement |
|---|---|---|---|---|
| Select / Clear | No knots, very low resin | 150 to 220 grit | Naphtha | Standard wood conditioner |
| #1 Common | Small tight knots, low risk | 120 to 180 grit | Mineral Spirits | Dewaxed shellac on knots |
| #2 Common | Large knots, active pitch pockets | 80 to 150 grit | Denatured Alcohol | 2-lb cut dewaxed shellac |
| #3 Common | Loose knots, heavy pitch bleed | 60 to 120 grit | Heavy Naphtha scrub | Epoxy filler + shellac |
Phase 1: Pre-Finish Resin Extraction Protocol
If you are maintaining raw pine or stripping an old finish to refinish, you must extract surface resin before applying any topcoat. Skipping this step on #2 or #3 Common grades guarantees that sap will eventually push through your finish, creating sticky, dirt-attracting amber spots.
The 3-Step Solvent Wash
- Scrape Active Pitch: Use a carbide scraper to gently remove any hardened, crystallized sap on the surface. Do not dig into the wood fibers.
- Solvent Wipe: Dampen a lint-free cloth with naphtha (for Select/#1) or denatured alcohol (for #2/#3). Wipe the wood in the direction of the grain. Naphtha evaporates faster and leaves less residue than mineral spirits, making it superior for high-grade pine prep.
- Shellac Lock-In: For #2 and #3 Common grades, apply a 2-pound cut of dewaxed shellac (such as Zinsser SealCoat) directly over the knots. Standard shellac contains natural wax that will cause modern water-based polyurethanes to peel. Dewaxed shellac acts as an impermeable barrier against pine pitch.
Phase 2: Routine Maintenance by Application
Once the pine is properly sealed and finished, routine maintenance shifts from chemical prep to surface preservation. The cleaning agents you choose must respect both the wood's softness and the integrity of the topcoat.
Interior Pine Flooring (Select & #1 Common)
Pine is a softwood with a low Janka hardness rating (Southern Yellow Pine is roughly 870 lbf, while Eastern White Pine is a mere 380 lbf). This means it dents and scratches easily. Maintenance is less about deep cleaning and more about grit removal.
- Daily: Use a microfiber dust mop. Never use a vacuum with a beater bar, as the hard plastic wheels and bristles will gouge the soft pine fibers.
- Monthly: Use a pH-neutral hardwood floor cleaner (pH 7.0 to 8.5). Avoid vinegar and water solutions. The acetic acid in vinegar slowly degrades the polyurethane topcoat, eventually exposing the raw pine to moisture and dirt.
- Annual: Inspect high-traffic zones for finish wear. If the finish is thinning, apply a single coat of water-based polyurethane refresher. Do not let the wood go bare, as pine will rapidly absorb oils from foot traffic, turning dark and blotchy.
Exposed Structural Beams (#2 & #3 Common)
Exposed pine beams in ceilings or timber-frame structures are typically finished with penetrating oils or left raw. Because they are out of reach, they accumulate fine dust and airborne grease (especially in kitchens).
Expert Insight: For raw or oiled structural pine beams, never use water-based liquid cleaners. Water will raise the grain of the softwood, creating a fuzzy, rough texture that traps more dust. Instead, use a dry chemical sponge (vulcanized rubber soot sponge) to lift grease and dust from the open pores of the pine without introducing moisture.
Exterior Pine Decking & Siding (Pressure-Treated #2)
Exterior pine is almost exclusively #2 grade or lower, pressure-treated with copper-based preservatives. Maintenance here focuses on preventing mold and UV degradation without stripping the preservatives.
- Cleaning Agent: Use an oxygen bleach solution (sodium percarbonate) mixed with warm water. Never use chlorine bleach (sodium hypochlorite) on pressure-treated pine; it breaks down the lignin in the wood fibers, causing severe surface checking and splintering.
- Application: Apply the oxygen bleach, let it dwell for 15 minutes, and scrub with a stiff-bristle synthetic brush. Rinse with a garden hose. Avoid pressure washers over 1,200 PSI, as the soft earlywood rings of pine will wash away, leaving a ridged, uneven surface.
Troubleshooting Common Pine Maintenance Failures
Even with proper prep, pine lumber grades can present unique maintenance headaches. Here is how to diagnose and fix the most common issues.
Symptom: Amber Bleed-Through on Painted Trim
The Cause: You painted #2 or #3 Common pine trim with a standard water-based acrylic latex paint without sealing the knots first. The tannins and resin have migrated through the paint film.
The Fix: Do not just repaint. Spot-prime the bleeding knots with a pigmented shellac-based primer (like BIN). Shellac is the only resin that completely blocks pine tannin migration. Once dry, topcoat with your original paint.
Symptom: Milky Haze in Clear Topcoat
The Cause: Moisture was trapped inside a pitch pocket when the clear coat was applied, or the wood was cleaned with a water-based solution and not given 48 hours to dry before finishing.
The Fix: Sand the affected area down to bare wood. Use a heat gun on a low setting to gently draw out any remaining moisture from the pitch pocket, wipe with denatured alcohol, seal with dewaxed shellac, and reapply the topcoat.
Symptom: Blotchy, Uneven Stain Appearance
The Cause: Pine has alternating bands of hard latewood and soft earlywood. The soft earlywood absorbs stain deeply, while the hard latewood rejects it, leading to a reversed, blotchy grain pattern, especially on lower grades with wild grain near knots.
The Fix: For future projects, always apply a pre-stain wood conditioner (a thinned varnish or oil) 15 minutes before staining. For existing blotchy finishes, the only true fix is to sand the piece completely bare and switch to a gel stain, which sits on the surface rather than penetrating the uneven pine grain.
Final Thoughts on Grade-Specific Care
Understanding the specific characteristics of different pine species and grades is the difference between a finish that lasts decades and one that fails in months. By matching your cleaning solvents, sanding grits, and maintenance routines to the exact lumber grade you are working with, you neutralize the inherent weaknesses of softwood and highlight its natural, timeless beauty.