Pine Wood Construction Maintenance: A Complete Cleaning Playbook
Master pine wood construction maintenance with our expert cleaning playbook. Learn pH-specific washing, sap bleed fixes, and exterior timber care.
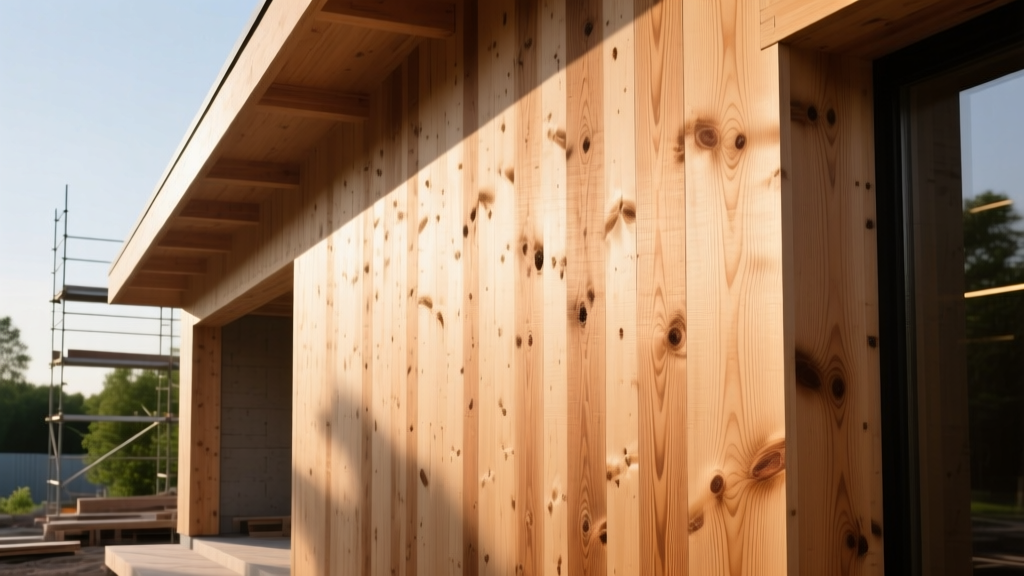
The Unique Vulnerabilities of Pine in Construction
Pine is a dominant species in both structural framing and interior finish carpentry, prized for its workability, cost-efficiency, and distinct grain. However, maintaining pine wood construction requires a fundamentally different approach than hardwoods like oak or maple. Pine's cellular structure is characterized by large resin canals and a high concentration of pitch pockets, making it highly reactive to temperature fluctuations and harsh chemicals.
Furthermore, pine's relative softness dictates its maintenance thresholds. Eastern White Pine registers at just 380 lbf on the Janka hardness scale, while Southern Yellow Pine reaches approximately 870 lbf. This softness means that aggressive scrubbing or alkaline cleaners will not only strip finishes but also physically crush the wood fibers, leading to permanent surface fuzzing and accelerated moisture ingress. According to the USDA Forest Products Laboratory, the differential density between pine's earlywood (soft, porous) and latewood (hard, dense) bands causes uneven absorption of stains and cleaners, necessitating highly controlled maintenance protocols.
Routine Interior Cleaning Protocols
For interior pine elements—such as exposed ceiling beams, shiplap paneling, and pine flooring—routine cleaning must prioritize pH neutrality and moisture control. Water is the enemy of raw or lightly finished pine, as it raises the grain and promotes fungal staining.
The 4-Step Daily/Weekly Playbook
- Dry Extraction First: Use a canister vacuum with a natural horsehair floor brush attachment. Avoid beater bars, which will dent soft pine flooring. For beams and paneling, use a 300-GSM microfiber duster to trap dust without scratching.
- pH-Balanced Damp Mopping: Mix a pH-neutral cleaner (target pH 6.5 to 7.0) specifically formulated for softwoods. Products like Bona Hardwood Floor Cleaner or a heavily diluted (1:8 ratio) Murphy's Oil Soap are ideal. Never use steam mops on pine; the forced heat and moisture will delaminate polyurethane finishes and cause checking in solid timber.
- Directional Wiping: Always wipe parallel to the grain. Wiping across the grain forces dirt into the porous earlywood bands, creating a permanently dingy appearance over time.
- Immediate Drying: Follow the damp mop with a dry, lint-free microfiber cloth to remove residual moisture before it penetrates micro-fissures in the finish.
Never use diluted white vinegar (acetic acid) or ammonia on pine. The National Wood Flooring Association (NWFA) explicitly warns against acidic cleaners, as they degrade water-based polyurethanes over time. More importantly, ammonia and highly alkaline cleaners (pH > 8) react with pine's natural tannins, causing irreversible dark, blotchy staining that can only be removed by sanding down to bare wood.
Exterior Pine Siding and Structural Timber Care
Exterior pine wood construction, including siding, fascia, and exposed structural glulam beams, faces UV degradation, moisture cycling, and biological growth. Film-forming finishes (like standard polyurethane or varnish) will inevitably peel on exterior pine due to the wood's high dimensional movement. Instead, penetrating alkyd-oil stains (e.g., Sansin Dec or Osmo Color) are required.
| Season | Maintenance Task | Specific Product / Tool Requirement |
|---|---|---|
| Early Spring | Biological Growth Removal | Oxygen bleach solution (sodium percarbonate). Avoid chlorine bleach, which destroys pine lignin. |
| Late Spring | Moisture Auditing | Pinless moisture meter. Exterior pine should read below 16% MC before applying any topcoats. |
| Autumn | UV & Water Repellent Refresh | Penetrating oil stain maintenance coat. Apply only when ambient temps are between 50°F and 85°F. |
Troubleshooting Common Pine Defects
When maintaining pine wood construction, you will inevitably encounter species-specific defects. Use this diagnostic framework to address them without causing secondary damage.
Symptom: Pitch / Sap Bleeding Through Paint
- Cause: Pine contains active resin canals. When exposed to direct sunlight or interior heating, the sap liquefies, expands, and pushes through standard latex primers and paints.
- The Fix: Do not simply paint over it. Scrape the hardened sap with a putty knife. Clean the area with denatured alcohol to remove residual resin. Seal the knot and surrounding grain with a shellac-based primer (specifically Zinsser B-I-N), which creates an impermeable vapor barrier that locks in the pitch. Topcoat with your desired acrylic paint.
Symptom: Severe Ambering (Yellowing) of Interior Finishes
- Cause: Oil-based polyurethanes naturally amber over time, and this effect is magnified by the pale yellow undertones of pine. UV exposure accelerates this chemical shift.
- The Fix: For existing floors, a screen-and-recoat will not fix ambering. The floor must be sanded to bare wood (starting at 36-grit, finishing at 100-grit). Apply a water-based, non-yellowing commercial finish like Bona Traffic HD. Water-based polys remain crystal clear and will preserve pine's natural, light colorway.
Symptom: Surface Fuzzing After Cleaning
- Cause: Using excessive water or highly alkaline cleaners on raw or oiled pine causes the soft earlywood fibers to swell and stand up, creating a rough, 'fuzzy' texture.
- The Fix: Allow the wood to dry completely for 48 hours. Lightly buff the surface with a 120-grit sanding screen or a maroon synthetic steel wool pad (Scotch-Brite) to shear off the raised fibers. Reapply a penetrating hardwax oil (e.g., Rubio Monocoat) to bind the fibers down.
Refinishing and Deep Restoration Playbook
When routine cleaning fails and pine elements require deep restoration, the sanding and refinishing process must account for the wood's softness and uneven density.
Professional sanding and refinishing of pine flooring typically ranges from $4.50 to $6.50 per square foot. This is roughly 15-20% higher than oak, as pine requires an extra intermediate sanding step and careful hand-scraping to prevent machine swirl marks from permanently embedding into the soft grain.
The Pine-Specific Sanding Sequence
Never jump grits aggressively on pine. The soft earlywood will sand away much faster than the dense latewood, resulting in a wavy, dish-washed surface if heavy grits are used too long.
- Rough Cut (36 or 40 grit): Only use if removing thick, peeling film finishes. Keep the drum sander moving constantly to avoid gouging.
- Leveling (60 grit): The workhorse grit. This removes the scratches from the 40-grit pass and levels the floor.
- Smoothing (80 grit): Essential for closing the pores of the pine.
- Final Polish (100 or 120 grit): Mandatory for pine if you are applying a water-based finish or a penetrating oil. Skipping this step will result in a blotchy, uneven stain absorption.
Conditioning Before Staining
If your restoration involves changing the color of the pine, a pre-stain wood conditioner is non-negotiable. Pine's erratic grain density causes 'blotching'—where dark stain pools in the soft earlywood and rejects the hard latewood. Apply a gel-based conditioner or a dedicated sanding sealer, let it penetrate for 15 minutes, and wipe it off before applying a gel stain. Gel stains sit on the surface of the wood rather than penetrating deeply, providing a much more uniform color across pine's varied grain structure.
By adhering to these precise, species-specific protocols, property managers and homeowners can drastically extend the lifecycle of pine wood construction, preserving both its structural integrity and its aesthetic warmth for decades.