Installing Different Types of Wooden Boards: Best Practices Guide
Master installation best practices for different types of wooden boards, including solid hardwood, engineered plywood, and MDF composite panels.

The Physics of Wood: Why Board Type Dictates Installation
Wood is a hygroscopic material, meaning it continuously exchanges moisture with its surrounding environment. When installing different types of wooden boards, a one-size-fits-all approach guarantees structural failure, aesthetic defects, or premature degradation. Solid dimensional lumber, engineered structural panels, and composite fiberboards each possess unique dimensional stability, density, and fastener-holding capacities. Understanding these material-specific behaviors is the dividing line between a master carpenter and a callback-prone contractor.
Universal Pre-Installation: Moisture Content (MC) Equilibrium
Before any fastener is driven, moisture equilibrium must be verified. The Equilibrium Moisture Content (EMC) is the point where the wood neither gains nor loses moisture to the ambient air. According to the National Wood Flooring Association (NWFA), installing wood outside of its EMC parameters is the leading cause of seasonal gapping and buckling.
Acclimation Timelines and Environmental Controls
- Solid Hardwood Boards: Require 7 to 14 days of acclimation in the installation space. The HVAC system must be operational, maintaining 60°F–80°F and 30%–50% relative humidity.
- Engineered Wood (Plywood/OSB): Require 48 to 72 hours to acclimate to the structural framing environment.
- MDF and Composite Boards: Highly susceptible to edge swelling. Require 48 hours in a climate-controlled space, kept flat and fully supported to prevent gravitational sagging.
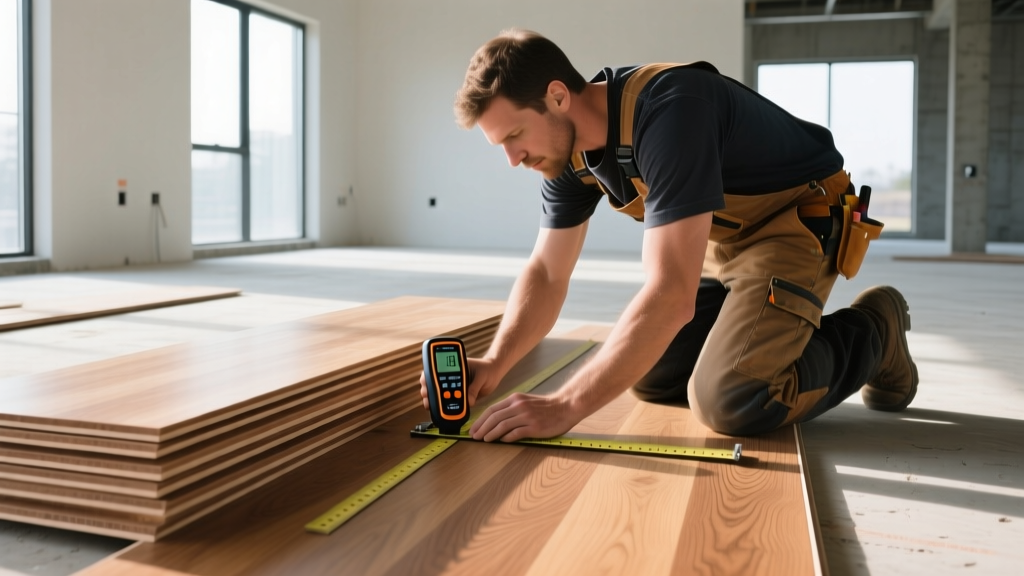
Verification requires a pinless electromagnetic moisture meter (such as the Wagner Orion 910). For solid hardwood flooring, the MC of the boards must be within 2% to 4% of the wood subfloor's MC. For engineered panels, the variance should not exceed 2%.
Solid Hardwood Boards: Flooring and Millwork Fastening
Solid hardwood boards (typically 3/4-inch thick tongue-and-groove) expand and contract significantly across their width. Installation must accommodate this lateral movement while securing the board firmly to the joists.
Blind Nailing and Cleat Specifications
For 3/4-inch solid boards, use a pneumatic flooring nailer driving 15.5-gauge staples or 16-gauge L-cleats. Fasteners must be driven at a 45-degree angle through the upper corner of the tongue. This 'blind nailing' technique hides the fastener while pulling the board tight against the previous row.
Expansion Gaps: Maintain a strict 1/2-inch to 3/4-inch expansion gap along all vertical obstructions (walls, pipes, cabinets). The first and last rows of flooring cannot be blind-nailed; they must be face-nailed using 15-gauge finish nails, pre-drilled with a 3/32-inch bit, countersunk, and filled with color-matched wood putty.
Engineered Wood Boards: Plywood, OSB, and LVL
Engineered boards are manufactured by bonding wood veneers or strands with structural adhesives. They offer superior dimensional stability compared to solid wood but require specific spacing and fastener schedules to maintain structural integrity. The APA – The Engineered Wood Association mandates precise installation tolerances for structural sheathing.
Subfloor and Sheathing Panel Spacing
Engineered panels expand slightly when exposed to construction moisture. To prevent panel buckling (which telegraphs through finished flooring), you must leave a 1/8-inch gap at all panel ends and edges. Use a 10d nail or a specialized spacing tool to maintain this gap during fastening.
Fastener Schedules and Adhesive Bonding
For 3/4-inch tongue-and-groove subfloor panels (like AdvanTech or Sturd-I-Floor), the optimal fastener is a #8 x 2-1/2-inch structural wood screw (e.g., Simpson Strong-Tie SDWS) or an 8d ring-shank nail. Screws provide superior withdrawal resistance and reduce the risk of fastener pop.
Industry Standard: To eliminate subfloor squeaks, apply a continuous 3/8-inch bead of polyurethane subfloor adhesive (such as Loctite PL Premium) to the top flange of every joist before laying the engineered board. Fasten the panel within 15 minutes of adhesive application.
Composite, MDF, and Particle Boards: Trim and Cabinetry
Medium Density Fiberboard (MDF) and particle boards are incredibly dense and uniform, making them ideal for paint-grade trim and cabinet boxes. However, their lack of continuous wood grain makes them highly prone to splitting and edge blowout during installation.
Edge Clearance and Pre-Drilling
Never drive a screw or nail within 3 inches of an MDF edge without pre-drilling. The internal pressure generated by the fastener displacement will fracture the board. When joining MDF cabinet face frames, use 23-gauge micro-pin nailers for temporary holding while the PVA wood glue cures, or use specialized trim-head screws with deep self-countersinking threads.
Machining and Blade Selection
When cutting composite boards on-site, standard framing blades will cause severe tear-out on the melamine or veneer faces. Use an 80-tooth or 100-tooth carbide-tipped finishing blade with a high alternate top bevel (ATB) grind. Apply painter's tape over the cut line to further minimize micro-chipping on the visible face.
Fastener and Spacing Matrix by Board Type
| Board Type | Primary Application | Recommended Fastener | Spacing / Edge Clearance | Adhesive Requirement |
|---|---|---|---|---|
| 3/4" Solid Hardwood | Finish Flooring | 16-ga L-Cleat or 15.5-ga Staple | 8"-10" OC; 1/2" wall gap | None (floating or nailed) |
| 3/4" T&G Plywood/OSB | Structural Subfloor | #8 x 2-1/2" Structural Screw | 6" edges / 12" field; 1/8" panel gap | Polyurethane Subfloor Adhesive |
| 1/2" MDF Board | Paint-Grade Trim / Wainscoting | 23-ga Pin or 18-ga Brad (pre-drilled) | Min 3" from any edge | PVA Wood Glue at joints |
| 1-3/4" LVL Beam | Structural Headers / Ridges | 1/2" Thru-Bolts or SDS Heavy-Duty Screws | Per structural engineer stamp | None (mechanical only) |
Troubleshooting Common Installation Failures
Failure 1: Subfloor Telegraphing and Squeaking
Symptom: Visible ridges appear at the seams of engineered subfloor panels, and the floor squeaks under lateral loads.
Root Cause: Joist spacing exceeds 16 inches on-center (OC) for the given panel thickness, or panels were installed tight without the 1/8-inch expansion gap, causing edge compression and buckling.
Corrective Action: If caught before finish flooring is laid, cut out the buckled seams using a circular saw set to the exact depth of the subfloor to create the missing 1/8-inch gap. Add structural blocking between joists to stiffen the framing and re-fasten the panels using structural screws driven directly into the joists, not just the existing nails.
Failure 2: Solid Hardwood Cupping
Symptom: The edges of solid hardwood boards are higher than the center, creating a washboard effect.
Root Cause: A moisture differential where the bottom of the board is wetter than the top. This is often caused by a damp crawlspace, a plumbing leak, or installing over a concrete slab without a proper Class I vapor retarder.
Corrective Action: Do not sand the floor flat immediately. Sanding cupped wood will result in 'crowns' once the wood dries and shrinks back to its normal state. Identify and eliminate the moisture source, run commercial dehumidifiers until the MC stabilizes across the board's thickness, and only then assess if sanding is required. Refer to the Architectural Woodwork Institute (AWI) standards for acceptable tolerances in millwork and flooring remediation.
Failure 3: MDF Trim Joint Separation
Symptom: Coping or miter joints on MDF baseboards and crown molding open up during seasonal humidity drops, ruining the paint finish.
Root Cause: MDF expands and contracts primarily in its thickness, but standard PVA glue can starve the porous MDF end-grain, leading to a weak mechanical bond.
Corrective Action: Size the MDF end-grain with a 50/50 mix of PVA glue and water, let it tack up for 3 minutes, then apply full-strength PVA glue and clamp. For crown molding where clamping is impossible, use a fast-setting cyanoacrylate (CA) glue alongside 23-gauge pins to hold the joint rigid while the primary wood glue cures.
Written by
James ThorntonJames Thornton is a construction industry veteran with 25 years of hands-on experience in wood framing, lumber grading, and residential building codes. He started as a framing carpenter in rural Oregon, earned his ICC Residential Building Inspector certification, and eventually became a senior plan reviewer for the City of Portland Bureau of Development Services. James holds a B.S. in Wood Science & Technology from Oregon State University and is a certified lumber grader through the West Coast Lumber Inspection Bureau (WCLIB). He has inspected over 3,000 residential construction sites and authored the city's internal guide on advanced framing techniques (2x6 at 24" O.C.). James lives in Bend, OR, where he builds custom timber-frame cabins and competes in lumberjack sports.
More from James Thornton
View all
Insulation
Best Home Insulation Materials: Complete 2026 Guide
Compare top home insulation materials for 2026. Find R-values, installed costs per square foot, and best uses for fiberglass, spray foam, and mineral wool.
Aug 4, 2026

Sustainable Building
Certify Your Green Building Material for LEED and WELL
Step-by-step guide to certifying a green building material for LEED v5 and WELL v2. Master EPDs, HPDs, and VOC limits for 2026 project specifications.
Aug 4, 2026

Stone & Masonry
Veneer Stacked Stone Panels: Interior Design & Style Showcase
Discover how veneer stacked stone panels transform interiors. Explore modern design profiles, material pairings, and technical installation specs.
Aug 4, 2026