Plywood 1 1/2 Maintenance: Cleaning and Sealing Guide
Expert playbook for maintaining plywood 1 1/2 surfaces. Learn specific cleaning protocols, edge-sealing techniques, and moisture prevention strategies.
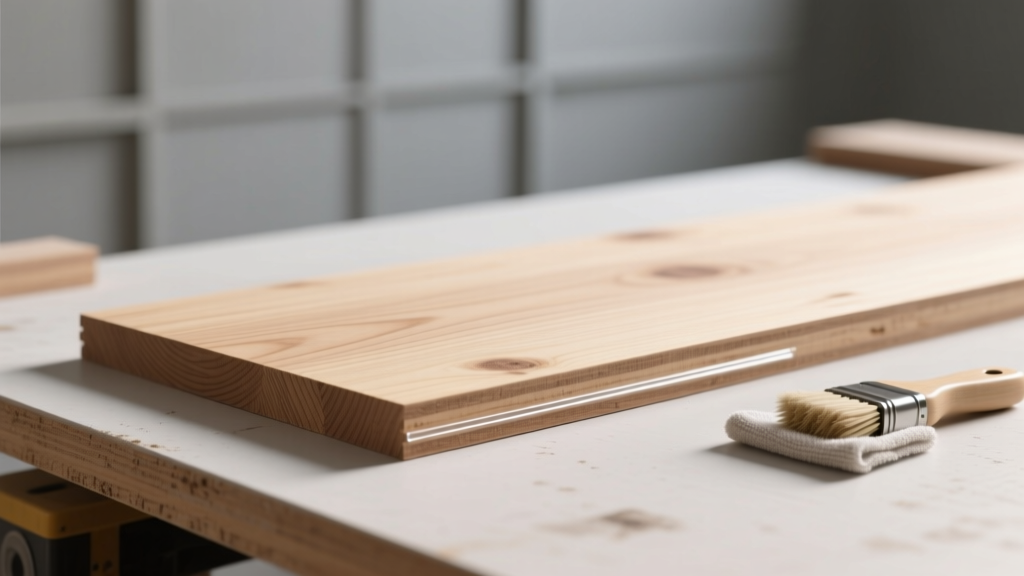
The Unique Anatomy of 1-1/2 Inch Plywood
Sourcing true 1-1/2 inch thick plywood (nominal 1.5', actual thickness typically 1.4375' to 1.5') is a specialized endeavor. Unlike standard 3/4' stock found in big-box stores, 1-1/2' plywood is usually custom-pressed for marine transoms, heavy-duty industrial subfloors, or specialized structural beams. It consists of 23 to 45 individual veneer plies, or it is site-laminated from two 3/4' sheets using structural adhesives.
This extreme thickness introduces unique maintenance challenges. The primary vulnerability is not the face veneer, but the massive edge-grain exposure. A 1-1/2' edge exposes dozens of end-grain layers, creating a highly efficient capillary network that wicks moisture deep into the core. According to the USDA Forest Products Laboratory, end-grain moisture absorption can occur up to 15 times faster than face-grain absorption, making edge encapsulation the single most critical maintenance task for this material.
Environment-Specific Cleaning Playbooks
Maintenance begins with proper cleaning. The chemical composition of your cleaning agents must match the environment where the 1-1/2' plywood is installed. Using the wrong solvent can break down the phenolic or urea-formaldehyde resins binding the plies.
Workshop and Industrial Workbenches
In heavy-duty workshop environments, 1-1/2' plywood serves as an impact-resistant assembly table. It frequently encounters mineral spirits, wood glues, and metallic dust.
- Daily Debris Removal: Use a stiff bristle brush or a shop vacuum with a brush attachment. Avoid compressed air, which drives fine particulate matter into the micro-fissures of the edge grain.
- Solvent and Adhesive Spills: Wipe immediately with a rag dampened in naphtha or mineral spirits. Never use acetone or lacquer thinner on unsealed edges; these aggressive solvents can penetrate the ply layers and degrade interior urea-formaldehyde glues.
- Deep Degreasing: For embedded oils, apply a citrus-based d-Limonene cleaner. Let it dwell for 3 minutes, then scrub with a nylon-bristle pad. Rinse with a barely damp cloth and dry immediately with forced air.
Marine and Exterior Structural Applications
When used for boat transoms, dock scaffolding, or exterior architectural features, 1-1/2' marine-grade plywood (often Okoume or Douglas Fir) faces UV degradation, salt intrusion, and biological growth.
- Mildew and Algae Removal: Never use chlorine bleach. Chlorine breaks down lignin (the natural polymer holding wood fibers together) and corrodes stainless steel fasteners. Instead, use a powdered oxygen bleach (sodium percarbonate) mixed at a ratio of 2 tablespoons per quart of warm water. Apply, let sit for 10 minutes, and scrub gently.
- Salt Extraction: Salt is hygroscopic and will pull moisture into the wood even in dry weather. Flush exterior surfaces with fresh water monthly. For crystallized salt in edge checks, use a 50/50 white vinegar and distilled water solution to dissolve the deposits before rinsing.
Step-by-Step Edge Sealing and Refinishing Protocol
The APA - The Engineered Wood Association emphasizes that engineered wood products require comprehensive moisture barriers to maintain structural integrity. For 1-1/2' plywood, standard polyurethane is insufficient for the edges due to its brittle nature and inability to penetrate deeply. Follow this encapsulation protocol:
- Moisture Testing: Use a pin-type moisture meter with deep-penetration probes. Drive the pins into the edge grain at a 45-degree angle. The moisture content (MC) must be below 12% before applying any sealer. If MC is higher, use a dehumidifier or air circulation for 72 hours.
- Edge Preparation: Sand the exposed edges starting with 80-grit aluminum oxide to level the uneven veneer plies, progressing to 120-grit. Do not sand past 120-grit on the edges; the microscopic scratches left by 120-grit provide necessary mechanical tooth for the epoxy.
- Epoxy Encapsulation: Apply a two-part Clear Penetrating Epoxy Sealer (CPES). Mix strictly according to the manufacturer's ratio (typically 1:1 by volume). Apply the first coat to the edges using a foam brush, allowing it to wick into the ply layers. Wait 4 hours, then apply a second coat. The edge will absorb 2 to 3 times more epoxy than the face.
- Face Veneer Topcoat: Once the edges are fully encapsulated and cured (usually 24-48 hours), sand the face veneers to 220-grit. Apply a high-build marine spar varnish or a two-part linear polyurethane (LPU) to the faces for UV and abrasion resistance.
Troubleshooting Common 1-1/2' Plywood Failures
Even with rigorous maintenance, heavy-duty plywood can develop specific failure modes. Use this diagnostic matrix to identify and correct issues before they compromise the structural integrity of the panel.
| Symptom | Root Cause | Corrective Action |
|---|---|---|
| Edge Checking (small vertical splits on the edge) | Rapid moisture cycling causing outer veneers to shrink faster than the core. | Route a 1/8' V-groove into the split, fill with thickened marine epoxy, and re-seal the entire edge. |
| Face Veneer Blistering | Trapped moisture vaporizing under thermal load; common in site-laminated 1-1/2' sheets. | Slice the blister, inject thin epoxy using a syringe, clamp flat with a caul board until cured. |
| Chalking or White Haze on Surface | UV degradation of the topcoat, or moisture trapped beneath a non-breathable film finish. | Sand off the degraded topcoat. Switch to a penetrating oil or vapor-permeable marine sealer. |
| Fastener Pull-Through | Edge fasteners placed too close to the end-grain, causing the ply layers to shear. | Move fasteners minimum 1.5' from the edge. Use epoxy-filled pilot holes for edge-driven screws. |
Routine Maintenance Schedule Matrix
Consistency is the cornerstone of wood preservation. The following schedule dictates the required maintenance intervals based on the installation environment. Adhering to this matrix ensures the 1-1/2' plywood retains its load-bearing capacity and dimensional stability over decades of use.
| Environment | Weekly Tasks | Bi-Annual Tasks | Annual / 3-Year Tasks |
|---|---|---|---|
| Interior Workshop | Vacuum dust; wipe solvent spills. | Apply paste wax or Boiled Linseed Oil to the face veneer. | Check edge banding adhesion; re-glue with CA glue if lifting. |
| Exterior Marine | Freshwater rinse; inspect for impact damage. | Oxygen bleach wash; inspect epoxy edge seals for micro-cracks. | Light scuff-sand and apply fresh coat of UV-stabilized spar varnish. |
| Heavy-Duty Subfloor | Sweep debris; check for standing water. | Moisture meter testing at panel seams and edge joints. | Re-torque structural fasteners; inject construction adhesive into squeaky seams. |
Proper maintenance of 1-1/2' plywood requires shifting your focus from the broad face veneers to the highly vulnerable edge grain. By utilizing penetrating epoxies, avoiding harsh chlorine-based cleaners, and adhering to a strict moisture-monitoring schedule, you can preserve the structural rigidity and aesthetic quality of this premium engineered material for the lifespan of the building or vessel.