Plywood Subfloor Installation: Step-by-Step Joist Guide
Master plywood subfloor installation with our step-by-step joist guide. Learn panel spacing, fastener schedules, and glue techniques for squeak-free floors.
Material Selection: CDX vs. Engineered T&G Panels
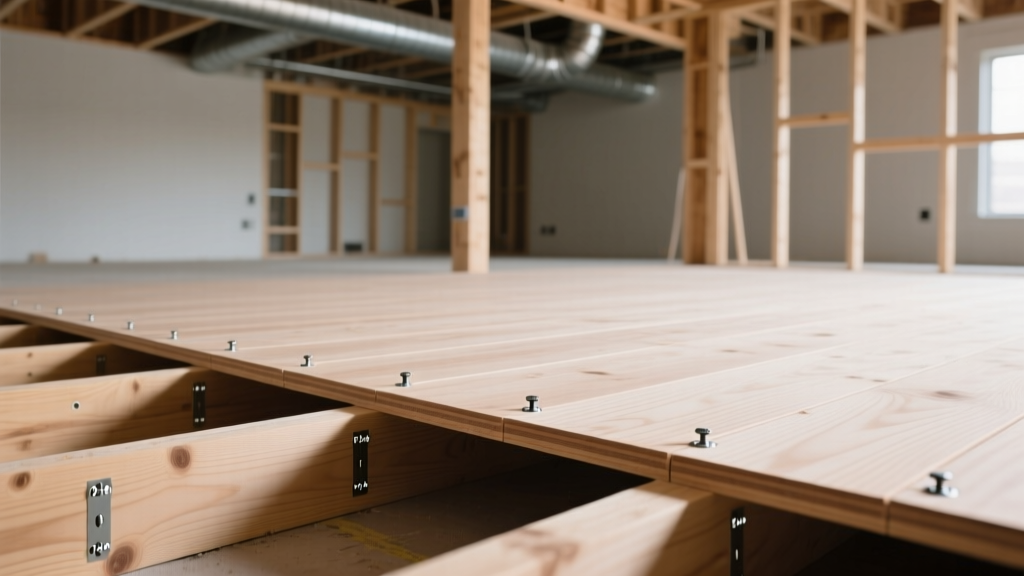
Choosing the right panel is the first critical decision in any plywood subfloor installation. While traditional CDX (C-grade face, D-grade back, exterior glue) plywood has been the industry standard for decades, modern engineered wood panels offer superior moisture resistance and dimensional stability. For 2026 construction standards, 3/4-inch tongue-and-groove (T&G) panels are the baseline for floor joists spaced 16 inches on center (OC).
| Material Type | Standard Thickness (16" OC) | Avg. Cost per 4x8 Sheet (2026) | Moisture Tolerance | Best Application |
|---|---|---|---|---|
| CDX Plywood | 3/4" (23/32") | $55 - $70 | Moderate (Exterior Glue) | Budget builds, dry climates |
| OSB (Oriented Strand Board) | 3/4" (23/32") | $45 - $60 | Low (Swells at edges) | Dry-in ready immediately |
| Advantech T&G (Engineered) | 3/4" (23/32") | $75 - $95 | High (Resin-saturated) | High-end custom, wet climates |
According to The Engineered Wood Association (APA), T&G edges eliminate the need for edge blocking on the long seams, transferring loads directly to adjacent panels and significantly reducing floor deflection. If your budget allows, upgrading to an engineered subfloor like Advantech provides a 500-day no-sand warranty against moisture swelling, a metric detailed in their technical documentation.
Pre-Installation: Joist Prep and Moisture Checks
Never install a plywood subfloor over damp or crowned joists. The maximum allowable moisture content for wood framing before subfloor installation is 19%. Use a pin-type moisture meter to verify. If joists are crowned (bowed upward), install the subfloor panels perpendicular to the joists, starting at the highest point of the crown and working outward to flatten the framing.
Do not install subflooring if the building envelope is not sufficiently dried in, unless using specialized moisture-resistant panels. Trapped construction moisture between the subfloor and the eventual finish flooring (like hardwood or LVP) is the leading cause of catastrophic cupping and mold growth.
The 6-Step Plywood Subfloor Installation Procedure
Step 1: Layout and Staggering
Panels must be installed with their long dimension perpendicular to the floor joists. Stagger the end joints (the short 4-foot edges) by at least 2 feet in a brick-lay pattern. Never allow four panel corners to meet at a single joist intersection; this creates a structural weak point and guarantees future squeaks.
Step 2: Adhesive Application
Apply a continuous 3/8-inch bead of premium polyurethane subfloor adhesive (e.g., Loctite PL Premium or OSI Subfloor) along the top edge of every joist. Do not apply more adhesive than you can cover with a panel within 15 minutes. Polyurethane adhesives skin over quickly; if the adhesive skins before the panel is laid, scrape it off and reapply.
Step 3: Panel Placement and T&G Engagement
Set the first panel with the grooved edge facing the exterior wall. Leave a strict 1/2-inch expansion gap between the panel edge and the wall framing. For the second panel, slide the tongue into the groove. Use a 2x4 sacrificial block against the grooved edge and strike it with a 10-pound sledgehammer to force the T&G joint tight. Never strike the panel edge directly with a hammer, as this will crush the veneers and ruin the joint.
Step 4: Fastening Sequence
Secure the panel immediately after setting. Use 8d (2.5-inch) hot-dipped galvanized ring-shank nails or #8 x 2.5-inch structural wood screws. Ring-shank nails offer superior withdrawal resistance compared to smooth-shank nails. If using screws, pre-drilling is not required for modern structural screws, but they take three times longer to install than pneumatic nails.
Step 5: Maintaining Expansion Gaps
The International Residential Code (IRC) and APA guidelines mandate a 1/8-inch gap at all square panel edges (ends and sides if not T&G) to allow for natural thermal and moisture expansion. Use a 10d nail as a spacer between panel ends to ensure this gap is maintained consistently. Failure to leave this gap will result in panel buckling and ridging visible through the finish floor.
Step 6: Edge Blocking and Blocking
If you are using square-edge panels (non-T&G) or if your local code requires it, install solid wood blocking (2x4 or 2x6) between joists under all unsupported panel edges. For T&G panels, edge blocking is generally not required on the long seams, but blocking is still required under the short end joints if they do not fall directly on a joist.
Fastener Schedule and Spacing Matrix
Adhering to the correct fastener schedule is non-negotiable for passing framing inspections and preventing floor bounce. The following matrix reflects standard APA and IRC requirements for 3/4-inch panels.
| Location on Panel | Nail Spacing (8d Ring-Shank) | Screw Spacing (#8 x 2.5") | Notes |
|---|---|---|---|
| Panel Edges (Joists) | 6 inches OC | 6 inches OC | Fasten within 3/8" of panel edge |
| Intermediate Joists | 12 inches OC | 12 inches OC | Drive flush, do not break the face veneer |
| Blocking (End Joints) | 6 inches OC | 6 inches OC | Required if ends don't land on joists |
If you are installing over existing older framing that is slightly out of plane, switch entirely to structural subfloor screws (like the Simpson Strong-Tie or GRK RSS series). While nails are faster, screws actively pull the plywood down tight to the joist, eliminating the micro-movements that cause friction and eventual squeaking.
Troubleshooting Common Failure Modes
- Panel Buckling / Ridging: Caused by missing the 1/8-inch expansion gaps at the ends. Fix: Use a circular saw with a guide to cut a 1/8-inch kerf along the buckled seams, then fill with flexible caulk if necessary before underlayment.
- Squeaking Floors: Caused by smooth-shank nails backing out or missing the joist center. Fix: From below, drive 1.5-inch wood screws through the joist into the subfloor, stopping exactly 1/8-inch below the finish floor surface.
- Soft Spots / Delamination: Caused by prolonged water exposure during the framing phase. CDX plywood delaminates easily if left exposed to rain for more than a few days. Fix: Cut out the delaminated section back to the center of the nearest joists on all sides and sister in a new patch panel using construction adhesive and blocking.
Frequently Asked Questions
Can I install a plywood subfloor directly over a concrete slab?
No. Plywood subflooring is designed for joist-framed structures. For concrete slabs, you must use a sleeper system (pressure-treated 2x4s anchored to the concrete with a vapor barrier) or a floating subfloor system like Dricore, which features integrated dimpled plastic moisture barriers. Direct contact with concrete will wick moisture and rot standard plywood within months.
Do I need a second layer of underlayment over the plywood subfloor?
It depends on the finish flooring. For carpet or ceramic tile (which requires cement backer board), the single layer of 3/4-inch T&G plywood is sufficient. However, for hardwood, laminate, or luxury vinyl plank (LVP), you should install a 1/4-inch or 1/2-inch sanded plywood or lauan underlayment over the subfloor. This secondary layer bridges the subfloor seams and provides a perfectly smooth, fastener-free surface for the finish floor.
What is the maximum joist span for 3/4-inch plywood?
Standard 3/4-inch (23/32") T&G plywood is rated for a maximum joist spacing of 19.2 inches OC. If your floor trusses or joists are spaced at 24 inches OC, you must upgrade to 1-inch or 1-1/8-inch thick panels to meet deflection limits (L/360) and prevent a bouncy floor.