Choosing the Best Type of Wood Joints for Structural Framing
Master structural timber framing by selecting the right type of wood joints. Learn installation best practices, load capacities, and joinery techniques.

Load-Bearing Mechanics: Matching the Type of Wood Joints to Structural Forces
The structural integrity of a timber frame relies entirely on the precise transfer of loads through its joinery. Selecting the correct type of wood joints requires analyzing the specific mechanical forces—compression, tension, shear, and torsion—acting on each connection point. Unlike light-frame construction that depends on metal fasteners and sheathing for lateral stability, heavy timber framing utilizes interlocking wood geometry to resist racking and gravity loads.
According to the USDA Forest Products Laboratory Wood Handbook, wood exhibits significantly higher strength parallel to the grain than perpendicular to it. Therefore, structural joints must be designed to bear loads on the longitudinal fibers. A common critical error in amateur timber framing is relying on friction or end-grain bearing in tension zones, which inevitably leads to joint failure under dynamic or seismic loading.
In regions governed by strict seismic codes, friction-only joints (like basic lap joints) are prohibited for primary structural connections. You must incorporate mechanical interlocks, such as dovetails or pegged mortise and tenons, to resist uplift and lateral racking forces as outlined by the American Wood Council (AWC) National Design Specification.
Core Joinery Profiles and Installation Best Practices
Mortise and Tenon (The Structural Workhorse)
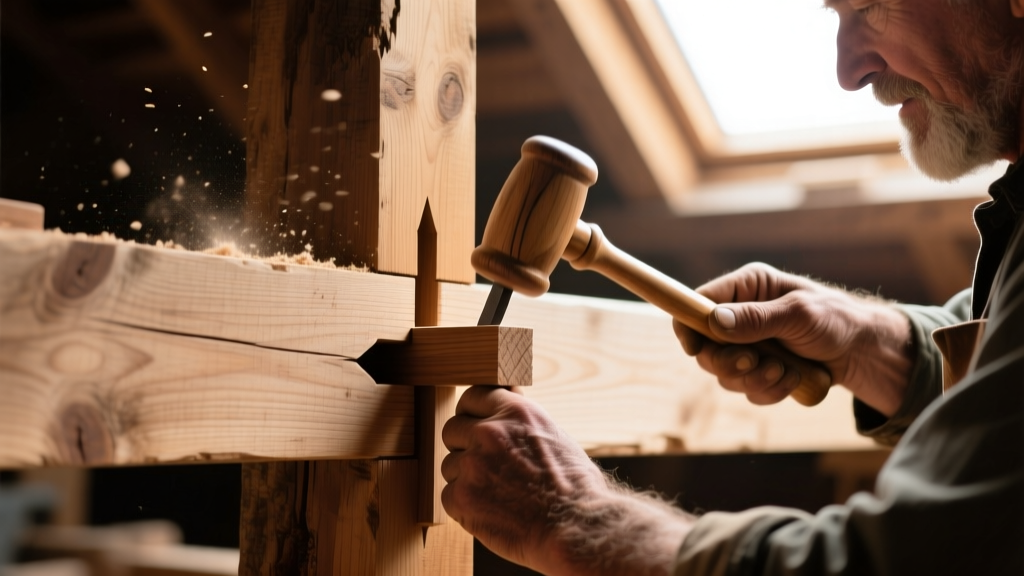
The mortise and tenon is the foundational joint for post-and-beam construction, primarily resisting compression and shear. For heavy timbers (8x8 or larger), a standard through-tenon or blind tenon must be reinforced. Best practice dictates using a haunched tenon—where a small 1/4-inch deep extension fills the outer edge of the mortise. This haunch prevents the timber from twisting (torsion) and keeps the shoulder line perfectly flush.
Installation Tolerance: The mortise should be cut exactly 1/16-inch deeper than the tenon is long. This relief gap prevents the tenon from bottoming out, which would otherwise leave a visible gap at the shoulder and compromise the load-bearing transfer.
Dovetail and Bridle Joints (Resisting Tension and Racking)
When horizontal beams must resist pulling away from a post (tension), a standard mortise and tenon is insufficient without massive steel reinforcements. Here, the structural dovetail excels. In timber framing, the angle of the dovetail is critical. Hardwoods require a 1:6 ratio (approx. 9.5 degrees), while softwoods require a 1:4 ratio (approx. 14 degrees) to prevent the short-grain at the edges from shearing off under load.
Scarf Joints (Splicing and Length Extension)
When timber lengths exceed standard milling capacities, scarf joints are used to splice two pieces together. For compression members (like posts), a simple sloped cut at a 1:4 ratio, secured with wooden pegs or steel drift pins, is adequate. However, for tension members (like floor girders), a stepped scarf joint with a keyed wedge is mandatory. The wedge is driven into the center of the splice, forcing the interlocking steps tightly together and creating a continuous load path.
Comparative Matrix: Joint Selection by Application
| Joint Type | Primary Force Resisted | Recommended Fastener/Peg | Standard Tolerance |
|---|---|---|---|
| Pegged Mortise & Tenon | Compression, Shear | 1" Riven White Oak Peg | +/- 1/32" on cheek width |
| Structural Dovetail | Tension, Uplift | Integral Wood Geometry | 1:4 angle for softwoods |
| Stepped Scarf Joint | Tension, Bending | Hardwood Wedge + Steel Pins | 1:4 slope ratio minimum |
| Bridle Joint (T-Miter) | Shear, Corner Alignment | Glue + Concealed Steel Pins | Exact 90-degree shoulder |
Modern Fastening Integration: Adhesives and Hidden Steel
While traditionalists rely solely on wood-to-wood contact and wooden pegs, modern structural codes often require supplementary reinforcement. The Timber Framers Guild engineering guidelines frequently approve the integration of concealed steel connectors to meet modern uplift requirements without sacrificing the aesthetic of exposed joinery.
For concealed reinforcement, internal steel plates (such as Simpson Strong-Tie concealed knife plates) are slotted into the center of the timber and bolted through the joint. Additionally, structural epoxies like West System G/flex 650 are increasingly used in scarf joints and end-grain splices. Unlike standard PVA wood glues (which require tight, perfectly mated clamping pressure that is impossible on a raised frame), G/flex fills gaps up to 1/16-inch and cures with high shear strength, accommodating the natural micro-movements of heavy timber.
Step-by-Step Installation Protocol: The Drawboring Technique
To achieve a joint that pulls itself tight and remains gap-free for centuries, master framers use the "drawboring" technique. This involves intentionally misaligning the peg holes to create mechanical leverage.
- Cut and Fit: Cut the tenon and mortise to exact dimensions. Ensure the tenon shoulder is perfectly square using a 12-inch combination square.
- Initial Drilling: Assemble the joint dry. Using a 1-inch or 1-1/4-inch ship auger bit, drill completely through the mortise cheeks and the tenon.
- The Offset: Disassemble the joint. Using a tapered reamer or a smaller drill bit, enlarge the hole in the tenon only, offsetting it by 3/32-inch to 1/8-inch toward the shoulder of the tenon.
- Peg Preparation: Turn or split tapered pegs from straight-grain white oak or black locust. The pegs must be kiln-dried to 8-10% moisture content (drier than the surrounding timber) so they swell and lock upon insertion.
- Assembly and Driving: Reassemble the joint. As you drive the tapered peg through the offset holes with a wooden mallet, the mechanical leverage will forcefully pull the tenon shoulder tight against the mortise cheek.
- Trimming: Cut the protruding peg ends flush with the timber surface using a flush-cut pull saw. Do not sand the end grain, as this will burnish and seal the peg, preventing it from breathing with the timber.
Moisture Content and Seasoning Tolerances
Wood is hygroscopic, and heavy timbers undergo significant dimensional changes as they equilibrate to the interior environment. According to the USDA Forest Products Laboratory, wood shrinks roughly twice as much tangentially (parallel to the growth rings) as it does radially (perpendicular to the rings).
If you are framing with "green" timber (Moisture Content > 30%), an 8x8 Douglas Fir post can shrink up to 1/4-inch in width as it dries to an interior equilibrium of 12%. If your joinery does not account for this, the mortise cheeks will pull away from the tenon. Best practice for green timber is to leave a 1/16-inch relief gap at the top and bottom of the tenon cheek, allowing the timber to shrink vertically across the grain without splitting the mortise.
Troubleshooting Common Joint Failures
Symptom: Gaping at the Tenon Shoulder After Pegging
Cause: The tenon is bottoming out in the mortise before the shoulder seats, or the drawbore offset was too aggressive (> 1/8"), causing the peg to bend rather than pull the joint.
Fix: Disassemble and relieve the bottom of the mortise by 1/16" using a router or chisel. Reduce the drawbore offset to exactly 3/32" for dense hardwoods.
Symptom: Peg Shear or Splitting During Installation
Cause: Using sawn (milled) pegs instead of riven (split) pegs, or using a softwood species. Sawn pegs have short-grain runout that snaps under shear stress.
Fix: Source riven white oak or black locust pegs. Riving follows the natural grain of the wood, providing up to 40% higher shear strength than milled dowels.
Mastering the installation of the correct type of wood joints bridges the gap between architectural design and structural longevity. By adhering to strict tolerances, understanding grain mechanics, and utilizing time-tested techniques like drawboring, framers ensure that the skeleton of the building remains rigid, resilient, and visually flawless for generations.
Written by
Priya KapoorPriya Kapoor is a real estate market analyst and construction economics researcher with expertise in housing affordability, development feasibility, and infrastructure investment. She holds a Master of Regional Planning from Cornell University and previously worked as a senior analyst at CBRE's Investment Properties group, where she modeled returns for $4B in mixed-use development pipelines. Priya now runs an independent research practice advising developers, municipalities, and REITs on construction cost forecasting and market timing. She publishes the quarterly "BuildMat Market Pulse" report tracking material price indices across 12 commodity categories. Based in Austin, TX, Priya serves on the board of Habitat for Humanity Austin and is a marathon runner.
More from Priya Kapoor
View all
Construction Cost
Cost to Build a 1600 Sq Ft Home in 2026: Full Breakdown
Accurate 2026 cost to build a 1600 sq ft home—material, labor, and regional pricing breakdowns included. Plan your budget with real-time estimates.
Aug 11, 2026

Wood & Lumber
Name the Types of Wood for Pressure Treatment and Preservation
Learn how to name the types of wood best suited for pressure treatment. Compare species treatability, chemical retention levels, and 2026 preservation costs.
Aug 4, 2026

Stone & Masonry
Stone Veneer Suppliers Lindenhurst: 2026 Cost Analysis
Analyze 2026 stone veneer costs in Lindenhurst, NY. Compare local supplier pricing, delivery fees, and Suffolk County installation labor rates.
Aug 4, 2026