How to Use Types of Wood Images to Verify Lumber Grades and Quality
Learn how to analyze types of wood images to verify lumber grades, spot visual defects, and ensure structural quality before purchasing building materials.

Visual Grading vs. Structural Stamping in Digital Sourcing
Procuring lumber for high-end millwork, architectural paneling, and structural framing increasingly relies on digital catalogs and remote supplier verification. While structural softwoods carry ink stamps denoting stress grades (e.g., #2 SPF, Douglas Fir-Larch Select Structural), appearance-grade hardwoods and finish softwoods depend entirely on visual inspection. When sourcing remotely, buyers must critically analyze the types of wood images provided by suppliers to verify National Hardwood Lumber Association (NHLA) grades or Western Wood Products Association (WWPA) appearance classifications.
Relying on generic stock photography is a primary cause of material rejection upon delivery. A true grade verification requires understanding how lighting, angle, and resolution in types of wood images can either reveal or conceal critical defects like wane, shake, pith, and torn grain. This guide provides a technical framework for decoding supplier imagery to ensure the lumber you approve matches the grade you pay for.
Decoding Types of Wood Images for NHLA Hardwood Standards
The NHLA grading system is based on the size and number of clear cuttings that can be obtained from a board, rather than the total number of defects. When evaluating types of wood images for hardwoods, you are essentially performing a virtual cutting yield analysis.
Never accept generic types of wood images labeled as 'FAS White Oak' or 'Select Maple' as proof of batch quality. Stock images typically feature heavily cropped, perfectly lit board faces that exclude the edges where wane and sapwood are most prevalent. Always require batch-specific photography for orders exceeding 500 board feet.
Visual Markers by Hardwood Grade
| NHLA Grade | Minimum Board Size | Clear Cutting Yield | What to Look for in Images |
|---|---|---|---|
| FAS (Firsts & Seconds) | 6" wide x 8' long | 83.3% to 100% | Long, uninterrupted grain. Knots must be small and widely spaced. Edges must be parallel with minimal wane. |
| Select | 4" wide x 6' long | 83.3% to 100% | One face must meet FAS standards; the reverse face may show #1 Common characteristics (smaller clear sections). |
| #1 Common | 3" wide x 4' long | 66.6% to 83.3% | Visible knot clusters. Images should show clear sections large enough for standard cabinet door and drawer fronts. |
Spotting Concealed Defects in Softwood Appearance Grades
For finish-grade softwoods (such as WWPA Finish and Select or SPIB grades), the visual rules shift from cutting yield to surface perfection. Suppliers often use high-flash photography that washes out subtle surface defects. When reviewing types of wood images for softwoods, actively look for the following anomalies:
- Skip: Areas where the planer missed the wood surface. In flat-lit images, skip looks like a slight color variation. Request raking-light images to reveal the raised texture.
- Pitch Pockets: Lens-shaped openings filled with resin. High-contrast images will show these as dark, glossy streaks. If the supplier's images are heavily color-corrected, pitch pockets may be masked as standard grain variation.
- Shake: Separation along the annual growth rings. This is nearly invisible in face-on photos. You must inspect end-grain images to identify concentric ring separation.
- Torn Grain: Fibers pulled out during planing. Often occurs around knots. Zoom in on the perimeter of knots in the provided images to check for surface pitting.
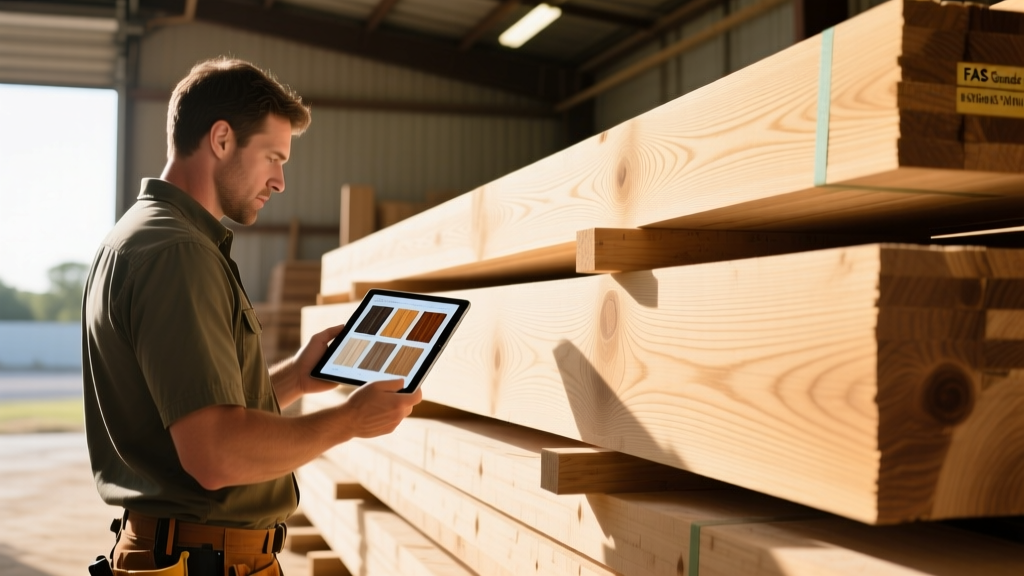
The 4-Angle Photo Request Protocol
If a supplier provides only a single, top-down image of a lumber bundle or a single board face, you lack the data required to verify the grade. According to guidelines supported by the APA - The Engineered Wood Association and general industry best practices for visual inspection, mandate the following 4-angle photo protocol for remote batch approvals.
1. The Face Shot (Cutting Yield Assessment)
Require a top-down image taken at a 90-degree angle to the board face, with a physical tape measure laid across the width. This confirms the nominal-to-actual width and allows you to map out clear cutting units for NHLA grading. The image must include the entire length of at least three sample boards from the top, middle, and bottom of the bundle.
2. The Edge Shot (Wane and Straightness)
A profile view of the board edge is non-negotiable. This angle reveals wane (bark or missing wood on the edge) and crook (longitudinal bending). A board may have a perfect FAS face, but if the edge shot reveals a 1-inch taper or excessive wane, the usable width drops, potentially downgrading the board to #1 Common.
3. The End-Grain Shot (Moisture and Checking)
End-grain photography is critical for verifying kiln-drying quality. Look for end-checks (splits radiating from the pith) and honeycomb (internal checking, which appears as dark, shadowed lines within the end grain). Furthermore, the end grain reveals the pith location. Boards containing the pith (the center of the log) are highly prone to warping and are generally excluded from top-tier appearance grades.
4. The Raking Light Shot (Surface Planing Defects)
Request an image taken with a light source positioned at a low, 15-degree angle to the board surface. This raking light casts micro-shadows that instantly reveal skip, chipped grain, and machine tear-out that flat lighting hides. This is the most crucial image for verifying 'Superior' or 'A-Grade' finish softwoods.
Species Verification Through Visual Cues
Beyond grading, analyzing types of wood images is essential for preventing species substitution—a common issue in global supply chains. Two specific substitutions account for the majority of remote sourcing disputes:
White Oak vs. Red Oak
Red oak is highly porous and lacks tyloses, making it unsuitable for exterior or wet applications. In high-resolution images, examine the end grain. White oak end grain will show plugged pores (tyloses), while red oak pores will appear as open, dark holes. Additionally, look for 'ray fleck' on the quarter-sawn face images; white oak exhibits significantly longer and more pronounced medullary rays than red oak.
Genuine Mahogany vs. Philippine Mahogany (Luan)
Genuine Honduran mahogany (Swietenia macrophylla) features a distinct, interlocked grain with a high natural luster. Philippine mahogany (Shorea species) is a lightweight lauan that lacks structural density. In face images, genuine mahogany will show a uniform, ribbon-stripe pattern on quarter-sawn boards, whereas lauan often exhibits coarse, uneven texture and prominent resin canals visible as small white specks in the grain.
Integrating Visual Data with Structural Certifications
While visual analysis of types of wood images is powerful for appearance grades, it cannot replace structural engineering data. For load-bearing timber, glulam, and cross-laminated timber (CLT), visual grading is superseded by mechanical testing and mill stamping. The American Wood Council (AWC) emphasizes that structural design values must be derived from recognized grading agencies, not visual estimates.
However, even in structural timber, visual image analysis plays a role in verifying the placement of knots relative to the neutral axis of the beam, and ensuring that edge knots do not exceed the maximum allowable size for the specified stress grade. Always cross-reference the visual characteristics in the supplier's images with the physical grade stamp and the accompanying mill certificate upon delivery.
By enforcing strict photographic protocols and understanding the specific visual markers of NHLA and WWPA grades, procurement teams can eliminate the blind spots inherent in remote lumber sourcing. Treat every image not as a marketing asset, but as a technical document subject to rigorous grade verification.
Written by
Marcus ChenMarcus Chen is a licensed structural engineer (PE) and building materials analyst with over 12 years of experience across residential, commercial, and industrial construction. He holds a Master of Science in Civil Engineering from UC Berkeley and spent six years at Thornton Tomasetti before transitioning to independent consulting and technical writing. Marcus specializes in material selection for seismic-prone regions, concrete reinforcement strategies, and lifecycle cost analysis. His work has been cited by the American Concrete Institute (ACI) and the Structural Engineers Association of California (SEAOC). When he is not on a job site or at his desk, you will find him hiking the Sierra Nevada or restoring a 1920s craftsman bungalow in Oakland, CA.
More from Marcus Chen
View all
Construction Cost
How Much Did the Eiffel Tower Cost to Build?
How much did the Eiffel Tower cost to build in 1889? We adjust for inflation and compare its budget to modern skyscraper construction.
Aug 4, 2026

Fire Resistance
What Is a Fire Resistant Material? Testing & Certification Guide
Discover what is a fire resistant material through ASTM and UL testing. Learn how fire ratings, certifications, and assemblies work in construction.
Aug 4, 2026

Construction Cost
How Much Did the Burj Khalifa Cost to Build?
How much did the Burj Khalifa cost to build? We break down the $1.5B project and extract 5 money-saving strategies for your next build.
Jul 30, 2026