Types of Wood Chisels: Selection and Usage Best Practices
Master the types of wood chisels for joinery. Learn metallurgy, bevel geometry, and installation best practices for precise woodworking cuts.

Matching Metallurgy to the Task
Selecting the correct tool from the various types of wood chisels is not merely about blade width; it is fundamentally about metallurgy and geometry. The hardness and wear resistance of the steel dictate how the tool behaves when striking end-grain white oak versus paring soft pine. Modern chisel manufacturing relies on three primary steel alloys, each requiring specific installation and maintenance best practices.
- O1 (Oil-Hardening) Tool Steel: Found in budget and mid-tier chisels (e.g., Narex Richter, ~$35). O1 steel is easy to sharpen on standard waterstones and takes a remarkably keen edge, making it ideal for paring and softwood joinery. However, it dulls quickly when subjected to heavy mallet strikes in abrasive hardwoods.
- A2 (Air-Hardening) Tool Steel: The industry standard for premium Western chisels (e.g., Lie-Nielsen, ~$85). A2 offers superior edge retention due to its chromium content, making it the go-to for general bench work and mortising. The trade-off is that A2 is more stubborn to sharpen and requires high-quality diamond plates or ceramic waterstones to abrade effectively.
- PM-V11 (Powdered Metallurgy): Pioneered by Veritas (~$79), PM-V11 holds an edge up to twice as long as A2 and is significantly less brittle. It is the ultimate choice for production joinery, heavy mortising in dense tropical hardwoods, and installers who cannot afford frequent sharpening interruptions on the job site.
Categorizing the Types of Wood Chisels for Joinery
Understanding the structural differences between chisel categories prevents catastrophic tool failure and ensures clean, accurate joints. Below is a functional breakdown of the primary chisel types used in professional woodworking and timber framing.
| Chisel Type | Primary Application | Blade Geometry | Handle & Tang Style | Best Steel Match |
|---|---|---|---|---|
| Bench Chisel | General joinery, hinge mortises, dovetail waste removal | Beveled edges, 1/4' to 1' wide, medium thickness | Hornbeam or impact-resistant acetate; socket or tang | A2 or PM-V11 |
| Mortise (Sash) Chisel | Deep, narrow mortises for mortise-and-tenon joints | Thick, square edges, 1/4' to 3/8' wide, heavy bolster | Heavy turned ash or hornbeam; robust tang | A2 or O1 |
| Paring Chisel | Shaving thin layers, fitting joints, smoothing surfaces | Long, thin, flexible, beveled edges, up to 2' wide | Long, lightweight handle; tang only (never struck) | O1 or High-Carbon |
| Firmer Chisel | Heavy chopping, timber framing, deep waste removal | Square edges, thicker than bench, 1/2' to 1.5' wide | Heavy mallet-grade wood; reinforced socket | A2 or Chrome-Vanadium |
| Japanese Nomi | Precision paring, intricate timber joints, fine cabinetry | Laminated steel, hollow-ground back (ura), hoop on handle | White oak with steel hoop; tang driven into wood | White/Blue Paper Steel |
Bevel Angles and Micro-Bevels: The Geometry of Cutting
The factory grind on most Western bench chisels is a 25-degree primary bevel. While 25 degrees slices effortlessly through end-grain, it is too fragile for the lateral forces encountered when chopping mortises in hardwoods like hard maple or hickory.
Rather than regrinding the entire primary bevel to 30 or 35 degrees, hone a 2-degree micro-bevel at the very tip using an 8000-grit stone. For general bench work, hone a 30-degree micro-bevel on your 25-degree primary grind. For heavy mortising in abrasive woods, hone a 35-degree micro-bevel. This preserves the low-angle geometry for easy material removal while reinforcing the cutting edge against micro-chipping.
Japanese chisels operate on a different geometric principle. They feature a laminated blade with a hollow-ground back (the ura). This hollow reduces the surface area that must be kept perfectly flat during sharpening, allowing the extremely hard, brittle high-carbon steel edge (often hardened to 62-64 HRC) to be supported by a softer iron body that absorbs mallet shock.
Installation Best Practices: Striking, Paring, and Prying
Even the most expensive PM-V11 chisel will fail if used improperly. The following installation and usage protocols separate professional joiners from amateurs.
1. Mallet Selection and Striking Technique
Never use a metal hammer on a wooden chisel handle, and avoid overly hard mallets on socket chisels. For heavy mortising, use a round-faced urethane or brass mallet (16 oz to 24 oz). The urethane transfers kinetic energy efficiently without rebounding, reducing fatigue and preventing the mushrooming of Japanese steel hoops or the splitting of Western hornbeam handles. When chopping, let the weight of the mallet do the work; forcing the strike leads to deflected cuts and blown-out mortise walls.
2. The Two-Hand Paring Method
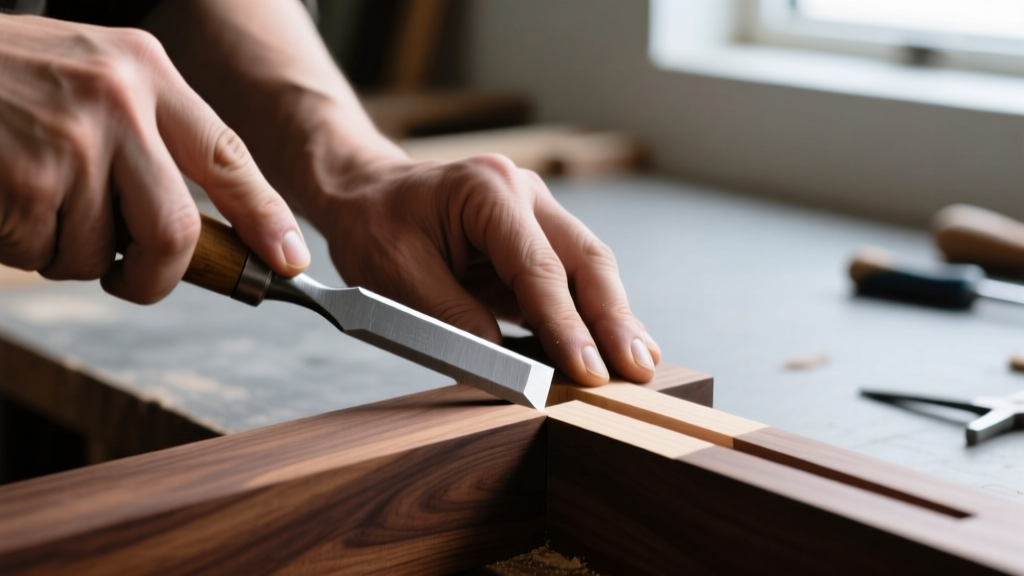
Paring is the act of shaving wood without mallet strikes to achieve a glass-smooth, perfectly dimensioned surface. Never strike a paring chisel. The thin blade will bend or snap. Instead, grip the handle with your dominant hand to push forward, while your non-dominant hand pinches the blade just behind the cutting edge to guide the angle and apply downward pressure. This creates a closed-loop feedback system that prevents the chisel from diving into the grain.
Using a bench chisel as a pry bar to pop out stubborn waste wood is the leading cause of snapped tips and bent tangs. Chisel steel is hardened to hold an edge, making it highly brittle under torsional stress. Always use a dedicated steel pry bar, a stiff putty knife, or a mortise chisel (which lacks beveled side edges and possesses a massive cross-section) to lever out waste.
Sharpening Protocols for Maximum Edge Retention
A dull chisel requires excessive force, leading to loss of control and severe tear-out. Maintaining a razor edge requires a systematic progression. According to master sharpening protocols outlined by experts at Lie-Nielsen Toolworks, flattening the back of the chisel is the non-negotiable first step.
- Flattening the Back: Use a DMT Extra Coarse diamond plate or a Shapton Glass 220-grit stone. Rub the back of the chisel in a figure-eight pattern until a uniform scratch pattern reaches the very cutting edge. You only need to flatten the first 1/2 inch of the blade.
- Primary Bevel Grinding: If the edge is chipped or the bevel angle needs resetting, use a slow-speed grinder with a friable aluminum oxide wheel (white or pink) to prevent burning the A2 or O1 steel. Alternatively, use a coarse diamond plate.
- Honing the Micro-Bevel: Progress through a 1000-grit waterstone to establish the cutting edge, followed immediately by an 8000-grit polishing stone. Apply a 2-degree micro-bevel on the 8000-grit stone using a honing guide or freehand. Five to ten strokes on the 8000-grit stone are sufficient.
- Stropping: Finish with a leather strop charged with 0.5-micron chromium oxide compound. This removes the microscopic wire edge (burr) left by the waterstones, resulting in an edge capable of shaving arm hair and leaving glass-smooth end-grain cuts.
Frequently Asked Questions
Can I use a mortise chisel for general bench work?
No. Mortise chisels have thick, square sides designed to withstand heavy lateral mallet strikes and leverage out deep waste. Their lack of beveled side edges makes them useless for cutting into tight corners, such as cleaning out dovetail sockets or routing shallow hinge mortises, where the beveled sides of a standard bench chisel are required to clear the adjacent wood.
Why do my chisel edges keep rolling over in hardwoods?
Edge rolling indicates that the micro-bevel angle is too low for the density of the wood. If you are working with Ipe, Cumaru, or White Oak, a standard 25-degree bevel will collapse. Hone a 35-degree micro-bevel to increase the steel mass directly behind the cutting edge, providing the necessary support to resist deformation. For more on matching tools to specific timber densities, refer to the comprehensive guides at Wood Magazine.
Are vintage chisels better than modern ones?
Not necessarily. While vintage chisels (like early Stanley Sweethearts or Berg chisels) feature excellent ergonomic profiles and easily sharpened O1 or W1 high-carbon steel, they often require hours of initial restoration to flatten warped backs and re-establish bevels. Modern premium chisels from makers like Veritas or Narex arrive with machine-lapped backs and advanced metallurgy (like PM-V11) that outlasts vintage steel in abrasive modern composite woods and dense exotics. For a broader look at hand tool evaluations, Popular Woodworking offers extensive comparative reviews.
Written by
Priya KapoorPriya Kapoor is a real estate market analyst and construction economics researcher with expertise in housing affordability, development feasibility, and infrastructure investment. She holds a Master of Regional Planning from Cornell University and previously worked as a senior analyst at CBRE's Investment Properties group, where she modeled returns for $4B in mixed-use development pipelines. Priya now runs an independent research practice advising developers, municipalities, and REITs on construction cost forecasting and market timing. She publishes the quarterly "BuildMat Market Pulse" report tracking material price indices across 12 commodity categories. Based in Austin, TX, Priya serves on the board of Habitat for Humanity Austin and is a marathon runner.
More from Priya Kapoor
View all
Construction Cost
Cost to Build a 1600 Sq Ft Home in 2026: Full Breakdown
Accurate 2026 cost to build a 1600 sq ft home—material, labor, and regional pricing breakdowns included. Plan your budget with real-time estimates.
Aug 11, 2026

Wood & Lumber
Name the Types of Wood for Pressure Treatment and Preservation
Learn how to name the types of wood best suited for pressure treatment. Compare species treatability, chemical retention levels, and 2026 preservation costs.
Aug 4, 2026

Stone & Masonry
Stone Veneer Suppliers Lindenhurst: 2026 Cost Analysis
Analyze 2026 stone veneer costs in Lindenhurst, NY. Compare local supplier pricing, delivery fees, and Suffolk County installation labor rates.
Aug 4, 2026