Concrete Countertops vs Granite: Stain, Crack, and Chip Repair
Compare concrete countertops vs granite for stain, crack, and chip repair. Expert troubleshooting, epoxy fixes, and resealing costs for both materials.

The Reality of Wear: Porosity, Density, and Damage Vectors
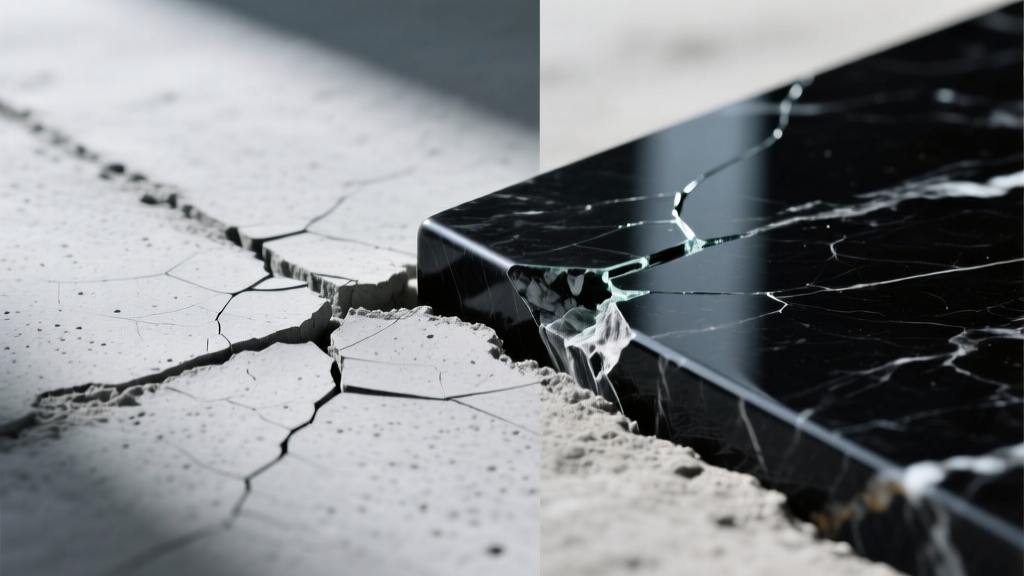
Homeowners typically evaluate concrete countertops vs granite based on aesthetics and initial installation costs. However, the true divergence between these materials emerges during years three through ten, when thermal shock, impact, and chemical exposure test their structural limits. Concrete is a cementitious composite prone to plastic shrinkage and topical sealer degradation. Granite is an igneous rock with extreme compressive strength but inherent micro-fissures and crystalline cleavage planes. Understanding the specific failure modes of each material is the first step in executing permanent, invisible repairs.
The Porosity & Staining Matrix: Chemical Extraction
Stains in natural stone and cementitious surfaces require fundamentally different extraction protocols. Granite stains are typically confined to the microscopic pores and natural fissures, while concrete stains penetrate the capillary network of the cement paste if the topical sealer has been compromised by UV degradation or alkaline hydrolysis.
| Damage Vector | Concrete Countertop Protocol | Granite Countertop Protocol |
|---|---|---|
| Organic (Wine, Coffee) | Strip topical sealer locally. Apply a hydrogen peroxide (12%) and talc poultice for 24 hours. Reseal with a penetrating lithium densifier followed by a topical acrylic. | Apply a commercial poultice (e.g., StoneTech Stain Remover) mixed with acetone. Cover with plastic wrap for 48 hours to slow evaporation and draw out the tannin. |
| Metallic (Rust, Iron) | Use a non-acidic rust converter. Avoid phosphoric acid, which reacts with calcium hydroxide in the concrete to form insoluble calcium phosphate, trapping the stain. | Apply a specialized iron-removing poultice containing oxalic acid. The acid chelates the iron ions without attacking the feldspar and quartz matrix of the granite. |
| Oil & Grease | Saturate the stain with a biodegradable citrus-based solvent. Blot, then apply a micro-crystalline wax to fill the evacuated pores. | Create a thick paste of baking soda and mineral spirits. Apply 1/4-inch thick, tape edges, and leave for 72 hours. The mineral spirits dissolve the lipid, and the baking soda absorbs it. |
Structural Integrity: Routing Cracks and Fissures
According to the Portland Cement Association, concrete cracking is often an inherent result of volume changes during the curing process, categorized as either plastic shrinkage or drying shrinkage. In granite, homeowners frequently confuse natural geological fissures with structural stress cracks.
Troubleshooting Concrete Shrinkage Cracks
Hairline cracks in concrete countertops (less than 1/16 inch wide) are rarely structural but compromise the sanitary surface. Do not attempt to fill these with standard cementitious grout; it lacks the tensile strength to bridge the gap and will inevitably debond.
- Route the Crack: Use a variable-speed rotary tool equipped with a 1/16-inch diamond V-groove bit. Enlarge the crack to a depth of 1/8 inch, creating a mechanical keyway.
- Evacuate Debris: Blow out the groove with compressed air, followed by an acetone wipe to remove microscopic dust and residual sealer.
- Inject Low-Viscosity Epoxy: Use a two-part, water-thin epoxy designed for concrete (such as PC-Concrete or a specific countertop formulation). Inject via a fine-gauge syringe to ensure deep capillary penetration.
- Strike Off and Polish: Once the epoxy reaches a tack-free state (typically 4-6 hours at 72°F), scrape it flush with a single-edge razor blade. Wet-polish the area using progressive diamond pads (400, 800, 1500 grit) to restore the surface sheen.
Differentiating and Repairing Granite Fissures vs. Cracks
The Natural Stone Institute notes that fissures are natural geological features that do not compromise the stone's structural integrity. A fissure will not catch your fingernail and will not reflect light differently when viewed from an angle. A true stress crack, however, will catch a fingernail and often extends through the full thickness of the slab.
Edge Chipping: Aggregate Exposure vs. Conchoidal Fractures
Impact damage manifests entirely differently across these two substrates due to their crystalline structures.
Concrete: The Exposed Aggregate Problem
When a concrete countertop edge chips, it often exposes the internal aggregate (pea gravel or crushed quartz). Matching the exact color and texture of the exposed matrix is nearly impossible with standard patching compounds. The Fix: Use a polymer-modified micro-topping, such as Ardex Feather Finish, mixed with precise doses of synthetic iron oxide pigments. Apply the slurry in thin, 1/32-inch lifts using a flexible trowel. Once cured, hand-sand with 220-grit silicon carbide paper to blend the patch into the surrounding paste, then apply a localized coat of penetrating sealer (e.g., Cheng Pro-Formula Concrete Sealer) to unify the gloss level.
Granite: Conchoidal Fractures
Granite lacks natural cleavage planes, meaning it chips in curved, shell-like patterns known as conchoidal fractures. These chips leave sharp, glass-like edges. The Fix: For micro-chips on the arris (the sharp edge), use a high-viscosity, UV-stable clear epoxy. Build the epoxy slightly proud of the surface. After 24 hours, use a carbide scraper to bring the repair flush, followed by hand-polishing with 3000-grit diamond paste to match the factory honed or polished finish.
Repair Cost & Effort Decision Matrix
When deciding whether to execute a DIY repair or hire a specialist, consider the material's forgiveness and the cost of professional intervention. Concrete is highly repairable by skilled DIYers, while granite often requires professional diamond-tooling to achieve invisible results.
- Concrete DIY Stain Removal: $15 - $30 (Poultice materials, sealer stripper, acrylic topcoat). Time: 48 hours.
- Concrete Pro Crack Injection: $150 - $300 per linear foot. Includes routing, epoxy injection, and full-surface repolishing.
- Granite DIY Chip Repair: $20 - $40 (Cyanoacrylate resin, razor scrapers). High risk of visible repair lines if polishing is inadequate.
- Granite Pro Stress Crack Repair: $250 - $500 per incident. Requires roto-tool routing, resin injection, mechanical clamping, and multi-stage diamond polishing.
Preventative Resealing Protocols
Troubleshooting is reactive; maintenance is proactive. The primary reason concrete countertops fail prematurely is the breakdown of topical sealers, leaving the cement paste vulnerable to acidic etching and lipid staining.
For concrete, abandon cheap acrylic sealers that require monthly reapplication. Specify a two-part system: a penetrating lithium silicate densifier to harden the surface capillaries, followed by a high-solids polyurethane or specialized topical sealer (like Buddy Rhodes Satin Sealer). Reapply the topical sacrificial coat every 18 to 24 months, depending on UV exposure and usage frequency.
For granite, the industry standard is an impregnating sealer based on fluoropolymer or siloxane chemistry (e.g., StoneTech BulletProof). These sealers do not form a surface film; they line the microscopic pores to repel water and oil. Perform the 'water bead test' annually: place three drops of water on the surface. If the water darkens the stone or absorbs within 10 minutes, the impregnator has depleted and a fresh coat is required. Typically, high-quality impregnators last 3 to 5 years in residential kitchen environments.
Written by
Priya KapoorPriya Kapoor is a real estate market analyst and construction economics researcher with expertise in housing affordability, development feasibility, and infrastructure investment. She holds a Master of Regional Planning from Cornell University and previously worked as a senior analyst at CBRE's Investment Properties group, where she modeled returns for $4B in mixed-use development pipelines. Priya now runs an independent research practice advising developers, municipalities, and REITs on construction cost forecasting and market timing. She publishes the quarterly "BuildMat Market Pulse" report tracking material price indices across 12 commodity categories. Based in Austin, TX, Priya serves on the board of Habitat for Humanity Austin and is a marathon runner.
More from Priya Kapoor
View all
Construction Cost
Cost to Build a 1600 Sq Ft Home in 2026: Full Breakdown
Accurate 2026 cost to build a 1600 sq ft home—material, labor, and regional pricing breakdowns included. Plan your budget with real-time estimates.
Aug 11, 2026

Wood & Lumber
Name the Types of Wood for Pressure Treatment and Preservation
Learn how to name the types of wood best suited for pressure treatment. Compare species treatability, chemical retention levels, and 2026 preservation costs.
Aug 4, 2026

Stone & Masonry
Stone Veneer Suppliers Lindenhurst: 2026 Cost Analysis
Analyze 2026 stone veneer costs in Lindenhurst, NY. Compare local supplier pricing, delivery fees, and Suffolk County installation labor rates.
Aug 4, 2026