How to Troubleshoot and Repair Failing Stone Veneer Concrete Steps
Diagnose and fix failing stone veneer concrete steps. Learn expert repair techniques for loose stones, efflorescence, and cracked mortar joints.

Diagnostic Matrix: Identifying Your Step Failure
Stone veneer applied to concrete steps faces extreme mechanical stress from foot traffic and severe environmental stress from freeze-thaw cycles and deicing salts. When installation shortcuts are taken—such as omitting a polymer-modified bond coat or using incorrect pointing mortar—failures typically manifest within two to five years. Before purchasing materials, match your specific symptoms to the diagnostic matrix below to determine the root cause.
| Primary Symptom | Root Cause | Required Repair Protocol |
|---|---|---|
| Stones popping off treads/risers | Hydrostatic pressure; lack of polymer-modified adhesive; substrate contamination. | Complete re-adhesion using ANSI A118.15 improved modified dry-set mortar. |
| White, powdery staining (Efflorescence) | Water migrating through unsealed concrete, carrying soluble salts to the surface. | Chemical cleaning with specialized masonry cleaners; application of silane/siloxane sealer. |
| Mortar joints crumbling or washing out | Incorrect mortar mix ratio; mortar too soft for high-traffic horizontal treads. | Rake out joints to 3/4 inch depth; repoint with polymer-fortified Type S mortar. |
| Stone faces flaking or spalling | Pointing mortar is harder than the stone; use of film-forming acrylic sealers trapping moisture. | Remove hard mortar; replace with Type N mortar; strip acrylic sealer and apply penetrating sealer. |
Symptom 1: Delamination and Popping Veneer
The most catastrophic failure in stone veneer concrete steps is delamination, where the stone completely separates from the concrete substrate. This is rarely a failure of the stone itself; it is almost always a failure of the bond coat. Standard Type N or Type S masonry mortars lack the tensile bond strength required to hold heavy stone veneers on horizontal treads subjected to the shear force of foot traffic and the expansive force of freezing water.
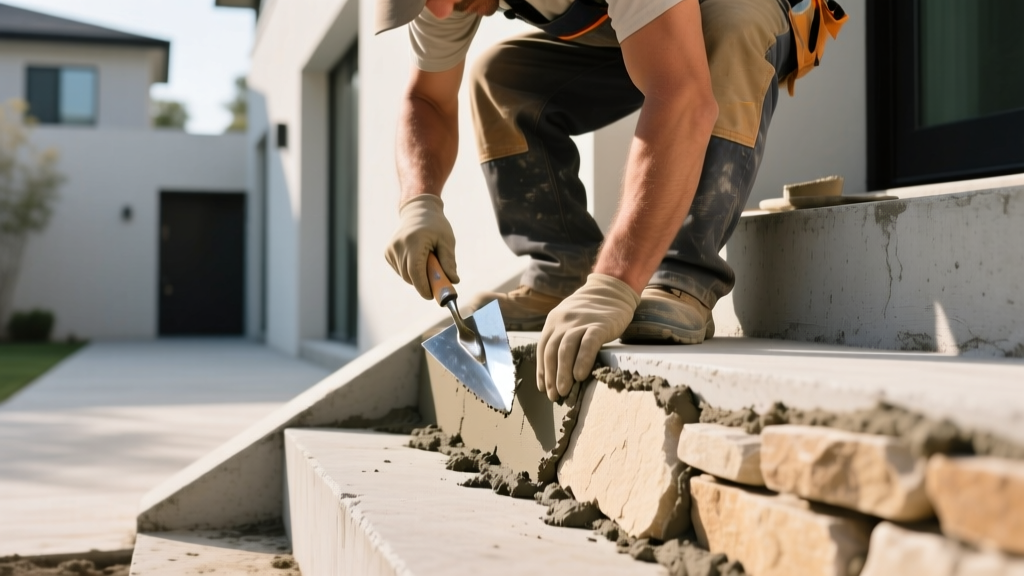
The Expert Re-Adhesion Protocol
- Removal and Cleaning: Pry off all loose stones. Use a wire wheel attached to an angle grinder to remove all old mortar from both the concrete substrate and the back of the stone. The concrete must be bare, clean, and free of dust.
- Slurry Bond Coat: Mix a slurry of Portland cement and a liquid latex bonding agent (such as LATICRETE 3701 Fortified Mortar Admix). Scrub this slurry directly onto the concrete step substrate using a stiff bristle brush. Do not let it dry completely before applying the mortar bed.
- Mortar Application: Use an ANSI A118.15 compliant improved modified dry-set mortar (e.g., Mapei Ultraflex LFT or LATICRETE 254 Platinum). Comb the mortar onto the substrate with a 1/2-inch x 1/2-inch square-notch trowel.
- Back-Buttering: Skim-coat the back of every stone veneer piece with the flat side of the trowel. Press the stone into the combed mortar bed, twisting slightly to collapse the ridges and achieve a minimum 95% mortar contact area.
Symptom 2: Efflorescence and White Staining
Efflorescence occurs when water dissolves soluble salts (primarily calcium hydroxide) within the concrete step substrate or the mortar bed, carries them to the surface, and evaporates, leaving a white crystalline deposit. According to the Brick Industry Association's Technical Notes, efflorescence requires three conditions: soluble salts, moisture to dissolve them, and a path for the moisture to migrate to the surface.
Many DIYers make the critical mistake of using muriatic acid to clean efflorescence from stone veneer. Muriatic acid (hydrochloric acid) can severely etch natural limestone, marble, and calcareous sandstones, permanently dulling the finish and degrading the mortar joints.
Safe Chemical Removal
For natural stone veneer, utilize a specialized, mild-acid masonry cleaner specifically formulated for sensitive stone, such as PROSOCO Sure Klean® Vana Trol® or a buffered phosphoric acid blend. Apply the cleaner, agitate with a natural-bristle brush, and rinse thoroughly with low-pressure water. Once the steps are completely dry (allow 48 to 72 hours of direct sunlight), the underlying moisture migration must be stopped.
"Efflorescence is a symptom of moisture movement, not merely a cosmetic stain. If the water source is not eliminated, the salts will return within weeks of cleaning." — National Park Service Preservation Guidelines
Symptom 3: Deteriorating Mortar Joints
Mortar joints on concrete steps take a beating from snow shovels, ice melt chemicals, and direct foot traffic. When joints crumble, water infiltrates the substrate, accelerating freeze-thaw damage. The Portland Cement Association notes that saturated concrete and masonry elements are highly susceptible to scaling and spalling when subjected to freezing temperatures.
Repointing with the Correct Mix
The golden rule of masonry repointing is that the mortar must be slightly softer and more permeable than the masonry unit it surrounds. However, step treads require higher abrasion resistance than vertical walls.
- For Vertical Risers: Use a standard Type N mortar mix (1 part Portland cement, 1 part hydrated lime, 6 parts masonry sand). This provides excellent workability and allows the joint to flex slightly with thermal expansion.
- For Horizontal Treads: Use a polymer-fortified Type S mortar (1 part Portland cement, 1/2 part lime, 4.5 parts sand, mixed with an acrylic polymer additive). The higher Portland content and polymer fortification provide the compressive strength needed to resist foot traffic and shovel impacts.
Execution: Rake out the deteriorated joints to a depth of at least 3/4 inch using a mortar rake or oscillating multi-tool. Vacuum the dust. Dampen the joints with a spray bottle (do not soak), and force the new mortar into the joint using a pointing trowel and a jointing tool to compact it tightly against the stone edges.
2026 Repair Cost Breakdown: DIY vs. Professional
Understanding the financial scope of your repair helps determine whether to tackle the project yourself or hire a licensed masonry contractor. The costs below reflect national averages for 2026, factoring in recent material price stabilizations and current labor rates.
| Repair Scope | DIY Material Cost (Per Sq. Ft.) | Professional Installed Cost (Per Sq. Ft.) | Typical Timeframe |
|---|---|---|---|
| Joint Repointing Only | $1.50 - $2.75 | $14.00 - $22.00 | 1-2 Days |
| Efflorescence Cleaning & Sealing | $0.85 - $1.50 | $6.00 - $10.00 | 1 Day |
| Partial Re-adhesion (Under 30%) | $4.00 - $7.50 | $24.00 - $38.00 | 2-3 Days |
| Full Tear-Off and Replacement | $12.00 - $18.00 | $65.00 - $115.00 | 4-7 Days |
Preventative Maintenance: The Sealer Trap
The most common mistake homeowners make after repairing stone veneer steps is applying the wrong type of sealer. Film-forming sealers (like cheap acrylics or polyurethanes) create a plastic-like barrier on the surface. While they initially repel surface water, they also trap moisture vapor trying to escape from the concrete substrate below. When this trapped moisture freezes, it expands, causing the stone face to spall off in thin layers.
The Solution: Always use a penetrating silane/siloxane water repellent (such as PROSOCO Siloxane PD or Eagle Armor Seal). These sealers penetrate up to 1/4 inch into the stone and mortar, reacting chemically to form a hydrophobic resin matrix within the pores. This stops liquid water from entering while remaining 100% vapor-permeable, allowing the concrete steps to 'breathe' and dry out naturally. Apply the sealer using a low-pressure pump sprayer until the surface is saturated, and reapply every 3 to 5 years depending on local weather exposure.
Written by
Sarah WhitfieldSarah Whitfield is a chartered quantity surveyor (MRICS) and construction cost analyst with 15 years of experience in material pricing, procurement strategy, and project budgeting. She earned her degree in Construction Management from the University of Reading (UK) and has worked on projects ranging from $2M custom homes to $180M mixed-use developments across North America and Europe. Sarah currently leads cost estimating for BuildMat Insight, maintaining a proprietary database of 4,000+ material price points updated quarterly. She is a frequent contributor to RSMeans cost data panels and has presented at the International Cost Engineering Council (ICEC) congress. Based in Denver, CO, Sarah is an avid trail runner and volunteer mentor for Women in Construction.
More from Sarah Whitfield
View all
Wood & Lumber
What Are the Different Types of Wood? A Builder's Guide
Compare structural softwoods, finish hardwoods, and engineered lumber. Analyze Janka ratings, MOE values, and 2026 pricing for construction.
Aug 4, 2026

Walls & Panels
Steel Framing vs Wood Framing: Corrosion and Moisture Defense
Compare steel framing vs wood framing for moisture resistance. Learn about galvanized coatings, condensation risks, and corrosion protection strategies.
Jul 21, 2026

Stone & Masonry
How to Cut Stone Veneer: Wet Saw vs Grinder Comparison
Compare the best tools for cutting stone veneer. We review wet saws, angle grinders, and chop saws to help you achieve clean, chip-free cuts.
Jul 21, 2026