Concrete Dye vs Concrete Stain: Pro Installation Guide
Master the concrete dye vs concrete stain debate with our pro installation guide. Compare chemistry, prep steps, costs, and application techniques.

The Core Chemistry: Why Dyes and Stains React Differently
Resolving the concrete dye vs concrete stain debate begins at the molecular level. Concrete dyes are non-reactive colorants composed of extremely fine particles (typically 50 to 200 nanometers in size) suspended in a water or solvent carrier. Because they do not chemically react with the concrete, they simply penetrate the pores and lodge themselves within the capillary network. This allows dyes to achieve vibrant, translucent colors—including bright reds, blues, and yellows—that are impossible with reactive stains.
Acid-based concrete stains, conversely, rely on a chemical reaction. They contain metallic salts (such as iron chloride, copper sulfate, or zinc chloride) dissolved in a mild acid solution (usually hydrochloric acid). When applied, the acid etches the surface, allowing the metallic salts to react with the free lime (calcium hydroxide) in the concrete. This reaction permanently alters the concrete's color, producing mottled, variegated earth tones like terracotta, olive green, and deep browns. According to The Concrete Network, understanding this chemical distinction is critical, as it dictates your surface preparation, application tools, and long-term maintenance requirements.
Concrete Dye vs Concrete Stain: At-a-Glance Comparison Matrix
| Feature | Concrete Dye (Water/Acetone) | Acid Concrete Stain |
|---|---|---|
| Color Palette | Vibrant, translucent, full spectrum | Mottled, variegated earth tones |
| Reaction Type | Non-reactive (penetrating) | Reactive (chemical bond) |
| UV Stability | Poor to Moderate (requires UV sealer) | Excellent (highly UV stable) |
| Application Time | Fast (dries in 1-2 hours) | Slow (requires 2-4 hrs + neutralization) |
| Material Cost (2026) | $0.15 - $0.30 per sq. ft. | $0.25 - $0.50 per sq. ft. |
| Best Application | Interior floors, polished concrete, overlays | Exterior patios, driveways, pool decks |
Pre-Installation Profiling: The Make-or-Break Step
Neither dyes nor stains will adhere properly to a smooth, troweled, or sealed surface. The concrete must be mechanically profiled to achieve a Concrete Surface Profile (CSP) of 2 or 3, as defined by the International Concrete Repair Institute (ICRI).
Mechanical Grinding vs. Acid Etching
- For Dyes: Mechanical diamond grinding is mandatory. Use a planetary grinder equipped with 40- to 60-grit metal-bond diamonds to open the pores. If you are applying dye to polished concrete, stop the polishing process at 400-grit resin, apply the dye, and then continue to the final polish.
- For Acid Stains: While mechanical grinding works, many contractors prefer a mild acid etch (using a 10:1 water-to-muriatic acid solution) to open the pores without removing too much of the surface lime, which is required for the stain to react. If the concrete is heavily weathered or exterior, power washing followed by chemical etching is the standard protocol.
Step-by-Step Installation: Water-Based Concrete Dyes
Water-based dyes (such as L.M. Scofield Formula One or Prosoco Consolideck) are the industry standard for interior commercial floors due to low VOC emissions and ease of use.
- Mixing: Dilute the dye concentrate with clean, distilled water according to the manufacturer's ratio (typically 1:1 or 2:1). Using distilled water prevents mineral deposits from altering the color.
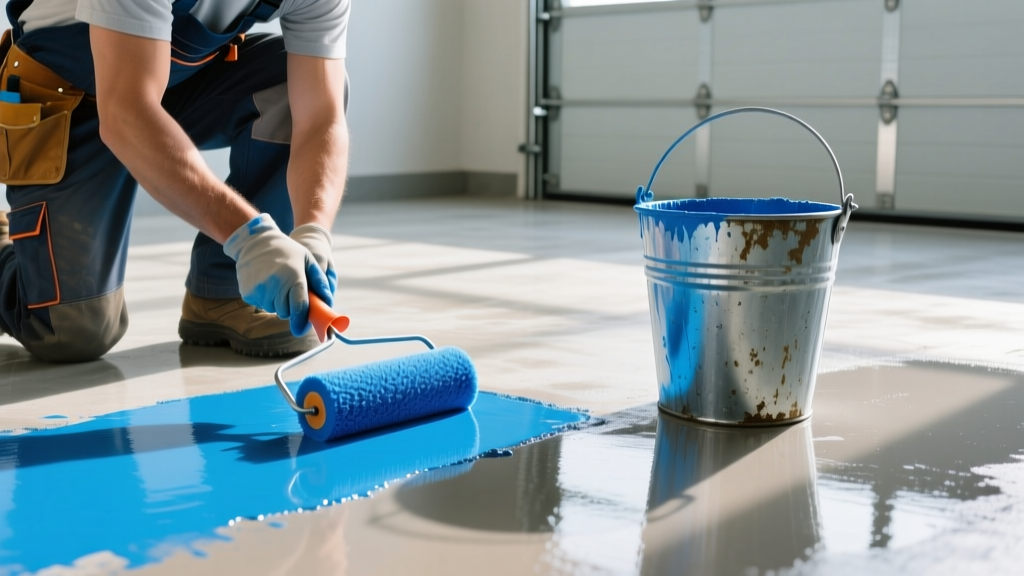
- Spraying: Apply the dye using a low-pressure pump sprayer or an HVLP (High Volume Low Pressure) sprayer. Maintain a consistent 18-inch distance from the floor, overlapping each pass by 50%.
- Backrolling: Immediately after spraying a 10x10 foot section, backroll the wet dye using an 18-inch microfiber pad on a pole. This prevents pooling, eliminates spray marks, and drives the nano-particles deep into the pores.
- Drying and Second Coat: Allow the first coat to dry for 1 to 2 hours. Dyes are highly transparent; a second coat is almost always required to achieve uniform color saturation and hide the underlying gray concrete.
Step-by-Step Installation: Acid-Based Concrete Stains
Acid stains (like Kemiko Stone Tone) require more labor and strict safety protocols but yield unparalleled exterior durability.
- Safety Gear: Don acid-resistant gloves, splash goggles, and a respirator with acid gas cartridges.
- Application: Use an acid-resistant plastic pump sprayer. Never use metal components, as the hydrochloric acid will corrode them and introduce rust spots into your finish. Apply in a circular motion to create natural variegation.
- Reaction Time: Allow the stain to react for 2 to 4 hours. You will see a mild fizzing action; this indicates the acid is reacting with the free lime. If no fizzing occurs, the concrete is likely too old, carbonated, or lacks sufficient lime.
- Neutralization (Critical): The chemical reaction must be stopped. Mix a neutralizing solution of 1 cup baking soda (or ammonia) per gallon of water. Mop the neutralizer generously over the stained floor, scrubbing lightly with a stiff nylon brush.
- Rinsing: Extract the residue using a wet vacuum, then rinse the floor thoroughly with clean water. Repeat the rinsing process twice to ensure all acidic residue and metallic salts are removed. Failure to rinse completely will result in a white, powdery efflorescence blooming under your sealer.
Troubleshooting Common Application Failures
Cause: Inconsistent surface porosity or failing to backroll immediately.
Fix: Lightly mist the area with the carrier solvent (water or acetone) to re-wet the dye, then aggressively backroll to redistribute the pigment. For severe blotching, apply a second, lighter coat of dye.
Cause: Incomplete neutralization and rinsing. The residual acid continues to eat the concrete beneath the sealer, breaking the bond.
Fix: Strip the sealer using a chemical stripper, re-neutralize the floor with a baking soda solution, power wash, and allow to dry completely before re-sealing.
Sealing and Maintenance: Locking in the Color
Neither dyes nor stains provide a protective wear layer; they are purely decorative. The longevity of your installation depends entirely on the sealer chosen.
For interior dyed concrete, particularly in high-traffic commercial spaces, a two-part polyaspartic or aliphatic polyurethane sealer is required. These sealers offer high abrasion resistance and, crucially, contain UV stabilizers that prevent the dye from fading under fluorescent or natural light. When applying polyurethanes, always check the EPA VOC Guidelines to ensure compliance with local indoor air quality regulations, as some solvent-based polyurethanes exceed the 250 g/L VOC limit enforced in many jurisdictions in 2026.
For exterior acid-stained concrete, a breathable, solvent-based acrylic sealer (such as L.M. Scofield Selectseal) is the optimal choice. Acrylics allow moisture vapor to escape from the concrete slab, preventing hydrostatic pressure buildup that causes blisters and peeling. Apply two thin coats using a 3/8-inch nap roller, allowing 4 hours of dry time between coats. Reapply a sacrificial wax or acrylic maintenance coat every 12 to 18 months to maintain the sheen and protect the underlying sealer from UV degradation and foot traffic wear.
Written by
Priya KapoorPriya Kapoor is a real estate market analyst and construction economics researcher with expertise in housing affordability, development feasibility, and infrastructure investment. She holds a Master of Regional Planning from Cornell University and previously worked as a senior analyst at CBRE's Investment Properties group, where she modeled returns for $4B in mixed-use development pipelines. Priya now runs an independent research practice advising developers, municipalities, and REITs on construction cost forecasting and market timing. She publishes the quarterly "BuildMat Market Pulse" report tracking material price indices across 12 commodity categories. Based in Austin, TX, Priya serves on the board of Habitat for Humanity Austin and is a marathon runner.
More from Priya Kapoor
View all
Construction Cost
Cost to Build a 1600 Sq Ft Home in 2026: Full Breakdown
Accurate 2026 cost to build a 1600 sq ft home—material, labor, and regional pricing breakdowns included. Plan your budget with real-time estimates.
Aug 11, 2026

Wood & Lumber
Name the Types of Wood for Pressure Treatment and Preservation
Learn how to name the types of wood best suited for pressure treatment. Compare species treatability, chemical retention levels, and 2026 preservation costs.
Aug 4, 2026

Stone & Masonry
Stone Veneer Suppliers Lindenhurst: 2026 Cost Analysis
Analyze 2026 stone veneer costs in Lindenhurst, NY. Compare local supplier pricing, delivery fees, and Suffolk County installation labor rates.
Aug 4, 2026