Porcelain Pavers vs Concrete Pavers: Installation Guide
Compare the installation requirements, base prep, and 2026 costs of porcelain pavers vs concrete pavers for patios, driveways, and rooftop decks.

The Structural Divergence: Flexibility vs. Rigidity
Choosing between porcelain pavers vs concrete pavers is not merely an aesthetic decision; it fundamentally dictates your site preparation, base materials, and jointing protocols. Concrete pavers, governed by ASTM C936 standards, are designed as flexible pavement systems. They rely on edge restraints and jointing sand to create structural interlock, allowing the surface to shift slightly with freeze-thaw cycles without cracking. Porcelain pavers (specifically 20mm or 3/4-inch exterior grade) are entirely rigid. If the base beneath a sand-set porcelain paver shifts, the paver will not flex; it will rock, crack, or cause the jointing material to fail.
Understanding this mechanical divergence is the first step in selecting the correct installation methodology for your specific site conditions.
Quick Decision Matrix: Which System Fits Your Site?
- Choose Concrete Pavers if: You are installing over expansive clay soils, require a permeable driveway system, or need a flexible surface that can be easily lifted to access underground utilities.
- Choose Porcelain Pavers if: You are building a rooftop deck, installing over an existing concrete slab, require absolute stain resistance (zero porosity), or want a pedestal system for hidden drainage and utility routing.
Subgrade and Base Material Requirements
Both materials require a properly compacted subgrade, but the bedding layer and base depth specifications diverge significantly based on the installation method. Below is the 2026 specification matrix for standard residential applications.
| Specification | Concrete Pavers (Sand-Set) | Porcelain Pavers (Sand-Set) | Porcelain Pavers (Pedestal) |
|---|---|---|---|
| Subgrade Compaction | 95% Proctor density | 98% Proctor density (Critical) | Not required (installed on structural slab/roof) |
| Base Aggregate | 4-6 in. crushed angular (3/4' minus) | 6-8 in. crushed angular (3/4' minus) | N/A |
| Bedding Layer | 1 in. coarse concrete sand (ASTM C33) | 3/4 in. coarse sand + geotextile separator | Adjustable polypropylene pedestals (e.g., Bison) |
| Slope Requirement | 1% minimum (1/8 in. per foot) | 2% minimum (1/4 in. per foot) | 1.5% minimum on underlying waterproof membrane |
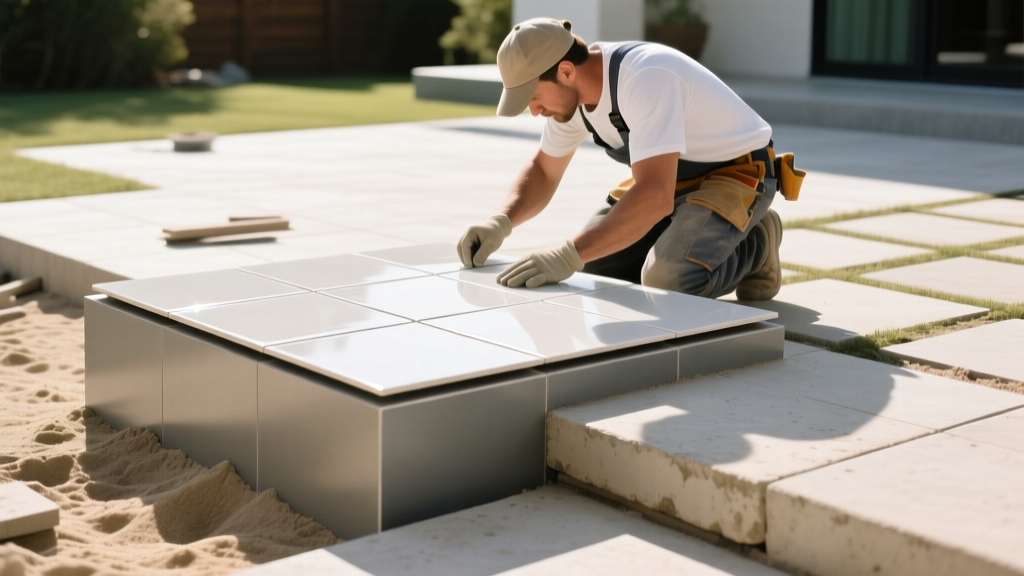
Step-by-Step Installation: Concrete Pavers
The sand-set method remains the industry standard for concrete pavers, heavily detailed in the ICPI Technical Specifications. The goal is to achieve uniform interlock without disturbing the bedding sand.
- Base Preparation: Excavate to a depth of 9-11 inches. Lay a non-woven geotextile fabric over the subgrade to prevent aggregate migration. Place and compact 3/4-inch minus crushed aggregate in 2-inch lifts using a vibratory plate compactor (minimum 5,000 lbs of compaction force).
- Screeding the Bedding Sand: Lay 1-inch diameter steel pipes as screed guides. Fill with ASTM C33 coarse concrete sand. Pull a magnesium screed board across the pipes. Never walk on or trowel the screeded sand.
- Paver Placement: Lay pavers tightly against each other, maintaining a 1/16-inch to 1/8-inch joint spacing. Drop pavers straight down; do not slide them, which will gouge the bedding sand and create low spots.
- Initial Compaction: Run a low-amplitude vibratory plate compactor with a polyurethane pad over the surface to seat the pavers into the sand and establish interlock.
Step-by-Step Installation: 20mm Porcelain Pavers
Installing 20mm porcelain requires precision. Unlike concrete, porcelain has virtually zero water absorption (less than 0.5%), meaning it will not bond to standard mortar or polymeric sand without specific chemical or mechanical interventions.
The Pedestal Method (Rooftops and Decks)
For elevated surfaces, porcelain is installed over a waterproof membrane using adjustable pedestals. This is the cleanest, fastest method.
- Map out the pedestal grid based on the paver dimensions (typically 24x24 inches).
- Place pedestals at every corner intersection. Use tab spacers built into the pedestal head to maintain a strict 1/8-inch open joint for drainage.
- Shim pedestals using manufacturer-provided rubber shims to correct minor slope variations in the underlying slab. Laser levels are mandatory here; a 1/16-inch variance will cause a rigid porcelain paver to rock audibly underfoot.
The Sand-Set Method (Ground Level)
When sand-setting porcelain, you must mitigate the risk of 'tenting' (where thermal expansion causes the rigid pavers to pop up). According to the TCNA Handbook guidelines for exterior rigid paving, expansion joints are non-negotiable.
- Install a rigid, poured-in-place concrete perimeter collar to act as an absolute edge restraint. Plastic snap-edging used for concrete pavers will fail under the lateral thrust of expanding porcelain.
- Leave a 1/4-inch expansion gap between the porcelain pavers and the perimeter collar, filling it with a flexible polyurethane sealant.
- Use a high-performance, flexible polymeric sand (such as Techniseal Next Generation) specifically rated for porcelain's non-porous edges. Standard polymeric sand will not adhere to the dense porcelain edge and will wash out within one season.
Critical Failure Mode: Efflorescence and Staining
Concrete pavers naturally contain Portland cement, which can produce efflorescence (white, powdery salt deposits) as moisture migrates through the paver. Porcelain pavers do not produce efflorescence. However, if you sand-set porcelain over a base containing limestone dust or unwashed masonry sand, minerals can stain the surface. Always use washed, silica-based bedding sand for porcelain installations.
Cutting, Edging, and Jointing Protocols
The tools and materials required to finish the installation highlight the starkest contrast between the two materials.
Cutting Specifications
- Concrete: A standard segmented diamond masonry blade on a gas-powered cut-off saw will slice through concrete pavers quickly. Dust control is the primary concern.
- Porcelain: Segmented blades will chip and shatter the glazed edge of a porcelain paver. You must use a continuous-rim, turbo-mesh diamond blade specifically engineered for porcelain (e.g., Pearl Abrasive Company P4 or MK Diamond Porcelain Plus). Cuts must be performed wet, or with a high-CFM dust extractor, feeding the blade slowly to prevent overheating and glazing the diamond matrix.
Jointing Materials
Concrete pavers utilize standard jointing sand or basic polymeric sand. The sand locks the flexible system together. Porcelain pavers, being rigid, do not rely on sand for structural interlock. For sand-set porcelain, use an epoxy-based jointing compound or a high-resin polymeric sand designed for narrow, non-porous joints. For mortar-set porcelain, use a flexible, exterior-grade urethane grout to accommodate thermal expansion.
2026 Installation Cost & Time Breakdown
Labor and material costs have stabilized in 2026, but the premium for porcelain installation remains significant due to the specialized tools and stricter base tolerances required. The following data reflects national averages for professional installation on a standard 500-square-foot residential patio.
| Cost Factor | Concrete Pavers (Sand-Set) | 20mm Porcelain (Sand-Set) | 20mm Porcelain (Pedestal) |
|---|---|---|---|
| Material Cost (Pavers Only) | $3.50 - $6.00 / sq ft | $7.00 - $12.00 / sq ft | $8.00 - $14.00 / sq ft |
| Base & Bedding Materials | $2.00 - $3.50 / sq ft | $3.00 - $4.50 / sq ft | $4.00 - $7.00 / sq ft (Pedestals) |
| Professional Labor | $7.00 - $10.00 / sq ft | $11.00 - $16.00 / sq ft | $9.00 - $14.00 / sq ft |
| Total Installed Cost | $12.50 - $19.50 / sq ft | $21.00 - $32.50 / sq ft | $21.00 - $35.00 / sq ft |
| Installation Time (500 sq ft) | 3 - 4 Days | 4 - 6 Days | 2 - 3 Days |
While the pedestal system for porcelain carries a higher material cost for the supports, the labor time is drastically reduced because there is no excavation, base compaction, or sand screeding involved. If your site already features a structurally sound concrete slab or a reinforced waterproof roof deck, the pedestal method is the most efficient installation route available in modern hardscaping.
Written by
Elena RodriguezElena Rodriguez is a civil engineer and technical writer specializing in concrete technology, masonry systems, and ASTM/ACI compliance. She earned her B.S. in Civil Engineering from Texas A&M University and spent a decade at a materials testing laboratory, performing over 2,000 concrete compressive strength tests and masonry prism evaluations. Elena is an ACI-certified Field Testing Technician (Grade I) and a member of ASTM Committee C12 on Natural Building Stone. She currently consults on forensic engineering cases involving concrete failures and moisture intrusion. Based in San Antonio, TX, Elena is a proud member of the Society of Women Engineers (SWE) and coaches her daughter's FIRST Robotics team.
More from Elena Rodriguez
View all
Walls & Panels
Cost Analysis: Light Gauge Steel Framing Advantages and Disadvantages
Evaluate light gauge steel framing advantages and disadvantages through a strict cost analysis lens, comparing material, labor, and lifecycle expenses.
Aug 4, 2026

Walls & Panels
Gypsum Board Types: Exact Specifications, Thickness & Dimensions
Compare standard, Type X, and moisture-resistant gypsum board types. Get exact specifications, thicknesses, dimensions, and ASTM standards for your project.
Aug 4, 2026

Fire Resistance
Best Fire-Resistant Outdoor Decking Materials: 2026 Buyer Guide
Discover the best fire-resistant outdoor decking materials for 2026. Compare Class A PVC, aluminum, and hardwood options for WUI compliance and safety.
Aug 4, 2026