Concrete Paint vs Concrete Stain: Pro Installation Guide
Master the concrete paint vs concrete stain debate. Compare costs, prep steps, and application techniques for durable, professional-grade results.

The Core Distinction: Film-Forming vs. Penetrating Coatings
Resolving the concrete paint vs concrete stain debate requires understanding how each product interacts with the cementitious matrix at a chemical level. Concrete paint (including acrylics, epoxies, and polyurethanes) is a film-forming coating. It sits on top of the slab, bridging the pores to create an opaque, continuous shield. Conversely, concrete stain (acid or water-based) is a penetrating treatment. Acid stains react chemically with the calcium hydroxide in the concrete to create permanent, variegated color, while water-based stains penetrate the pores to deposit pigments without forming a surface film.
Choosing the wrong system for your specific environmental and traffic conditions is the primary cause of premature coating failure. Below is a professional decision matrix to guide your material selection before installation begins.
Decision Matrix: Selecting the Right System
| Condition / Requirement | Concrete Stain (Acid/Water) | Concrete Paint (Epoxy/Acrylic) |
|---|---|---|
| Heavy Vehicular Traffic | Poor (Requires heavy sacrificial wax) | Excellent (100% solids epoxy) |
| Outdoor UV Exposure | Excellent (UV stable, no yellowing) | Poor to Fair (Epoxies chalk/yellow; use aliphatic polyurethane topcoat) |
| Moisture Vapor Transmission | Excellent (Breathable system) | Poor (Traps moisture, causes blistering) |
| Aesthetic Goal | Translucent, mottled, natural stone look | Opaque, solid colors, high-gloss or flake systems |
| Surface Imperfections | Highlights cracks and flaws | Hides minor flaws; builds thickness |
Step-by-Step Installation: Concrete Stain
Acid staining relies on a chemical reaction with hydrated lime (calcium hydroxide). If your concrete mix has a high fly ash or slag content, or if the surface is heavily power-troweled, the reaction will be weak or non-existent. Always perform a 2x2 foot test patch before full application.
1. Surface Profiling and Cleaning
Unlike paint, stain cannot bridge a smooth, dense surface. You must open the pores to achieve a Concrete Surface Profile (CSP) of 1 or 2. Avoid mechanical grinding if possible, as it can burnish the surface and close pores. Instead, use a mild acid etch (phosphoric acid) or a specialized concrete prep solution. Clean the slab with a heavy-duty degreaser and a stiff-bristle brush, followed by a thorough pressure washing to remove all residue.
2. Application and Chemical Reaction
Apply the acid stain using a non-corrosive, acid-resistant pump sprayer. Maintain a wet edge and spray in overlapping circular motions to prevent harsh lap marks. The chemical reaction takes between 2 to 8 hours to fully develop. You will see the color shift from the stain's liquid hue to its final oxidized tone. For deeper color saturation, apply a second coat after the first has dried, but do not dilute the stain.
3. Neutralization and Sealing
This is the most critical and frequently botched step. The acid must be completely neutralized to stop the reaction and allow sealers to adhere. Mop the floor with a neutralizing solution of water and baking soda (1 cup per gallon) or Trisodium Phosphate (TSP). Scrub vigorously, vacuum the slurry with a wet-vac, and rinse twice with clean water. Once the slab is 100% dry, apply a penetrating silane/siloxane sealer or a solvent-based acrylic sealer to lock in the color and provide UV protection.
Acid stains contain hydrochloric acid and metallic salts. Always wear chemical-resistant gloves, splash goggles, and a respirator with acid gas cartridges. Ensure cross-ventilation in enclosed spaces to prevent inhalation of acidic fumes.
Step-by-Step Installation: Concrete Paint and Epoxy
When installing opaque coatings, particularly high-build systems like 100% solids epoxy or polyaspartic polyurea, surface preparation dictates 90% of the system's lifespan. Paint does not adhere to concrete; it adheres to the profile of the concrete.
1. Moisture Testing and Diamond Grinding
Before any mechanical prep, test the slab for Moisture Vapor Transmission Rate (MVTR) using the ASTM F1869 calcium chloride test. If the emission rate exceeds 3 to 5 lbs per 1,000 square feet per 24 hours, a standard epoxy will fail via osmotic blistering. You will need a moisture-mitigating epoxy primer. Mechanically prepare the floor using a planetary diamond grinder equipped with 30-grit or 40-grit metal-bond diamonds to achieve a CSP-2 or CSP-3 profile. This creates microscopic peaks and valleys for the epoxy to mechanically lock into.
2. Priming and Base Coats
Vacuum the floor with a HEPA-filtered shrouded grinder and auto-scrub with a neutral pH cleaner. Apply a low-viscosity, high-solids epoxy primer using a squeegee and back-roll with a 1/4-inch nap roller. This primer penetrates the CSP profile and outgasses trapped air. Allow it to cure to a 'tack-free' state (typically 12-18 hours at 70°F) before applying the 100% solids epoxy base coat.
3. Topcoats and Anti-Slip Additives
For garages or commercial spaces, a clear aliphatic polyurethane or polyaspartic topcoat is mandatory to prevent UV yellowing and provide scratch resistance. Broadcast an anti-slip additive (such as 60-mesh aluminum oxide or polymer grit) into the wet topcoat at a rate of 1 to 1.5 lbs per 100 square feet to achieve a slip-resistant surface, especially when wet.
Never sand or scrape an epoxy base coat if you plan to apply the next coat within the manufacturer's specified recoat window (usually 12-24 hours). If the epoxy cures past this window, it cross-links completely, and you must mechanically screen the surface with a 120-grit resin pad to ensure intercoat adhesion.
Cost, Coverage, and Curing Timelines
Budgeting accurately requires looking beyond the initial material cost to include prep tools, sealers, and downtime.
- Acid Stain System: Materials cost $0.20 to $0.40 per sq. ft. for the stain, plus $0.25 to $0.50 per sq. ft. for the acrylic sealer. Total DIY material cost: $0.45 - $0.90 per sq. ft. Coverage is typically 200-300 sq. ft. per gallon. Walkable in 4 hours; fully cured and sealed in 48 hours.
- Water-Based Acrylic Paint: Materials cost $0.30 to $0.60 per sq. ft. Coverage is 300-400 sq. ft. per gallon. Requires 2 coats. Walkable in 12 hours; light vehicular traffic in 72 hours. Lifespan: 1-3 years.
- 100% Solids Epoxy + Polyurethane Topcoat: Materials cost $1.50 to $3.00 per sq. ft. (including primer, epoxy, topcoat, and grit). Coverage is 100-150 sq. ft. per gallon at 10-15 mils thickness. Walkable in 24 hours; heavy vehicular traffic in 5-7 days. Lifespan: 10-20 years.
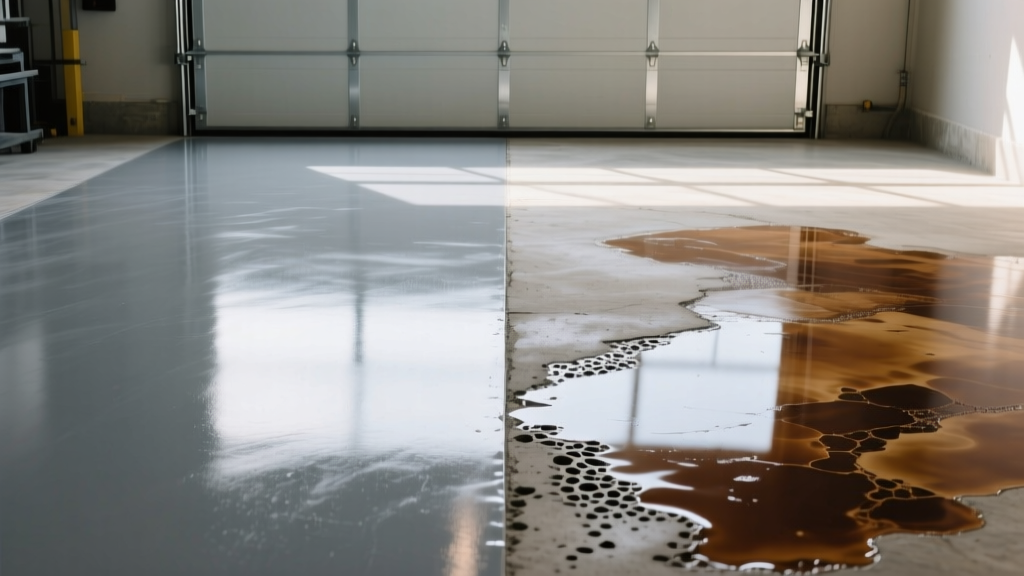
Troubleshooting Common Installation Failures
Even experienced installers encounter anomalies. Here is how to diagnose and fix the most common issues in both systems.
Stain Failures
- Symptom: Color is pale, blotchy, or didn't take at all.
Cause: Lack of calcium hydroxide (common in high fly-ash mixes) or surface contamination from curing compounds.
Fix: Switch to a water-based penetrating stain, which relies on physical pigment deposition rather than chemical reaction, or apply a micro-topping overlay before staining. - Symptom: Sealer is peeling or turning white (blushing).
Cause: Moisture was trapped in the slab during sealer application, or the acid was not fully neutralized.
Fix: Strip the sealer using a chemical stripper (methylene chloride or soy-based alternative), re-neutralize with TSP, allow 72 hours of drying time, and reapply a breathable, moisture-tolerant sealer.
Paint and Epoxy Failures
- Symptom: Epoxy is peeling up in large sheets.
Cause: Inadequate surface profiling (CSP too low) or application over laitance (the weak, milky layer of cement and fines on new concrete).
Fix: Complete removal via shot blasting or heavy diamond grinding. Acid etching is rarely sufficient for high-build epoxies in high-traffic zones. - Symptom: Tiny bubbles or pinholes in the cured epoxy.
Cause: Outgassing from a porous slab, or applying the coating when the concrete temperature is rising (which forces air out of the pores).
Fix: Always apply epoxy when the slab temperature is falling (late afternoon/evening). Use a spiked roller immediately after application to pop emerging bubbles.
Authoritative Resources
For detailed technical data sheets, chemical resistance charts, and advanced troubleshooting, consult the following industry authorities:
- The Concrete Network: Staining Interior and Exterior Concrete - Comprehensive guides on acid and water-based stain chemistry and application.
- The Concrete Network: Epoxy Floor Coatings - Technical breakdowns of 100% solids epoxies, moisture mitigation, and surface profiling.
- International Concrete Repair Institute (ICRI) - The definitive source for Concrete Surface Profile (CSP) standards and mechanical preparation guidelines.
Written by
Marcus ChenMarcus Chen is a licensed structural engineer (PE) and building materials analyst with over 12 years of experience across residential, commercial, and industrial construction. He holds a Master of Science in Civil Engineering from UC Berkeley and spent six years at Thornton Tomasetti before transitioning to independent consulting and technical writing. Marcus specializes in material selection for seismic-prone regions, concrete reinforcement strategies, and lifecycle cost analysis. His work has been cited by the American Concrete Institute (ACI) and the Structural Engineers Association of California (SEAOC). When he is not on a job site or at his desk, you will find him hiking the Sierra Nevada or restoring a 1920s craftsman bungalow in Oakland, CA.
More from Marcus Chen
View all
Construction Cost
How Much Did the Eiffel Tower Cost to Build?
How much did the Eiffel Tower cost to build in 1889? We adjust for inflation and compare its budget to modern skyscraper construction.
Aug 4, 2026

Fire Resistance
What Is a Fire Resistant Material? Testing & Certification Guide
Discover what is a fire resistant material through ASTM and UL testing. Learn how fire ratings, certifications, and assemblies work in construction.
Aug 4, 2026

Construction Cost
How Much Did the Burj Khalifa Cost to Build?
How much did the Burj Khalifa cost to build? We break down the $1.5B project and extract 5 money-saving strategies for your next build.
Jul 30, 2026