Plaster vs Concrete Overlays: Wall Installation Guide
Compare plaster vs concrete overlays for masonry walls. This installation guide covers mix ratios, substrate prep, curing times, and failure modes.
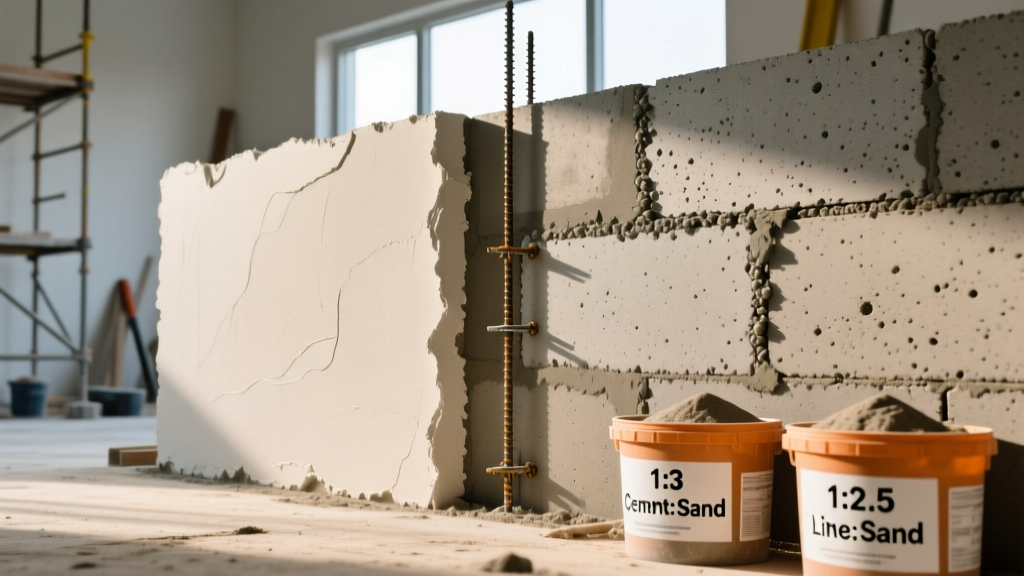
Material Selection: Plaster vs Concrete Finishes
When finishing concrete masonry units (CMU), poured concrete, or brick substrates, contractors must choose between traditional cement plaster and modern concrete overlays (micro-toppings). While both utilize Portland cement as a primary binder, their installation protocols, thickness tolerances, and structural behaviors differ drastically. Evaluating plaster vs concrete overlays requires understanding the substrate's moisture profile, the desired aesthetic thickness, and the environmental exposure of the wall system.
Cement plaster (often referred to as stucco in exterior applications) is a thick, multi-coat system designed to bridge minor substrate irregularities and provide a durable, breathable weather barrier. Concrete overlays, conversely, are polymer-modified, ultra-thin skim coats engineered for high compressive strength, chemical resistance, and seamless interior aesthetics. Selecting the wrong system for a specific moisture environment is the leading cause of delamination and efflorescence in masonry finishing.
| Criteria | Traditional Cement Plaster | Polymer Concrete Overlay |
|---|---|---|
| Ideal Thickness | 3/8" to 3/4" (Multi-coat) | 1/16" to 1/4" (Single/Double coat) |
| Substrate Tolerance | High (bridges gaps up to 1/2") | Low (requires near-perfect leveling) |
| Moisture Vapor Transmission | Highly breathable (perm rating > 10) | Low breathability (requires MVT mitigation) |
| Primary Application | Exterior facades, wet areas, CMU walls | Interior feature walls, retail, commercial |
| Curing Mechanism | Hydration (requires moist curing) | Polymer coalescence + hydration |
Shared Substrate Preparation (CSP 3 to 5)
Both systems demand rigorous substrate profiling. According to the International Concrete Repair Institute (ICRI), masonry and concrete walls must be mechanically abraded to achieve a Concrete Surface Profile (CSP) between 3 and 5. This ensures adequate mechanical interlock for the cementitious bond.
- Contaminant Removal: Shot blasting or scarifying is required to remove form release agents, curing compounds, and laitance. Chemical strippers must be followed by high-pressure water blasting (minimum 3,500 PSI) to extract residual solvents from the substrate pores.
- Joint Treatment: Active control joints in the underlying concrete must be honored. Do not bridge structural joints with either plaster or overlay. Install a flexible polyurethane sealant or a pre-formed expansion joint strip flush with the substrate before applying any finish coats.
- Moisture Testing: For interior concrete overlays, conduct a calcium chloride test per ASTM F1869. If Moisture Vapor Transmission (MVT) exceeds 3 lbs/1,000 sq. ft./24 hours, a moisture mitigation epoxy primer (e.g., Mapei Primer SN or Ardex MVP) is mandatory before overlay installation. Plaster systems do not require MVT testing due to their high permeability.
Installation Protocol: Traditional Cement Plaster
Mix Ratios and the Three-Coat System
Traditional plaster relies on a three-coat application: scratch, brown, and finish. The Portland Cement Association (PCA) specifies strict volumetric ratios to prevent shrinkage cracking and ensure adequate workability.
- Scratch Coat (3/8" thick): Mix 1 part Type N masonry cement (or 1 part Portland cement + 1/4 part hydrated lime) to 2.5 or 3 parts washed plaster sand. Apply using a 3/8" V-notch trowel to create horizontal ridges. Scratch the surface with a rake or stiff brush while still plastic to create a mechanical key for the next layer.
- Brown Coat (3/8" thick): Use the identical 1:3 mix ratio. Apply over the damp-cured scratch coat using a flat steel trowel. Straightedge this layer to achieve a perfectly plumb and flat surface. This layer dictates the final wall geometry.
- Finish Coat (1/8" thick): Mix 1 part white Portland cement to 2 parts fine silica sand (passing a #30 sieve). Add a liquid acrylic fortifier (replacing 20% of the mixing water) to improve adhesion and flexibility. Trowel smooth or float for a textured finish.
Curing and Control Joint Spacing
Cement plaster requires continuous moist curing to develop full compressive strength and minimize plastic shrinkage. Mist the wall with a fine water spray twice daily for a minimum of 48 hours after each coat application. In high-wind or low-humidity environments, cover the wall with 4-mil polyethylene sheeting to trap ambient moisture.
If plaster panels exceed 150 square feet, or if the length-to-width ratio exceeds 3:1, thermal expansion and shrinkage will cause map cracking. Install zinc or PVC weep screeds at the base, and embed casing beads and control joints to compartmentalize the plaster field into manageable, stress-relieved panels.
Installation Protocol: Concrete Overlays (Micro-Toppings)
Priming and Base Coats
Concrete overlays (such as Ardex SD-T or Mapcrete Micro-Topping) bypass the multi-coat thickness of plaster, relying instead on advanced polymer chemistry for adhesion at ultra-thin depths. These systems are strictly for interior or protected exterior applications where a seamless, modern aesthetic is required.
- Primer Application: Roll a two-part epoxy primer or a specialized acrylic bonding agent onto the CSP-profiled substrate. Broadcast 20-30 mesh silica sand into the wet primer at a rate of 1 lb per 10 sq. ft. to create a high-friction anchoring surface. Vacuum loose sand after the primer cures (typically 12-16 hours).
- Base/Skim Coat: Mix the polymer-modified overlay with its specific liquid additive (never use plain water unless specified). Apply at 1/16" to 1/8" thickness using a flexible stainless-steel squeegee or a magic trowel. The polymer content allows the material to be featheredged to zero without curling or cracking at the margins.
Sealing and Chemical Protection
Unlike plaster, which cures to a naturally durable state, concrete overlays are highly porous and require immediate chemical sealing to prevent staining and water ingress. Within 24 hours of the final trowel pass, apply a penetrating lithium silicate densifier to harden the surface. Follow this with two coats of a high-solids, aliphatic polyurethane sealer (e.g., Euclid Chemical EverClear). Aliphatic polyurethanes provide UV stability, ensuring the overlay does not yellow or chalk when exposed to interior sunlight.
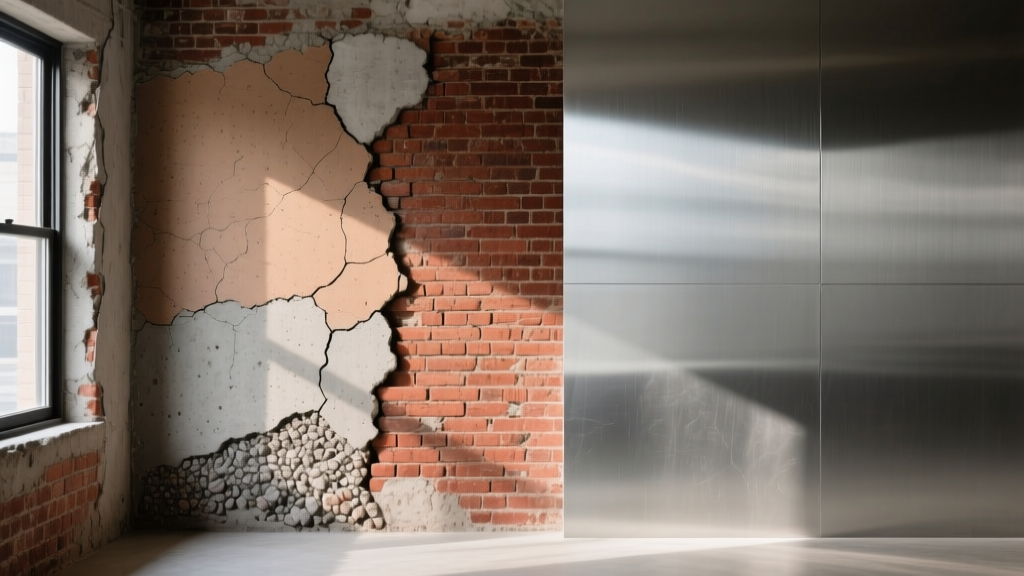
Troubleshooting Common Installation Defects
Cause (Plaster): Applying the brown coat over a completely dry scratch coat, which sucks the moisture out of the new layer before hydration occurs.
Fix: Always damp-cure the scratch coat and mist it immediately before applying subsequent layers. Tap the wall with a hammer; hollow areas must be chipped out and patched.
Cause (Overlay): Outgassing from the concrete substrate pushing through the thin overlay during the curing window.
Fix: Apply the overlay during the cooling part of the day when the substrate temperature is dropping, which reverses the vapor drive and pulls air into the slab rather than pushing it out.
Cost and Labor Breakdown (2026 Estimates)
Project budgeting requires accounting for both material density and labor intensity. Plaster is material-heavy but relies on lower-cost raw ingredients and standard masonry labor. Overlays utilize expensive proprietary polymers but require significantly less material volume, though the labor demands highly skilled decorative finishers.
| Cost Factor | Cement Plaster (3-Coat) | Concrete Overlay (Micro-Topping) |
|---|---|---|
| Material Cost (per sq. ft.) | $0.45 - $0.80 | $2.50 - $4.50 |
| Labor Cost (per sq. ft.) | $3.50 - $6.00 | $6.00 - $11.00 |
| Total Installed Cost | $3.95 - $6.80 / sq. ft. | $8.50 - $15.50 / sq. ft. |
| Installation Time (1,000 sq. ft.) | 5 - 7 days (including curing) | 3 - 4 days (including sealing) |
Ultimately, the decision between plaster and concrete overlays hinges on the project's performance requirements. Specify cement plaster for exterior durability, high-moisture environments, and substrates requiring substantial leveling. Reserve polymer-modified concrete overlays for high-end interior applications where ultra-thin profiles, seamless integration, and specific decorative finishes are paramount.
Written by
Sarah WhitfieldSarah Whitfield is a chartered quantity surveyor (MRICS) and construction cost analyst with 15 years of experience in material pricing, procurement strategy, and project budgeting. She earned her degree in Construction Management from the University of Reading (UK) and has worked on projects ranging from $2M custom homes to $180M mixed-use developments across North America and Europe. Sarah currently leads cost estimating for BuildMat Insight, maintaining a proprietary database of 4,000+ material price points updated quarterly. She is a frequent contributor to RSMeans cost data panels and has presented at the International Cost Engineering Council (ICEC) congress. Based in Denver, CO, Sarah is an avid trail runner and volunteer mentor for Women in Construction.
More from Sarah Whitfield
View all
Wood & Lumber
What Are the Different Types of Wood? A Builder's Guide
Compare structural softwoods, finish hardwoods, and engineered lumber. Analyze Janka ratings, MOE values, and 2026 pricing for construction.
Aug 4, 2026
Walls & Panels
Steel Framing vs Wood Framing: Corrosion and Moisture Defense
Compare steel framing vs wood framing for moisture resistance. Learn about galvanized coatings, condensation risks, and corrosion protection strategies.
Jul 21, 2026

Stone & Masonry
How to Cut Stone Veneer: Wet Saw vs Grinder Comparison
Compare the best tools for cutting stone veneer. We review wet saws, angle grinders, and chop saws to help you achieve clean, chip-free cuts.
Jul 21, 2026