Concrete Tile vs Clay Tile Roof: Installation & Structural Guide
Compare concrete tile vs clay tile roof installation. Explore structural load specs, cutting techniques, fastening patterns, and 2026 labor costs.

Structural Load-Bearing Prerequisites
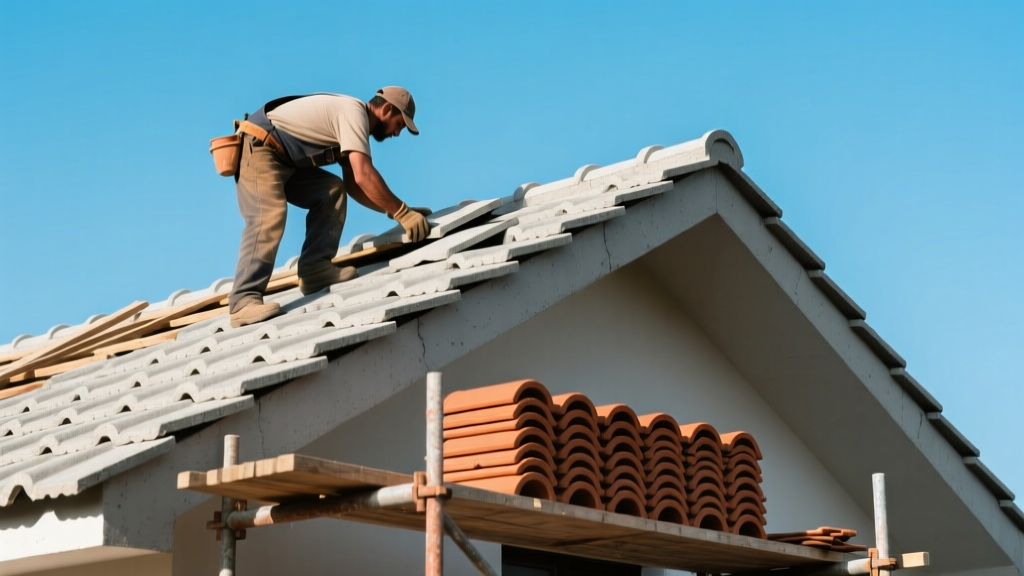
Before unloading a single pallet, the fundamental divergence between a concrete tile vs clay tile roof installation dictates structural engineering requirements. The dead load imposed on the roof trusses is the primary limiting factor for retrofit projects and a critical sizing metric for new construction.
Standard profile concrete tiles typically weigh between 9.5 and 11.0 pounds per square foot (psf), translating to roughly 950 to 1,100 pounds per roofing square (100 square feet). In contrast, standard clay tiles are lighter, generally ranging from 6.5 to 9.0 psf (650 to 900 pounds per square). While both materials are significantly heavier than asphalt shingles (which average 2.5 to 4.0 psf), the 20% to 30% weight penalty of concrete requires explicit verification by a structural engineer.
According to guidelines published by the Tile Roofing Institute, the structural framing must also account for localized snow loads and seismic shear forces, which compound the baseline dead load of the heavier concrete profiles.
Material Handling and Cutting Protocols
The physical composition of the tiles demands entirely different cutting and handling protocols on the job site. Concrete tiles are a composite of Portland cement, sand, and water, cured to a high compressive strength. Clay tiles are kiln-fired terra cotta, making them highly brittle with a crystalline structure prone to micro-fractures.
Cutting Concrete: Dust Mitigation and Blade Selection
Cutting concrete tiles on-site generates respirable crystalline silica dust. Under current OSHA silica regulations, dry cutting concrete without a HEPA vacuum attachment or water suppression system is a severe compliance violation. Installers must use a 10-inch or 12-inch wet saw equipped with a continuous-rim diamond masonry blade. The water suppression not only eliminates hazardous dust but also prevents the diamond matrix from overheating and glazing, ensuring clean, square cuts that maintain the integrity of the tile's interlocking water channels.
Cutting Clay: Preventing Micro-Fractures
Clay tiles do not pose the same silica dust hazard as concrete, but their brittleness requires specialized handling. Using a standard toothed masonry blade on clay will cause aggressive chipping along the cut edge, destroying the aesthetic finish and compromising the side-lap seal. Installers must use a specialized carbide-tipped scoring tool or a continuous-rim diamond blade designed specifically for ceramics. Cuts should be scored deeply on the top face and snapped, or cut slowly with minimal downward pressure to prevent the tile from shattering under the saw's torque.
Deck Preparation, Underlayment, and Battens
Both systems rely on the underlayment as the primary water barrier, while the tiles themselves act as a weather-shedding cladding. However, the porosity of the materials influences the underlayment and batten strategy.
Concrete is inherently more porous than kiln-fired clay. During wind-driven rain events, capillary action can draw moisture through the body of a concrete tile. Therefore, installations in high-precipitation climates require a high-tensile synthetic underlayment (minimum 50-mil thickness) rather than traditional #30 felt, which degrades faster under the retained moisture of concrete tiles. The Portland Cement Association notes that proper ventilation beneath concrete tiles is critical to allow absorbed moisture to evaporate, preventing the degradation of the roof deck.
Batten systems must be constructed using minimum 1x2 or 2x4 pressure-treated lumber. For concrete tiles, the battens must be installed with a 1/2-inch gap every 4 feet to allow lateral water drainage down the roof deck. If solid battens are used, a batten-sealer or eave closure must be installed to prevent wind-blown debris and pests from entering the sub-tile cavity, while still permitting airflow.
Fastening Patterns and Wind Uplift Resistance
The mechanical attachment of the tiles is where installation labor and material costs diverge most sharply. Both materials must comply with ASTM D7158 for wind resistance, but their mass and structural integrity dictate different fastener types.
- Concrete Fastening: Due to their higher mass, concrete tiles rely heavily on gravity. In standard wind zones (up to 110 mph), a single 8d or 10d corrosion-resistant ring-shank nail driven through the pre-punched nail hole is often sufficient, combined with a tile clip at the tail. In High-Velocity Hurricane Zones (HVHZ), two nails per tile and structural adhesive at the overlaps are mandatory.
- Clay Fastening: Clay tiles are lighter and more susceptible to wind uplift. They almost universally require two fasteners per tile in moderate-to-high wind zones. Because clay is brittle, over-driving a nail will crack the tile's nailing flange. Installers must use pneumatic nail guns calibrated to a precise PSI (usually 60-80 PSI) so the nail head sits flush without fracturing the terra cotta. Alternatively, self-tapping stainless steel screws with neoprene washers are increasingly preferred for clay to eliminate the impact shock of nail guns.
Installation Comparison Matrix
| Specification | Concrete Tile | Clay Tile |
|---|---|---|
| Dead Load (psf) | 9.5 - 11.0 lbs | 6.5 - 9.0 lbs |
| Primary Cutting Tool | 10" Wet Saw (Diamond Blade) | Carbide Scorer / Ceramic Diamond Blade |
| Standard Fastening | 1 Nail + Tail Clip | 2 Nails or Screws |
| Moisture Absorption | Moderate (Requires Ventilation) | Very Low (Impervious) |
| Fragility During Install | Low (High Impact Resistance) | High (Prone to Edge Chipping) |
Troubleshooting Common Installation Failures
Improper installation techniques manifest differently across the two materials. Recognizing these specific failure modes allows project managers to enforce correct protocols during the build.
Concrete: Efflorescence and Capillary Leakage
The Symptom: White, powdery streaks appearing on the tile surface within the first six months, or water staining on the interior ceiling directly beneath side-laps.
The Cause: Efflorescence occurs when water dissolves soluble salts within the concrete matrix and deposits them on the surface as it evaporates. While structurally harmless, it is aesthetically unacceptable to clients. Capillary leakage occurs when tiles are installed with insufficient headlap (minimum 2 inches required) or when debris blocks the sub-tile drainage channels.
The Fix: Apply a breathable, silane-based penetrating sealer to the concrete tiles post-installation to reduce water absorption without trapping internal moisture. Ensure batten gaps are clear of mortar droppings.
Clay: Flange Blowouts and Glaze Crazing
The Symptom: Tiles cracking horizontally near the nail hole, or the glossy glaze developing a spiderweb pattern (crazing) shortly after installation.
The Cause: Flange blowouts are caused by installers using excessive air pressure on pneumatic nailers, shattering the brittle nailing flange. The tile may hold initially but will slip out of alignment under thermal expansion. Glaze crazing is caused by thermal shock—installing dark-glazed clay tiles on a hot deck and then exposing them to sudden cold rain, or using incompatible rigid mortars at the ridge caps that do not flex with the clay's thermal expansion rate.
The Fix: Mandate the use of self-drilling stainless steel screws with flexible neoprene washers instead of nails. Specify flexible, polymer-modified ridge sealants rather than rigid Portland cement mortars for hip and ridge caps.
2026 Labor and Material Cost Breakdown
The financial outlay for these two systems reflects their manufacturing complexity and installation labor intensity. As of 2026, regional labor rates and supply chain logistics heavily influence the final square-foot cost.
Concrete Tile Roofing:
Material costs range from $3.50 to $6.00 per square foot, depending on the profile (flat vs. S-curve) and color integration. Installation labor, including synthetic underlayment, battens, and mechanical fastening, averages $8.00 to $12.00 per square foot. Total installed cost: $11.50 to $18.00 per square foot.
Clay Tile Roofing:
Material costs are significantly higher, ranging from $8.00 to $15.00 per square foot, with imported or custom-glazed profiles exceeding $20.00. Installation labor is more expensive due to the slower handling, precise cutting, and dual-fastener requirements, averaging $12.00 to $16.00 per square foot. Total installed cost: $20.00 to $31.00 per square foot.
When evaluating a concrete tile vs clay tile roof, the decision ultimately hinges on the structural capacity of the framing and the project's budget ceiling. Concrete offers superior impact resistance and lower material costs, while clay provides an unmatched, impervious lifespan with zero efflorescence risk, provided the installation crew adheres strictly to low-impact fastening protocols.
Written by
Marcus ChenMarcus Chen is a licensed structural engineer (PE) and building materials analyst with over 12 years of experience across residential, commercial, and industrial construction. He holds a Master of Science in Civil Engineering from UC Berkeley and spent six years at Thornton Tomasetti before transitioning to independent consulting and technical writing. Marcus specializes in material selection for seismic-prone regions, concrete reinforcement strategies, and lifecycle cost analysis. His work has been cited by the American Concrete Institute (ACI) and the Structural Engineers Association of California (SEAOC). When he is not on a job site or at his desk, you will find him hiking the Sierra Nevada or restoring a 1920s craftsman bungalow in Oakland, CA.
More from Marcus Chen
View all
Construction Cost
How Much Did the Eiffel Tower Cost to Build?
How much did the Eiffel Tower cost to build in 1889? We adjust for inflation and compare its budget to modern skyscraper construction.
Aug 4, 2026

Fire Resistance
What Is a Fire Resistant Material? Testing & Certification Guide
Discover what is a fire resistant material through ASTM and UL testing. Learn how fire ratings, certifications, and assemblies work in construction.
Aug 4, 2026

Construction Cost
How Much Did the Burj Khalifa Cost to Build?
How much did the Burj Khalifa cost to build? We break down the $1.5B project and extract 5 money-saving strategies for your next build.
Jul 30, 2026