Concrete vs Mortar Mixer: Setup & Installation Guide
Master the concrete vs mortar mixer debate. Learn job site setup, mechanical differences, material applications, and safety protocols for masonry installs.

The Mechanical Divide: Tumbling vs. Shearing Physics
When planning a masonry or flatwork project, the 'concrete vs mortar mixer' debate is not merely a matter of semantics; it is a fundamental question of mechanical physics. Using the incorrect mixer for your specific installation material will result in ruined batches, compromised structural integrity, and catastrophic equipment failure. Understanding the mechanical divide between these two machines is the first step in proper job site setup.
Drum Mixers (Concrete Applications)
Concrete mixers utilize a rotating drum equipped with fixed internal spiral blades. As the drum spins, the blades lift the heavy mixture of cement, sand, water, and coarse aggregate (typically 3/4-inch gravel) to the top, allowing gravity to tumble it back down. This tumbling action is essential for evenly distributing coarse aggregate and preventing segregation in high-slump concrete mixes used for footings, slabs, and paver bases.
Paddle Mixers (Mortar Applications)
Mortar mixers feature a stationary horizontal trough with a rotating central shaft fitted with steel or heavy-duty rubber paddles. Because mortar contains no coarse gravel—only fine masonry sand, cement, and often hydrated lime—it requires a shearing and folding action rather than tumbling. The paddles aggressively shear the fine particles, ensuring the lime is fully hydrated and every grain of sand is encapsulated in the cementitious paste.
Never attempt to mix concrete containing gravel in a paddle mortar mixer. The coarse aggregate will wedge between the rotating paddles and the stationary trough. This will instantly snap the shear pins, strip the drive gears, and potentially burn out the electric motor. Conversely, mixing fine mortar in a drum mixer will result in a clumpy, poorly hydrated paste that fails to adhere to brick or block during installation.
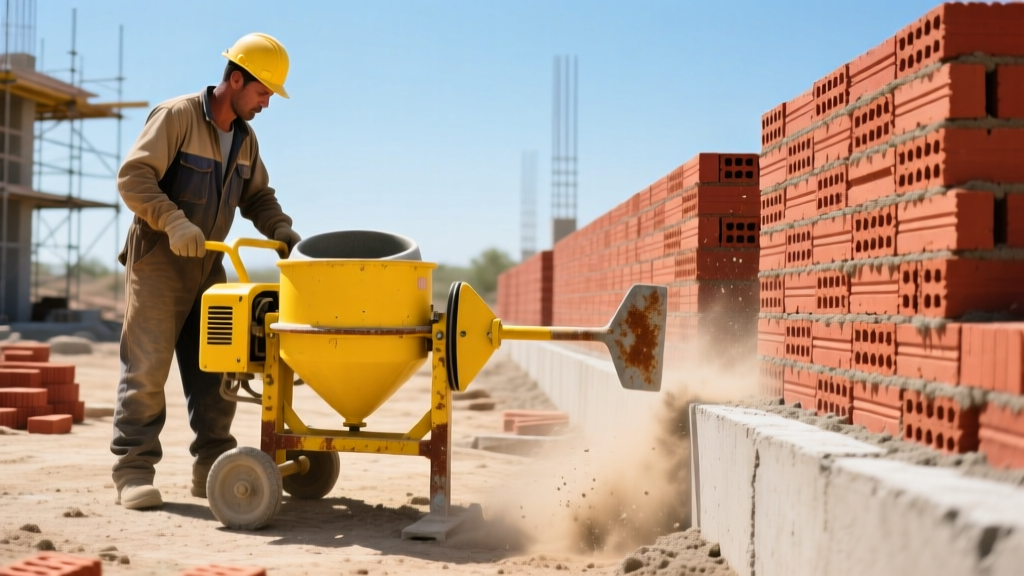
Job Site Setup and Power Infrastructure
Proper installation of the mixer on the job site dictates both operational efficiency and worker safety. Mixers generate significant vibration and torque; placing them on unstable ground leads to tipping hazards and inconsistent mixing angles.
Ground Preparation and Positioning
For soft or muddy terrain, install a base of 3/4-inch treated plywood or steel road plates to distribute the machine's footprint. The mixer must be leveled side-to-side to prevent the drum or trough from binding on its main bearings. Always engage wheel chocks on both sides of the axle, and ensure the discharge chute has a clear, unobstructed path to the wheelbarrow or mortar tub.
Power Matrix and Specifications
Selecting the right power source depends on your site infrastructure and the volume of your installation. Below is a comparison of standard industry workhorses for 2026 masonry and concrete installations.
| Specification | Kushlan 600DD (Concrete Drum) | Imer Workman II 130 (Mortar Paddle) |
|---|---|---|
| Mixing Action | Rotating Drum / Tumbling | Stationary Trough / Paddle Shearing |
| Batch Capacity | 6.0 cu. ft. (approx. 2-3 bags) | 9.0 cu. ft. (approx. 4-5 bags) |
| Power Requirement | 120V / 15A (Standard Outlet) | 120V / 15A or 240V (Dual Voltage) |
| Motor Output | 3/4 HP | 1.5 HP |
| Ideal Installation Use | Footings, Slabs, Paver Bases | Brick Veneer, CMU Block, Stone |
| Approximate Cost (2026) | $750 - $900 | $2,200 - $2,600 |
Material Installation Applications: Matching Mix to Method
The output of your mixer directly dictates the quality of your installation. Understanding how the mixed material behaves during the installation phase is critical for structural compliance.
Scenario A: Installing Brick Veneer and CMU Blockwork
When installing clay brick or concrete masonry units (CMU), you require Type N or Type S mortar. Type S offers higher compressive strength (minimum 1,800 PSI) and is mandated for below-grade blockwork and retaining walls. A paddle mortar mixer ensures the hydrated lime achieves maximum plasticity and water retention. This plasticity is what allows the mortar to 'hang' on the trowel and adhere to the vertical face of the brick without sagging out of the head joints during installation. If mixed in a drum mixer, the mortar will lack cohesion, leading to dried-out, crumbly joints that fail to bond to the masonry units.
Scenario B: Pouring Footings and Flatwork Slabs
For structural footings, patio slabs, and sidewalk pours, a standard 3,000 to 4,000 PSI concrete mix is required. This mix relies on the interlocking of 3/4-inch coarse aggregate for its compressive strength. The tumbling action of a drum mixer ensures the aggregate is suspended evenly throughout the cement paste. During installation, this prevents 'honeycombing' (voids in the concrete) when the material is vibrated into forms. According to guidelines published by the Brick Industry Association, ensuring the correct mortar type and consistency is just as critical for masonry longevity as the concrete footing it rests upon.
Step-by-Step Operation and Silica Dust Mitigation
Operating a mixer requires a strict sequence to protect the equipment and comply with federal safety regulations. Dry cement and sand generate respirable crystalline silica dust, a known carcinogen. The Occupational Safety and Health Administration (OSHA) strictly regulates silica exposure under standard 29 CFR 1926.1153. Proper mixing sequences inherently suppress this dust.
- Charge with Water First: Always add 80% of your required water to the drum or trough before adding dry materials. This creates a liquid bed that immediately captures silica dust upon contact, keeping it below the OSHA Permissible Exposure Limit (PEL) of 50 micrograms per cubic meter of air.
- Add Half the Dry Aggregate/Sand: Introduce half of your sand or gravel. This buffers the cement when it is added.
- Add the Cementitious Materials: Pour in your Portland cement, masonry cement, or lime. Because the water and sand are already agitating, dust generation is minimized.
- Add Remaining Dry Materials and Water: Introduce the rest of the sand/gravel, followed by the remaining water. Add water in small increments; it is impossible to remove water once a mix becomes too soupy.
- Mix to Uniformity: Allow the machine to mix for a minimum of 3 to 5 minutes after all materials are charged. The mix is ready when it exhibits a uniform color and consistent slump or plasticity.
For comprehensive health guidelines regarding silica exposure during masonry and concrete mixing, refer to the NIOSH Silica Topic Page, which outlines mandatory medical surveillance and respiratory protection protocols for operators.
End-of-Day Cleanup and Maintenance Protocols
Failure to clean a mixer immediately after the final batch will result in cured material that can permanently warp paddle blades or unbalance a concrete drum, leading to violent vibrations and bearing failure.
Mechanical vs. Chemical Cleaning
For paddle mortar mixers, never use a steel hammer or heavy chisel to chip cured mortar off the rubber or steel paddles; this will alter the blade pitch and reduce mixing efficiency. Instead, use a stiff-bristle brush and a high-pressure water nozzle immediately after use. For stubborn buildup, apply a diluted muriatic acid solution (1 part acid to 10 parts water), allow it to fizz for three minutes, and scrub. Always neutralize the acid with a baking soda and water solution before rinsing to prevent corrosion of the steel trough.
For drum concrete mixers, toss three gallons of water and a shovel full of coarse gravel into the drum. Let it tumble for 15 minutes. The gravel acts as an abrasive scrubber, knocking loose any semi-cured concrete from the internal spiral blades without damaging the steel. Dump the slurry into a designated washout pit—never into municipal drains or storm sewers—and grease the main drum bearings and drive chain with a lithium-based waterproof grease to ensure longevity for the next installation phase.
Written by
Elena RodriguezElena Rodriguez is a civil engineer and technical writer specializing in concrete technology, masonry systems, and ASTM/ACI compliance. She earned her B.S. in Civil Engineering from Texas A&M University and spent a decade at a materials testing laboratory, performing over 2,000 concrete compressive strength tests and masonry prism evaluations. Elena is an ACI-certified Field Testing Technician (Grade I) and a member of ASTM Committee C12 on Natural Building Stone. She currently consults on forensic engineering cases involving concrete failures and moisture intrusion. Based in San Antonio, TX, Elena is a proud member of the Society of Women Engineers (SWE) and coaches her daughter's FIRST Robotics team.
More from Elena Rodriguez
View all
Walls & Panels
Cost Analysis: Light Gauge Steel Framing Advantages and Disadvantages
Evaluate light gauge steel framing advantages and disadvantages through a strict cost analysis lens, comparing material, labor, and lifecycle expenses.
Aug 4, 2026

Walls & Panels
Gypsum Board Types: Exact Specifications, Thickness & Dimensions
Compare standard, Type X, and moisture-resistant gypsum board types. Get exact specifications, thicknesses, dimensions, and ASTM standards for your project.
Aug 4, 2026

Fire Resistance
Best Fire-Resistant Outdoor Decking Materials: 2026 Buyer Guide
Discover the best fire-resistant outdoor decking materials for 2026. Compare Class A PVC, aluminum, and hardwood options for WUI compliance and safety.
Aug 4, 2026