Gunite vs. Concrete Swimming Pools: Installation Guide
Compare gunite vs. concrete swimming pools with our installation guide. Learn structural specs, curing times, and 2026 build costs.

The Technical Distinction: Dry-Mix Gunite vs. Poured Concrete
When evaluating gunite vs. concrete swimming pools, the construction industry relies on precise nomenclature defined by the American Concrete Institute (ACI). 'Gunite' is a trademarked term for dry-mix shotcrete, where cement and sand are pneumatically projected through a hose, with water introduced only at the nozzle. 'Concrete' in pool construction typically refers to cast-in-place (poured) concrete utilizing traditional formwork, or occasionally wet-mix shotcrete. This guide focuses strictly on the installation protocols, structural differences, and application mechanics of pneumatic dry-mix gunite versus traditional poured-in-place concrete formwork.
Phase 1: Subgrade Preparation and Steel Reinforcement
Regardless of the application method, the structural skeleton of a pool shell requires identical preparation. The excavated subgrade must be compacted to a minimum 90% Proctor density to prevent differential settlement. Plumbing rough-ins (Schedule 40 or 80 PVC) are pressure-tested to 50 PSI before steel tying begins.
Rebar Framing Specifications
- Material: Grade 60, #4 (1/2-inch diameter) steel rebar is standard for residential shells; #5 (5/8-inch) is mandated for commercial pools or expansive clay soils.
- Spacing: Rebar must be tied in a continuous 12-inch by 12-inch on-center grid. Beam and bond beam areas require doubled or tripled horizontal bars.
- Clearance: A strict 3-inch clearance between the rebar grid and the soil subgrade must be maintained using concrete 'dobies' (spacer blocks). This ensures the steel is fully encapsulated in the concrete matrix, preventing ground moisture corrosion.
Installation Matrix: Application Methods Compared
The choice between gunite and poured concrete dictates the equipment, labor specialization, and timeline of the shell construction phase.
| Metric | Dry-Mix Gunite | Poured Concrete (Formwork) |
|---|---|---|
| Compressive Strength | 4,000 - 7,500+ PSI | 3,500 - 5,000 PSI |
| Application Speed | Rapid (1-2 days for standard shell) | Slow (3-5 days for form setting/pouring) |
| Formwork Required | No (uses earth and rebar as forms) | Yes (extensive plywood/aluminum forms) |
| Material Waste | 10-15% rebound (shatter) waste | < 5% waste |
| Design Flexibility | High (freeform, custom curves) | Low (restricted to straight lines/geometric) |
| Specialized Labor | Certified Nozzleman required | Carpenters and concrete finishers |
Phase 2: Pneumatic Gunite Application Protocol
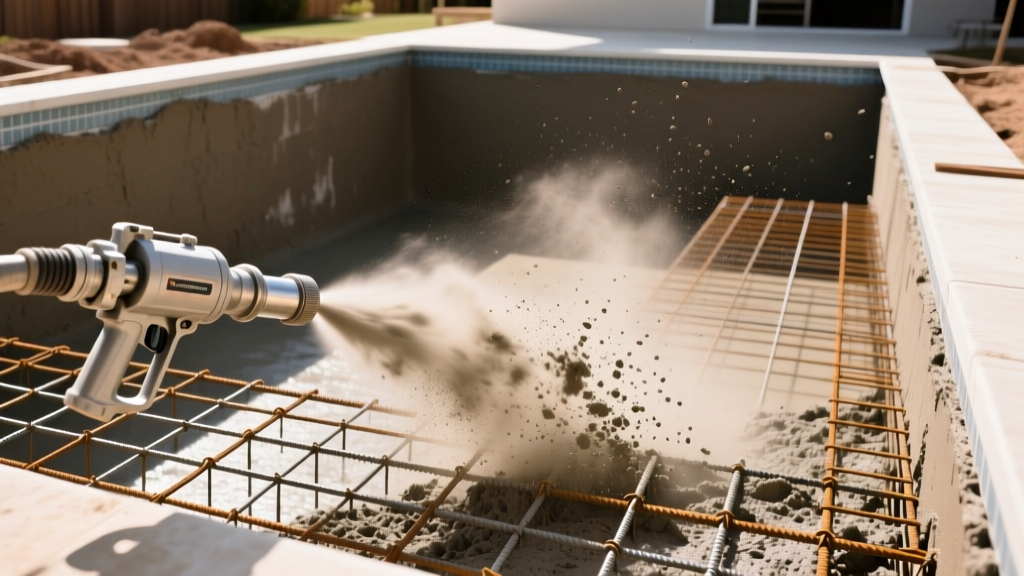
Gunite application relies heavily on the skill of the nozzleman. The American Shotcrete Association (ASA) mandates specific techniques to ensure structural integrity and minimize rebound.
- Equipment Calibration: The gunite machine is calibrated to deliver an air pressure of 80 to 100 PSI at the nozzle. The water ring at the nozzle tip is adjusted to achieve a water-cement ratio of approximately 0.40 to 0.45.
- Projection Angle and Distance: The nozzleman must hold the nozzle exactly perpendicular (90 degrees) to the receiving surface, maintaining a consistent distance of 3 to 4 feet. Angled spraying causes excessive rebound and weak structural layers.
- Layering Technique: Gunite is applied in 2-inch to 3-inch passes. The nozzleman uses a continuous circular or elliptical motion, overlapping previous passes by 50% to ensure uniform density.
- Rebound Management: As the dry mix impacts the rebar, the heavier aggregate bounces off while the cement paste adheres. This 'rebound' or 'shatter' falls to the pool floor. Critical Step: All rebound must be manually shoveled out of the pool immediately. Incorporating rebound into the shell creates porous, structurally deficient cold joints.
- Screeding and Shaping: Once the gunite reaches the desired thickness (typically 8 to 12 inches in coves, 6 to 8 inches on walls), finishers use screed boards and trowels to carve the final shell geometry while the material is still plastic.
Phase 2 Alternative: Cast-in-Place Poured Concrete
Poured concrete pools are predominantly used in commercial applications, rooftop pools, or highly specific architectural designs where soil retention is impossible.
- Formwork Erection: Carpenters construct rigid, double-sided forms using aluminum or high-density plywood, secured by steel snap ties spaced every 18 inches. Forms must be braced heavily to withstand the immense hydrostatic pressure of wet concrete.
- Pouring and Consolidation: Concrete is pumped into the forms. To prevent honeycombing (air voids), workers insert internal pencil vibrators (operating at 10,000 to 15,000 RPM) every 18 inches to consolidate the mix and force out trapped air.
- Cold Joint Prevention: The pour must be continuous. If a delay occurs, a structural cold joint forms. Unlike gunite, which can be seamlessly layered, poured concrete requires specialized waterstops and epoxy bonding agents at cold joints.
- Form Stripping and Patching: After 48 to 72 hours of initial curing, forms are stripped. The hundreds of snap tie holes left in the walls must be individually routed out and patched with non-shrink hydraulic cement to prevent future leaks.
Warning: The Danger of Shadowing
In both gunite and poured concrete applications, 'shadowing' occurs when material fails to flow completely behind the rebar, leaving a void between the steel and the earth. In gunite, this is prevented by maintaining high air pressure and the correct nozzle angle. In poured concrete, it is mitigated by using a highly fluid mix (slump of 6-8 inches) and rigorous internal vibration.
Curing Protocols and Structural Integrity
Concrete does not 'dry'; it cures through a chemical hydration process. Proper curing is non-negotiable for achieving target PSI ratings and preventing shrinkage cracking.
According to the Association of Pool & Spa Professionals (APSP), a pool shell must achieve a minimum 28-day compressive strength of 3,500 PSI before interior finishes (plaster, pebble, or tile) can be applied.
Gunite Curing
Because gunite is applied with a low water-cement ratio and exposed to the air, it requires aggressive moisture curing. The shell must be misted with water 2 to 3 times daily for a minimum of 7 days. In arid or high-wind climates, a liquid membrane curing compound (ASTM C309 compliant) is sprayed on immediately after the final troweling to lock in moisture.
Poured Concrete Curing
Poured concrete retains its mixing water within the forms. Once forms are stripped, the exposed surfaces must be kept continuously wet using burlap wraps or continuous drip systems for 7 days. Alternatively, a secondary application of curing compound is applied to the stripped walls.
2026 Installation Cost Breakdown
The financial divergence between gunite and poured concrete is driven primarily by labor and formwork materials. Below is the estimated 2026 cost breakdown for a standard 400-square-foot residential pool shell (excavation, steel, plumbing rough-in, and shell application only).
| Cost Category | Gunite Shell (400 sq ft) | Poured Concrete Shell (400 sq ft) |
|---|---|---|
| Excavation & Soil Haul | $6,500 - $9,000 | $6,500 - $9,000 |
| Steel & Plumbing | $8,000 - $11,000 | $8,000 - $11,000 |
| Formwork Materials/Labor | $0 | $14,000 - $22,000 |
| Concrete Material & Pump | $7,500 - $10,000 | $9,000 - $12,000 |
| Application Labor | $6,000 - $8,500 | $8,000 - $12,000 |
| Total Shell Cost | $28,000 - $38,500 | $45,500 - $66,000 |
Note: Poured concrete costs scale exponentially with complex geometries, whereas gunite costs remain relatively stable for freeform designs.
Troubleshooting Common Installation Failure Modes
Identifying and correcting installation errors during the shell phase prevents catastrophic failures post-completion.
- Delamination (Gunite): Occurs when rebound is trapped between layers or when the substrate is not properly pre-wetted before application. Fix: Sounding the shell with a hammer; hollow spots must be saw-cut, removed, and patched with structural epoxy mortar.
- Honeycombing (Poured): Visible rock pockets on the wall surface caused by inadequate vibration or overly stiff concrete mix. Fix: Chip out loose aggregate to a depth of 1 inch and trowel flush with a polymer-modified patching compound.
- Plastic Shrinkage Cracking: Micro-cracks appearing within hours of application due to rapid surface evaporation. Fix: Immediate application of a liquid curing compound and misting. Existing cracks must be routed and sealed with polyurethane injection resin before plastering.
Written by
James ThorntonJames Thornton is a construction industry veteran with 25 years of hands-on experience in wood framing, lumber grading, and residential building codes. He started as a framing carpenter in rural Oregon, earned his ICC Residential Building Inspector certification, and eventually became a senior plan reviewer for the City of Portland Bureau of Development Services. James holds a B.S. in Wood Science & Technology from Oregon State University and is a certified lumber grader through the West Coast Lumber Inspection Bureau (WCLIB). He has inspected over 3,000 residential construction sites and authored the city's internal guide on advanced framing techniques (2x6 at 24" O.C.). James lives in Bend, OR, where he builds custom timber-frame cabins and competes in lumberjack sports.
More from James Thornton
View all
Insulation
Best Home Insulation Materials: Complete 2026 Guide
Compare top home insulation materials for 2026. Find R-values, installed costs per square foot, and best uses for fiberglass, spray foam, and mineral wool.
Aug 4, 2026

Sustainable Building
Certify Your Green Building Material for LEED and WELL
Step-by-step guide to certifying a green building material for LEED v5 and WELL v2. Master EPDs, HPDs, and VOC limits for 2026 project specifications.
Aug 4, 2026

Stone & Masonry
Veneer Stacked Stone Panels: Interior Design & Style Showcase
Discover how veneer stacked stone panels transform interiors. Explore modern design profiles, material pairings, and technical installation specs.
Aug 4, 2026