Gypcrete vs Concrete Repair: Fixing Cracks & Moisture
Learn how to troubleshoot and repair gypcrete vs concrete subfloors. Expert protocols for moisture testing, crack injection, and patching.

The Chemistry of Failure: Why Repair Protocols Diverge
Treating a gypsum concrete (gypcrete) underlayment with traditional Portland cement repair methods is one of the most common and costly mistakes in flooring restoration. The divergence in repair protocols stems from fundamental chemical differences. Traditional concrete relies on calcium silicate hydrate (C-S-H) bonds, creating a highly alkaline (pH 12-13), structural matrix. Gypcrete, composed of calcium sulfate hemihydrate, cures into a non-structural, pH-neutral (pH 6-8) matrix that is inherently vulnerable to prolonged moisture exposure.
When cementitious patching compounds are applied directly over unsealed gypcrete, the Portland cement aggressively pulls residual moisture from the gypsum. This starves the gypsum of the water it needs to maintain its crystalline structure, leading to rapid chalking, powdering, and ultimate delamination of the floor covering above. According to the Gypsum Association, gypcrete must be treated as a specialized underlayment, requiring strict moisture management and compatible, non-alkaline repair compounds.
Diagnostic Field Tests: Confirming Your Substrate
Before selecting a repair methodology, you must definitively identify the substrate. In multi-family residential or commercial renovations, documentation is often lost. Use these three field tests to differentiate the materials:
- The Water Drop Test: Place a 2-inch puddle of water on the bare floor. On traditional concrete, the water will bead or absorb slowly. On gypcrete, the water will absorb rapidly and darken the surface significantly within 60 seconds. Prolonged pooling (over 10 minutes) will soften the gypcrete surface, allowing you to scrape it with a putty knife.
- The Scratch Hardness Test: Drag a flathead screwdriver across the surface with moderate pressure. Concrete will resist scratching or yield only a faint metallic mark. Gypcrete will yield a distinct, chalky groove with minimal effort.
- The Core Color Test: Chip a small piece from an inconspicuous edge. Concrete reveals a dense, gray, granular interior with visible aggregate. Gypcrete reveals a lighter, almost white or tan, uniform, and porous interior.
Troubleshooting Gypcrete (Gypsum Concrete) Failures
Symptom: Surface Dusting, Chalking, and Powdering
Cause: Gypcrete requires a specific water-to-gypsum ratio during the initial pour. If the mix was too wet, or if the surface was over-troweled, a weak layer of laitance forms. Additionally, ambient humidity above 60% during curing can prevent proper crystallization.
Repair Protocol:
- Mechanically abrade the surface using a planetary grinder equipped with 40-grit diamond segments to remove the weak laitance layer.
- Vacuum the substrate completely; do not use water to clean the dust.
- Apply a consolidating primer designed specifically for gypsum substrates, such as ARDEX P 51 or Custom Building Products LevelQuik Primer. These primers penetrate the porous gypsum and bind the loose particles without introducing excess alkalinity.
- Allow the primer to dry to a clear, tacky finish (typically 1 to 3 hours) before applying a gypsum-compatible self-leveling underlayment (SLU) if resurfacing is required.
Symptom: Soft Spots and Substrate Crushing
Cause: Chronic moisture intrusion from plumbing leaks or inadequate vapor barriers beneath the slab. Gypsum loses its compressive strength when saturated.
Repair Protocol: You cannot patch structurally compromised gypcrete with liquid fillers. The damaged section must be removed.
- Score a perimeter around the soft spot using a walk-behind concrete saw set to the exact depth of the gypcrete pour (typically 0.75 to 1.5 inches) to avoid cutting into the structural wood or concrete deck below.
- Break out the damaged gypsum using a rotary hammer with a chisel bit.
- Prime the exposed edges and the subfloor with the manufacturer-specified primer.
- Repour the cavity using a high-compressive-strength gypsum underlayment like Maxxon Gyp-Crete 2000 or Hacker Industries Gyp-Span. Trowel flush with the surrounding floor.
Troubleshooting Portland Cement Concrete Failures
Symptom: Active Shrinkage Cracking
Cause: Improper control joint spacing, high water-to-cement ratio during the original pour, or rapid drying conditions. Unlike gypcrete, which is poured over a structural deck, concrete slabs-on-grade are subject to tensile stresses from soil settlement and thermal expansion.
Repair Protocol:
- Route the crack using a crack-chasing blade on an angle grinder to create a V-shaped groove (minimum 1/4 inch wide).
- Clean the groove with compressed air to remove silica dust.
- Inject a low-viscosity, high-modulus epoxy such as Sikadur-35 Hi-Mod LV. This restores the structural tensile strength of the slab, effectively welding the crack back together.
- Grind the surface flush once the epoxy has achieved full cure (usually 12-24 hours).
Symptom: Surface Spalling and Scaling
Cause: Freeze-thaw cycles in exterior or unconditioned spaces, or finishing the slab while bleed water was still present on the surface, trapping water beneath a dense crust.
Repair Protocol: Scarify the spalled area to a depth of at least 1/2 inch. Apply a bonding agent (e.g., Mapei Planicrete AC) and resurface with a polymer-modified cementitious overlay. The polymers provide flexibility and freeze-thaw resistance that standard concrete lacks.
The Moisture Trap: ASTM Testing Requirements
Moisture is the primary adversary for both materials, but the testing thresholds and implications differ. The American Concrete Institute (ACI) and flooring manufacturers mandate strict moisture testing before any repair or floor covering installation.
| Test Method | Gypcrete Threshold | Concrete Threshold | Primary Use Case |
|---|---|---|---|
| ASTM F2170 (In-situ RH Probe) | Max 75% RH (varies by adhesive) | Max 75% - 85% RH | Measures internal moisture deep within the slab or underlayment. The industry gold standard. |
| ASTM F1869 (Calcium Chloride) | Not Recommended | Max 3 to 5 lbs / 1,000 sq ft / 24 hrs | Measures moisture vapor emission rate (MVER) at the surface. Often invalidated by ambient room conditions. |
Expert Insight: Gypcrete dries much faster than traditional concrete. A 1.5-inch gypcrete pour can reach acceptable RH levels in 14 to 21 days under optimal conditions, whereas a 4-inch concrete slab-on-grade may require 60 to 90 days. However, if a gypcrete slab fails an ASTM F2170 test after 30 days, it almost always indicates an active moisture intrusion issue from below, as the material itself should have fully off-gassed.
Repair Material Compatibility Matrix
Selecting the wrong patching compound guarantees repair failure. Use this matrix to ensure chemical compatibility between your substrate and your repair materials.
| Repair Material Type | Use on Gypcrete? | Use on Concrete? | Notes & Required Prep |
|---|---|---|---|
| Standard Portland Cement Patch | NO | YES | Alkalinity will degrade gypsum. Requires no primer on concrete. |
| Gypsum-Based Patch (e.g., Maxxon) | YES | NO | Lacks compressive strength for structural concrete repairs. |
| Epoxy Injection Resin | CAUTION | YES | Can be used on gypcrete only if completely dry; traps moisture if damp. |
| Polyurethane Self-Leveler | YES | YES | Excellent moisture tolerance. Requires specific manufacturer primer for both. |
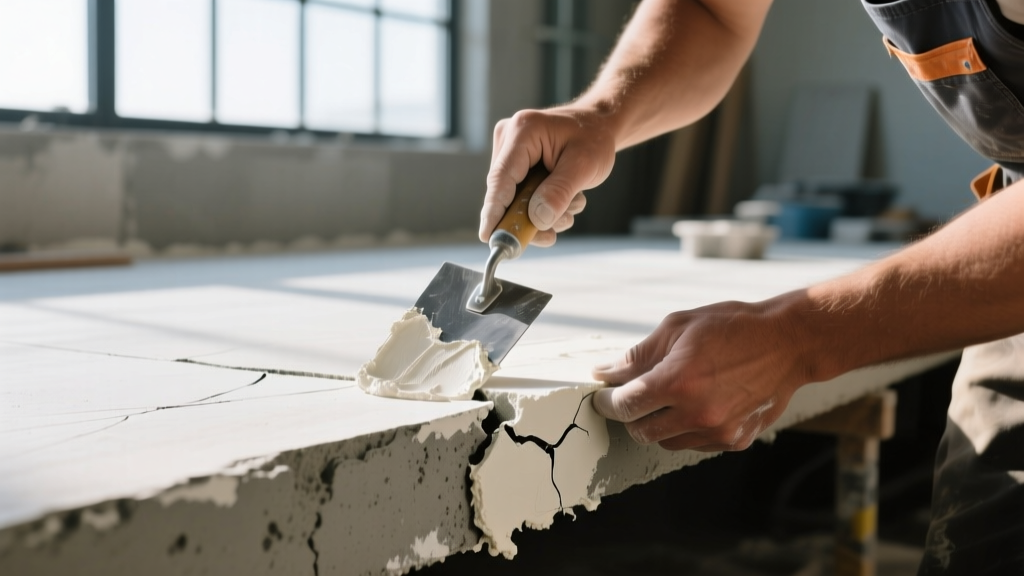
2026 Repair Cost Estimates
Budgeting for subfloor remediation requires understanding the labor intensity of each material. Gypcrete repairs are generally more expensive per square foot due to the specialized materials and the necessity of mechanical dust extraction, while concrete repairs often involve heavier machinery but cheaper raw materials.
- Gypcrete Surface Consolidation (Grinding & Priming): $1.25 to $2.50 per sq. ft. Includes diamond grinding, HEPA vacuuming, and application of a high-solids acrylic or polyurethane primer.
- Gypcrete Sectional Replacement: $4.00 to $7.50 per sq. ft. Highly dependent on the depth of the pour and accessibility for pumping the new gypsum slurry.
- Concrete Crack Routing and Epoxy Injection: $8.00 to $15.00 per linear foot. Driven by labor rates for precision saw-cutting and the high cost of structural epoxies.
- Concrete Slab Scarification and Overlay: $3.50 to $6.00 per sq. ft. Includes shot-blasting or scarifying the existing surface and applying a 1/2-inch polymer-modified overlay.
Successfully navigating the differences between gypcrete and concrete repairs requires strict adherence to material chemistry. By correctly identifying the substrate, enforcing rigorous ASTM moisture testing, and selecting chemically compatible patching compounds, you eliminate the primary vectors for flooring failure and ensure a stable, long-lasting subfloor.
Written by
David NakamuraDavid Nakamura is a licensed architect (AIA) and construction technology writer focused on sustainable building methods, mass timber engineering, and high-performance building envelopes. He holds a Master of Architecture from the University of Washington and is a certified Passive House Consultant (CPHC). David spent eight years at the Seattle firm Mithun, where he led the design of three LEED Platinum projects, before founding his own practice specializing in net-zero residential design. He serves on the editorial advisory board of GreenBuilder Magazine and has authored peer-reviewed papers on cross-laminated timber (CLT) connections for the Journal of Structural Engineering. In his spare time, David teaches woodworking at Pratt Fine Arts Center and kayaks the Puget Sound.
More from David Nakamura
View all
Construction Cost
Labor Cost to Build a Deck Per Sq Ft: 2026 Installation Guide
Discover the exact labor cost to build a deck per sq ft in 2026. This installation guide breaks down contractor rates, complexity factors, and hidden fees.
Aug 4, 2026

Construction Cost
How Much Does It Cost to Build a 3 Bedroom House? Financing Guide
Learn exactly how much it costs to build a 3 bedroom house and explore 2026 financing options, construction loan types, and budget frameworks for your build.
Aug 4, 2026

Construction Cost
Cost to Build a Tennis Court: 2026 Guide
How much does it cost to build a tennis court in 2026? Breakdowns for asphalt, concrete, and synthetic surfaces plus fencing and lighting.
Jul 30, 2026