Installation Guide to the Main Types of Concrete Slab Foundations
Master the installation of various types of concrete slab foundations. Learn site prep, rebar specs, post-tensioning, and curing protocols.

Selecting and installing the correct foundation is the most critical structural decision in any building project. The various types of concrete slab foundations—ranging from standard slab-on-grade to complex post-tensioned systems—require distinctly different installation protocols, soil preparations, and curing methodologies. A failure in the subgrade or reinforcement phase will manifest as differential settlement or structural cracking within the first five years. This guide provides field-tested installation procedures, material specifications, and engineering tolerances for the primary slab foundation systems used in modern construction.
Decision Matrix: Matching Slab Types to Site Conditions
Before breaking ground, match the foundation type to the geotechnical report. The table below outlines the installation parameters and 2026 cost baselines for the four primary slab systems.
| Foundation Type | Ideal Soil / Climate | Min. Thickness | Avg. Cost (2026) | Primary Installation Challenge |
|---|---|---|---|---|
| Standard Slab-on-Grade | Stable soils, warm climates, low frost line | 4 inches (6" for heavy loads) | $5.00 - $8.00 / sq ft | Preventing plastic shrinkage cracking during pour |
| T-Shaped (Frost Wall) | Cold climates, deep frost lines (>32 inches) | 4-inch slab, 12-24" footings | $8.00 - $12.00 / sq ft | Forming and pouring multi-stage concrete lifts |
| Frost-Protected Shallow (FPSF) | Cold climates, high water tables, expansive soils | 4-inch slab, 12-16" grade beam | $7.00 - $10.00 / sq ft | Protecting rigid foam insulation during backfill |
| Post-Tensioned Slab | Expansive clays, high plasticity index (PI > 25) | 5 to 8 inches (with ribs) | $9.00 - $14.00 / sq ft | Precise tendon stressing and grouting sequences |
Phase 1: Subgrade Engineering and Site Preparation
Regardless of the slab type, the subgrade must provide uniform support. A common failure mode is differential settlement caused by uncompacted fill soil or organic topsoil left beneath the slab.
- Excavation: Remove all topsoil and organic material to a minimum depth of 12 inches below the finished subgrade elevation.
- Compaction: The subgrade must be compacted to a minimum of 95% Standard Proctor density (per ASTM D698). Use a vibratory plate compactor for granular soils and a sheepsfoot roller for cohesive clays.
- Capillary Break: Install a 4-inch to 6-inch layer of crushed gravel (3/4-inch minus) over the compacted subgrade. This layer acts as a capillary break to prevent ground moisture from wicking into the concrete and provides a stable working surface.
- Moisture Conditioning: The subgrade should be uniformly moist (not saturated) before pouring. A dry subgrade will rapidly absorb water from the concrete mix, causing premature plastic shrinkage and weakening the bottom crust of the slab.
Phase 2: Standard Slab-on-Grade Installation Sequence
The standard slab-on-grade is the most ubiquitous of the types of concrete slab foundations. Precision in formwork and vapor barrier installation is non-negotiable.
1. Formwork and Vapor Retarders
Set 2x4 or 2x6 dimensional lumber or engineered steel forms, staked every 3 feet. Verify elevation with a laser level. Over the gravel base, install a continuous 15-mil or 20-mil cross-laminated polyethylene vapor barrier (compliant with ASTM E1745). Tape all seams with 4-inch vapor barrier tape. Do not puncture the barrier with rebar chairs; use sand mounds or specialized concrete-tipped stands to elevate the steel.
2. Reinforcement Placement
For residential and light commercial slabs, use a 6x6 W1.4xW1.4 welded wire mesh (WWM) or #4 (1/2-inch) rebar spaced at 16 inches on-center in a grid pattern. The reinforcement must be positioned in the upper third of the slab thickness to resist tensile forces from shrinkage and surface loading. Pull the mesh up during the pour using a rake, or use continuous bolsters to maintain the correct depth.
3. The Pour and Strike-Off
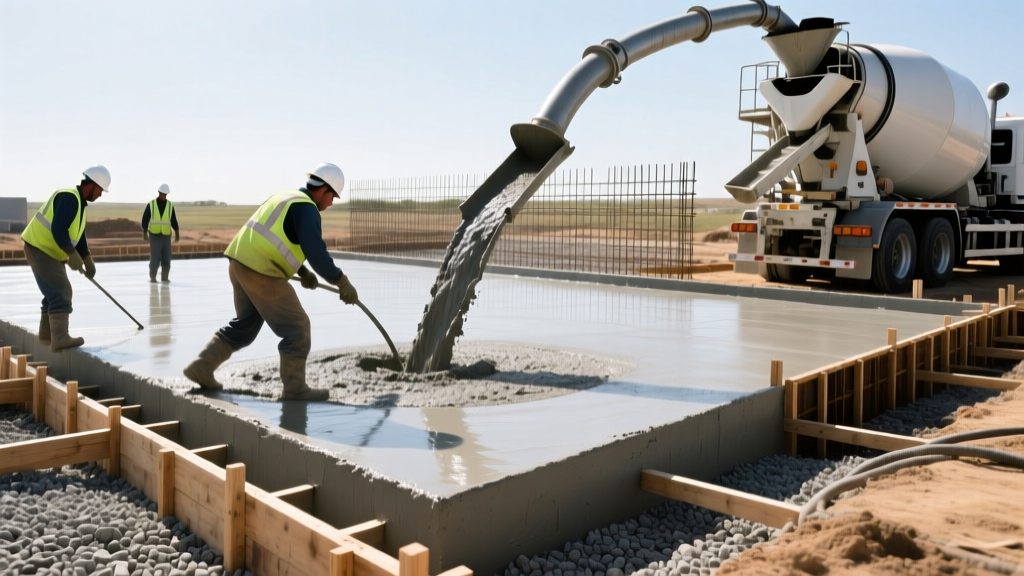
Order concrete with a minimum compressive strength of 3,000 PSI to 4,000 PSI at 28 days, with a maximum water-cement ratio (w/c) of 0.45 to 0.50. Avoid adding water on-site to increase slump; use a mid-range water reducer (plasticizer) instead. Strike off the concrete using a vibratory screed to ensure consolidation and a level surface.
Do not pour if the evaporation rate exceeds 0.2 lb/ft²/hr. High winds (>15 mph), low humidity, and high ambient temperatures will cause plastic shrinkage cracking before finishing even begins. Use temporary windbreaks and apply an evaporation retardant (like Alkyl Alcohol-based sprays) immediately after strike-off if conditions are marginal.
Phase 3: Specialized Installation: Post-Tensioned Slabs
When dealing with highly expansive soils, post-tensioned (PT) slabs are the superior choice among the types of concrete slab foundations. According to the Post-Tensioning Institute (PTI), PT slabs use high-strength steel tendons to compress the concrete, actively counteracting the tensile stresses caused by soil movement.
Tendon Layout and Pouring
PT tendons (typically 270 ksi, 0.5-inch diameter strands encased in a plastic sheath) are laid out in a banded pattern under load-bearing walls and a uniform grid in the slab field. Tendons must be securely tied to chairs to prevent floating during the concrete pour. The concrete must reach a minimum compressive strength of 2,500 PSI (verified via field-cured cylinder tests) before stressing can begin.
The Stressing Sequence
Using a calibrated hydraulic jack, stress the tendons to the engineered specifications (typically 33,000 lbs of force per tendon). This is usually done in two lifts: an initial stress at 2,500 PSI to seat the wedges, and the final stress once the concrete reaches 3,000 to 4,000 PSI. After stressing, the tendon tails are cut off, and the anchor pockets are filled with non-shrink grout to prevent corrosion.
Phase 4: Frost-Protected Shallow Foundations (FPSF)
For cold climates where excavating below the frost line is cost-prohibitive, the FPSF utilizes rigid insulation to trap geothermal heat beneath the building. The U.S. Department of Housing and Urban Development (HUD) provides extensive guidelines on the thermal dynamics of these systems.
- Vertical Insulation: Install Type IV or V Extruded Polystyrene (XPS) or high-density Expanded Polystyrene (EPS) vertically against the exterior of the grade beam. Minimum R-value is typically R-10, extending from the top of the slab down to the footing base.
- Horizontal Wing Insulation: Depending on the local Air Freezing Index (AFI), a horizontal "wing" of insulation (R-5 to R-15) extends outward from the grade beam into the subgrade for 2 to 4 feet. This wing must be sloped slightly away from the foundation to promote drainage.
- Protection: Backfill carefully by hand around the insulation to prevent crushing or displacing the foam boards. UV exposure will degrade XPS/EPS, so it must be covered or parged within 30 days of installation.
Phase 5: Curing Protocols and Temperature Controls
Curing is not merely "letting it dry"; it is the active management of moisture and temperature to ensure continuous cement hydration. The American Concrete Institute (ACI) mandates strict curing durations based on ambient conditions.
Standard 4,000 PSI Mix at 70°F: Minimum 7 Days
High-Early Strength Mix at 70°F: Minimum 3 Days
Cold Weather Pour (Below 50°F): Minimum 14 Days (with thermal blankets)
For interior slabs that will receive moisture-sensitive floor coverings (like epoxy, VCT, or hardwood), use a wet-curing method (continuous ponding or saturated burlap) for 7 days. Avoid membrane-forming curing compounds on these slabs, as they can interfere with flooring adhesives and emit volatile organic compounds (VOCs) that trap moisture beneath the floor covering.
Troubleshooting Common Installation Failures
Even with rigorous adherence to the types of concrete slab foundations outlined above, edge cases and environmental factors can cause defects. Use this troubleshooting matrix to diagnose and prevent field issues.
1. Random Map Cracking (Craze Cracking)
- Cause: Surface drying faster than the interior concrete, often due to over-troweling or applying water to the surface during finishing.
- Fix/Prevention: Never broadcast water or dry cement on the surface. Begin power troweling only when the concrete can support a worker's weight with a 1/4-inch indentation. Apply a liquid curing compound immediately after the final trowel pass.
2. Differential Settlement at Utility Trenches
- Cause: Plumbing trenches beneath the slab were backfilled with native, uncompacted soil, leading to localized sinking.
- Fix/Prevention: All utility trenches must be backfilled in 6-inch lifts using flowable fill (CLSM) or compacted crushed stone to 95% Proctor density before the vapor barrier is laid.
3. Curling at Control Joints
- Cause: High moisture gradient between the top and bottom of the slab. The top dries and shrinks while the bottom remains damp.
- Fix/Prevention: Ensure the subgrade vapor barrier is intact. Cut control joints to a depth of exactly 25% of the slab thickness (e.g., 1 inch deep for a 4-inch slab) within 4 to 12 hours of pouring to force controlled cracking before internal stresses build up.
Written by
Sarah WhitfieldSarah Whitfield is a chartered quantity surveyor (MRICS) and construction cost analyst with 15 years of experience in material pricing, procurement strategy, and project budgeting. She earned her degree in Construction Management from the University of Reading (UK) and has worked on projects ranging from $2M custom homes to $180M mixed-use developments across North America and Europe. Sarah currently leads cost estimating for BuildMat Insight, maintaining a proprietary database of 4,000+ material price points updated quarterly. She is a frequent contributor to RSMeans cost data panels and has presented at the International Cost Engineering Council (ICEC) congress. Based in Denver, CO, Sarah is an avid trail runner and volunteer mentor for Women in Construction.
More from Sarah Whitfield
View all
Wood & Lumber
What Are the Different Types of Wood? A Builder's Guide
Compare structural softwoods, finish hardwoods, and engineered lumber. Analyze Janka ratings, MOE values, and 2026 pricing for construction.
Aug 4, 2026

Walls & Panels
Steel Framing vs Wood Framing: Corrosion and Moisture Defense
Compare steel framing vs wood framing for moisture resistance. Learn about galvanized coatings, condensation risks, and corrosion protection strategies.
Jul 21, 2026

Stone & Masonry
How to Cut Stone Veneer: Wet Saw vs Grinder Comparison
Compare the best tools for cutting stone veneer. We review wet saws, angle grinders, and chop saws to help you achieve clean, chip-free cuts.
Jul 21, 2026