Installing Different Types of Concrete Curbs: A Step-by-Step Guide
Master the installation of different types of concrete curbs. Compare extruded, cast-in-place, and precast methods with exact mix designs and specs.

Understanding the Different Types of Concrete Curbs
Concrete curbs serve critical structural and aesthetic functions, defining property lines, managing stormwater runoff, and protecting landscaping from vehicular damage. However, the installation methodology shifts dramatically depending on the curb profile and formation technique. Selecting the wrong installation method for your specific site conditions or budget is the primary cause of premature curb failure, such as frost heave, spalling, or longitudinal cracking.
Before breaking ground, you must align your project requirements with the correct curb type. The table below breaks down the four primary categories of concrete curbs, their ideal applications, and current 2026 market pricing.
| Curb Type | Formation Method | Required Mix Slump | Best Application | Avg. Cost (per LF) |
|---|---|---|---|---|
| Extruded (Slip-Form) | Machine-fed, continuous extrusion | Zero-slump (0-1 inch) | Long residential driveways, parking lot perimeters | $4.50 - $8.00 |
| Cast-in-Place | Wood/steel forms, hand-finished | Low-slump (3-4 inches) | Custom landscapes, tight radii, decorative edges | $14.00 - $22.00 |
| Precast | Factory-cast, crane-set sections | N/A (Factory cured) | Municipal streets, heavy-duty commercial zones | $25.00 - $45.00 |
| Monolithic Curb & Gutter | Slip-form or heavy steel forms | 1-3 inches | Highway edges, large-scale stormwater management | $18.00 - $30.00 |
Pre-Installation: Subgrade and Base Preparation
Regardless of whether you are pouring a cast-in-place landscape curb or running an extrusion machine, the subgrade dictates the lifespan of the installation. Concrete is only as stable as the ground beneath it. According to guidelines from the Portland Cement Association, inadequate base compaction leads to differential settlement, resulting in transverse cracking.
- Excavation Depth: Dig 8 to 10 inches below the final finish grade to accommodate the base and curb depth.
- Compaction: Achieve a minimum 95% Standard Proctor density (ASTM D698) on the native soil.
- Base Material: Lay a 4-inch layer of crushed aggregate base course (ABC) or 3/4-inch minus gravel.
- Moisture Control: Dampen the base before pouring, but ensure no standing water is present in the trench.
Installation Walkthrough: Cast-in-Place Curbs
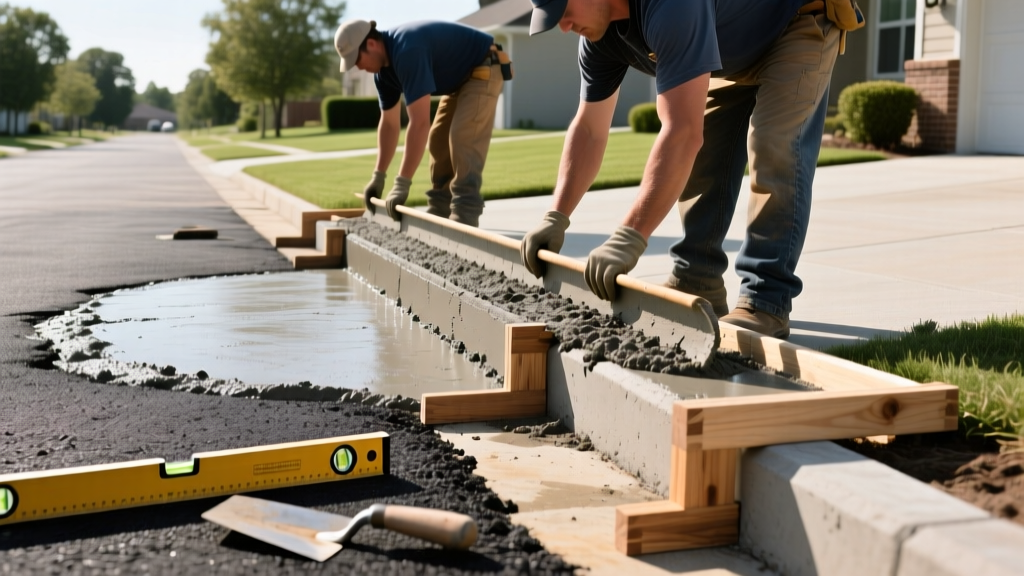
Cast-in-place installation is the standard for high-detail landscaping, tight curves, and projects where machinery cannot access the site. This method relies on traditional formwork and a slightly wetter mix to allow for hand tooling and stamping.
Step 1: Formwork and Bracing
Use straight, knot-free 2x4 or 2x6 lumber for straight runs, and flexible hardboard or specialized steel forms for radii under 10 feet. Stake the forms every 24 inches using 2-foot steel or wooden stakes. Drive stakes flush with the top of the form to prevent the screed board from catching. Apply a commercial form release agent (avoiding petroleum-based oils if you plan to stain or seal the concrete later) to ensure clean stripping.
Step 2: Placing and Consolidating the Mix
Order a 3,000 to 4,000 PSI air-entrained mix. Air entrainment (4% to 6% total air content) is non-negotiable in freeze-thaw climates; it creates microscopic voids that relieve internal osmotic pressure when water freezes. Pour the concrete into the forms, overfilling by about 1/2 inch. Use a mechanical pencil vibrator or a hand tamper to consolidate the mix, eliminating honeycomb voids along the form faces.
Step 3: Screeding and Finishing
Strike off the excess concrete using a straight 2x4 screed board in a sawing motion. Once the bleed water evaporates, run a magnesium bull float to embed the aggregate. Use a concrete edger along the form lines to create a smooth, rounded radius that resists chipping. Finish with a light broom texture for slip resistance, or apply stamps if executing a decorative design.
Installation Walkthrough: Extruded (Slip-Form) Curbs
Extruded curbs are formed by a continuous slip-form machine (such as a Curbmaster or Miller Curber). This method is highly efficient for long, straight runs but requires precise mix engineering.
The Zero-Slump Requirement
The most common failure in extruded curbs is "slumping" or losing profile shape immediately after exiting the machine mold. This happens when the mix is too wet. You must order a zero-slump or very low-slump (1-inch max) concrete mix. To maintain structural integrity without adding water, specify the addition of macro-synthetic fibers (typically 3 to 5 lbs per cubic yard) to control plastic shrinkage and provide secondary reinforcement.
Machine Operation and Feed
The ready-mix truck discharges directly into the machine's hopper. An internal auger feeds the concrete into the vibratory mold pan. The operator must maintain a steady travel speed of 5 to 15 feet per minute. Moving too fast causes tearing and surface voids; moving too slow causes the concrete to set up inside the hopper. A worker must trail the machine immediately with a float and edger to seal the surface before the concrete undergoes initial set.
Installation Walkthrough: Precast Concrete Curbs
Precast curbs are manufactured in controlled plant environments, ensuring high PSI (often 5,000+ PSI) and perfect curing. As noted by the National Precast Concrete Association, precast elements offer superior durability and immediate load-bearing capacity upon installation. They are ideal for municipal projects or commercial sites where lane closure times must be minimized.
- Trenching: Excavate a trench 6 inches wider than the curb base to allow for maneuvering and bedding adjustments.
- Bedding: Lay a 1-inch to 2-inch bed of coarse sand or a dry-pack mortar. Screed the bedding to exact grade using a laser level.
- Setting: Use a mini-excavator or boom truck with nylon slings to lower the precast sections. Never use steel chains directly on the concrete, as this will spall the edges.
- Joining: Most precast curbs feature tongue-and-groove ends. Clean the joints and seal them with a high-modulus polyurethane joint sealant to prevent water infiltration and subsequent frost heave.
Jointing, Curing, and Sealing Protocols
Concrete shrinks as it cures. Without planned weak points, it will crack randomly. Proper jointing and curing are what separate professional installations from amateur ones.
Control Joint Specifications
For standard 6-inch wide curbs, saw-cut control joints to a depth of 1.5 inches (exactly 1/4 of the curb depth). Space joints every 10 feet on straight runs, and place mandatory isolation joints wherever the curb abuts a rigid structure (like a driveway apron or building foundation).
Curing Methods
Apply an ASTM C309 compliant membrane-forming curing compound immediately after finishing and jointing. Alternatively, use continuous wet curing with burlap and polyethylene sheeting for a minimum of 3 days. Never allow newly placed curb concrete to dry out during the first 72 hours; rapid moisture loss reduces surface compressive strength by up to 40% and guarantees surface crazing.
Troubleshooting Common Installation Failures
Even with the right materials, execution errors lead to costly replacements. Use this diagnostic framework to identify and prevent field failures.
| Failure Symptom | Root Cause | Preventative Fix |
|---|---|---|
| Spalling at Saw-Cut Joints | Blade wobble or cutting before initial set. | Use a fresh, continuous-rim diamond blade designed for green concrete. Wait until the aggregate is firmly locked in the paste. |
| Longitudinal Cracking (Center Split) | Subgrade settlement or lack of base compaction. | Verify 95% Proctor density on the native soil and ensure the 4-inch aggregate base is uniformly compacted. |
| Frost Heave / Uplift | Water pooling under the curb and freezing. | Install a 4-inch perforated French drain pipe alongside the curb base, wrapped in filter fabric, to route subsurface water away. |
| Surface Scaling / Flaking | Finishing while bleed water is present, or insufficient air entrainment. | Never trowel bleed water back into the surface. Mandate 4-6% air content on the ready-mix ticket for freeze-thaw zones. |
Mastering the installation of different types of concrete curbs requires moving beyond generic advice and adhering to strict material science and field engineering principles. By matching the correct mix design to your formation method, enforcing rigorous subgrade compaction, and executing precise jointing protocols, you ensure a curb system that withstands both environmental stress and vehicular impact for decades.
Written by
Marcus ChenMarcus Chen is a licensed structural engineer (PE) and building materials analyst with over 12 years of experience across residential, commercial, and industrial construction. He holds a Master of Science in Civil Engineering from UC Berkeley and spent six years at Thornton Tomasetti before transitioning to independent consulting and technical writing. Marcus specializes in material selection for seismic-prone regions, concrete reinforcement strategies, and lifecycle cost analysis. His work has been cited by the American Concrete Institute (ACI) and the Structural Engineers Association of California (SEAOC). When he is not on a job site or at his desk, you will find him hiking the Sierra Nevada or restoring a 1920s craftsman bungalow in Oakland, CA.
More from Marcus Chen
View all
Construction Cost
How Much Did the Eiffel Tower Cost to Build?
How much did the Eiffel Tower cost to build in 1889? We adjust for inflation and compare its budget to modern skyscraper construction.
Aug 4, 2026

Fire Resistance
What Is a Fire Resistant Material? Testing & Certification Guide
Discover what is a fire resistant material through ASTM and UL testing. Learn how fire ratings, certifications, and assemblies work in construction.
Aug 4, 2026

Construction Cost
How Much Did the Burj Khalifa Cost to Build?
How much did the Burj Khalifa cost to build? We break down the $1.5B project and extract 5 money-saving strategies for your next build.
Jul 30, 2026