Stamped vs Brushed Concrete: Which Finish Fits Best?
Compare stamped vs brushed concrete for patios and driveways. Explore 2026 costs, slip resistance, design applications, and installation tips.

The Core Difference: Aesthetics vs. Traction
Choosing between stamped and brushed concrete fundamentally comes down to prioritizing visual complexity versus surface friction. Both finishes begin with the exact same base material—a standard 3,000 to 4,000 PSI ready-mix concrete slab—but diverge dramatically during the final troweling and curing stages.
Stamped concrete relies on polyurethane texture mats (such as those manufactured by Butterfield Color or Proline) pressed into the plastic surface. This process requires broadcasting an antiquing release agent to prevent the mats from sticking, which simultaneously adds a secondary color highlight to the crevices. Brushed concrete, conversely, is achieved by dragging a coarse-bristle push broom across the freshly floated surface. This creates microscopic, linear ridges that dramatically increase the Dynamic Coefficient of Friction (DCOF) without altering the slab's structural profile.
Application Showcase: Where Stamped Concrete Dominates
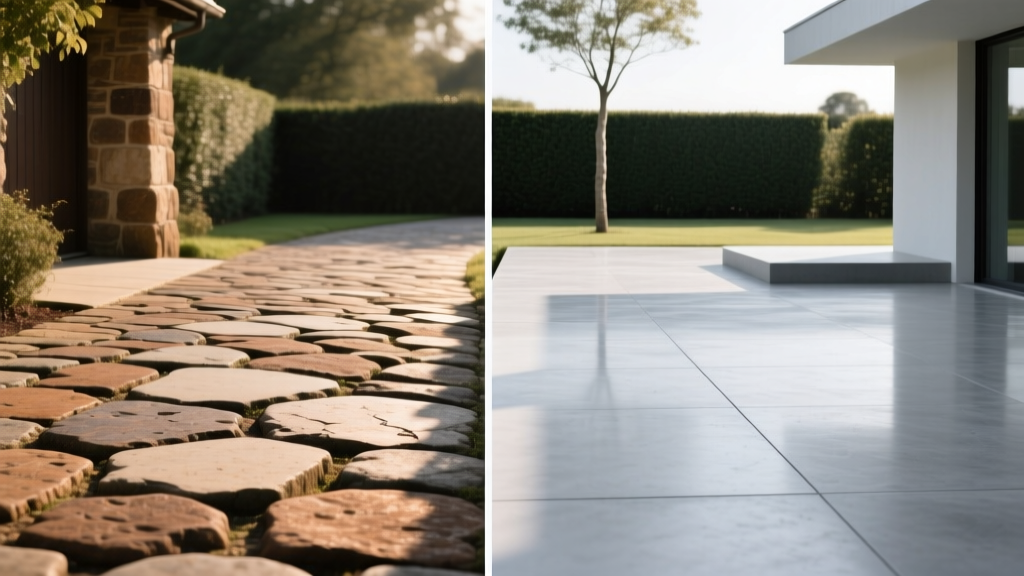
Stamped concrete is the premier choice for high-visual-impact residential and commercial applications where mimicking premium materials is the primary goal. In 2026, the most requested patterns remain Ashlar Slate for formal outdoor living spaces and Roman Cobble for expansive driveways.
Best Use Cases
- Formal Patios and Courtyards: Stamped finishes like seamless slate or herringbone brick elevate the architectural profile of a home, offering the look of hand-laid masonry at a fraction of the labor cost.
- Interior Flooring: When sealed with a high-gloss, high-solids acrylic sealer (minimum 25% solids), stamped concrete provides a durable, easily cleanable surface for sunrooms and entryways.
- Pool Coping and Surrounds (With Caveats): While visually stunning, stamped pool decks require the mandatory addition of a non-slip aggregate (like SureCrete SureGrip or SharkGrip) mixed directly into the final coat of sealer to prevent hazardous slip conditions when wet.
Application Showcase: Where Brushed Concrete Wins
Brushed (or broomed) concrete is the undisputed champion of utility, safety, and modern minimalist aesthetics. It is the default specification for municipal projects, steep gradients, and high-traffic commercial zones due to its superior water channeling and traction.
Best Use Cases
- Pool Decks and Water Features: The linear ridges created by a 4-inch to 6-inch polypropylene or corn bristle broom provide immediate slip resistance. For pool decks, broom strokes should run perpendicular to the pool edge to maximize barefoot traction.
- Steep Driveways and Walkways: On gradients exceeding 10%, brushed concrete prevents tire spin and pedestrian slips during wet or icy conditions. The ridges act as microscopic water breaks, disrupting surface tension and accelerating drainage.
- Modern Minimalist Architecture: A light, consistent broom finish on a gray or integrally colored slab complements contemporary architecture, providing a subtle texture that contrasts beautifully with smooth stucco or glass facades.
Head-to-Head Comparison Matrix
| Feature | Stamped Concrete | Brushed Concrete |
|---|---|---|
| 2026 Avg. Installed Cost | $16.00 - $28.00 per sq. ft. | $8.00 - $14.00 per sq. ft. |
| Slip Resistance (DCOF) | Low to Moderate (unless treated) | High (Excellent wet traction) |
| Maintenance Level | High (Reseal every 2-3 years) | Low (Clean and optional seal) |
| Installation Speed | Slow (Requires specialized crew) | Fast (Standard finishing crew) |
| Design Versatility | Extremely High (Colors/Patterns) | Low (Linear textures only) |
Real-World Cost Breakdown (2026 Pricing)
Understanding the financial gap between stamped and brushed concrete requires looking beyond the base material. According to current industry data aligned with Portland Cement Association guidelines, the base concrete mix (3,500 PSI with fiber mesh) costs roughly $2.50 to $3.50 per square foot delivered. The divergence happens in the finishing labor and ancillary materials.
Why Stamped Concrete Costs Up to 100% More
- Color Hardener & Release Agents: Broadcasting dry-shake color hardener adds $0.75 to $1.25 per square foot in materials alone.
- Specialized Tooling: Contractors must rent or amortize the cost of polyurethane stamping mats, which can cost upwards of $300 per set.
- Detail Labor: Stamping requires a larger crew working in a tightly synchronized window. After stamping, workers must hand-detail the edges and joints with texture skins and chisels, adding 30-40% more labor hours compared to a standard broom finish.
- Washing and Sealing: Stamped concrete requires a secondary site visit 24-48 hours later to power wash the excess release agent before applying a premium solvent-based acrylic sealer.
The 'Hybrid' Approach: Combining Both in One Project
For homeowners and commercial developers looking to maximize budget without sacrificing curb appeal, the hybrid layout is the most strategic application of both techniques. This involves pouring the entire slab as a single monolithic pour, but dividing the finishing techniques.
The Execution: The contractor stamps a 2-foot to 3-foot perimeter border using a contrasting pattern (e.g., a running bond brick or cobblestone) and applies a distinct color hardener. The expansive center field of the patio or driveway is then finished with a standard, light broom texture in a complementary integral color.
The Result: This technique reduces the total stamped square footage by 60% to 70%, effectively cutting the overall project cost by 25% to 35% compared to a fully stamped slab. It also places the high-traction brushed finish exactly where foot traffic and furniture placement are most concentrated, while framing the space with the high-end visual appeal of stamped masonry.
Critical Installation Failures to Avoid
Both finishes carry specific risks if the contractor ignores environmental conditions or rushes the curing process. Recognizing these failure modes will help you evaluate a contractor's expertise during the bidding phase.
Failure 1: Delamination in Stamped Edges
The Cause: When concrete sets faster than anticipated due to high winds or low humidity, amateur crews will spray water onto the surface to soften it for stamping. This alters the water-cement ratio at the surface, leading to a weak layer that eventually flakes and delaminates under freeze-thaw cycles.
The Fix: Professional crews use a liquid evaporation retarder (a monomolecular film) sprayed over the slab to trap moisture without altering the mix design. If the concrete is too hard to stamp, it must be left as-is or ground down later; adding water is a fatal error.
Failure 2: Flattened Ridges in Brushed Concrete
The Cause: Brooming too early, while bleed water is still present on the surface, causes the ridges to slump and flatten out, resulting in a smooth, slippery finish. Brooming too late tears the aggregate and creates a rough, jagged surface that traps dirt.
The Fix: The surface must be completely free of visible water sheen. The contractor should perform the thumbprint test across multiple zones of the slab. When the concrete yields exactly 1/8 inch under moderate thumb pressure, it is the optimal window for dragging the broom in a single, continuous, overlapping motion.
Making the Final Decision
Select between stamped and brushed concrete based strictly on the functional demands of the specific zone. Use stamped concrete to create architectural focal points, formal entertainment areas, and aesthetic borders where visual replication of stone or brick is desired. Default to brushed concrete for all high-moisture zones, steep inclines, commercial walkways, and expansive center fields where long-term traction, minimal maintenance, and budget efficiency are the primary drivers. By understanding the mechanical and financial differences outlined above, you can specify the exact finish that guarantees both safety and design integrity for your project.
Written by
Elena RodriguezElena Rodriguez is a civil engineer and technical writer specializing in concrete technology, masonry systems, and ASTM/ACI compliance. She earned her B.S. in Civil Engineering from Texas A&M University and spent a decade at a materials testing laboratory, performing over 2,000 concrete compressive strength tests and masonry prism evaluations. Elena is an ACI-certified Field Testing Technician (Grade I) and a member of ASTM Committee C12 on Natural Building Stone. She currently consults on forensic engineering cases involving concrete failures and moisture intrusion. Based in San Antonio, TX, Elena is a proud member of the Society of Women Engineers (SWE) and coaches her daughter's FIRST Robotics team.
More from Elena Rodriguez
View all
Walls & Panels
Cost Analysis: Light Gauge Steel Framing Advantages and Disadvantages
Evaluate light gauge steel framing advantages and disadvantages through a strict cost analysis lens, comparing material, labor, and lifecycle expenses.
Aug 4, 2026

Walls & Panels
Gypsum Board Types: Exact Specifications, Thickness & Dimensions
Compare standard, Type X, and moisture-resistant gypsum board types. Get exact specifications, thicknesses, dimensions, and ASTM standards for your project.
Aug 4, 2026

Fire Resistance
Best Fire-Resistant Outdoor Decking Materials: 2026 Buyer Guide
Discover the best fire-resistant outdoor decking materials for 2026. Compare Class A PVC, aluminum, and hardwood options for WUI compliance and safety.
Aug 4, 2026