Paver Patio vs Concrete Cost: 2026 Installation Guide
Compare paver patio vs concrete cost for 2026. This installation guide breaks down material pricing, labor, base prep, and long-term ROI.

The True Cost Breakdown: Pavers vs. Poured Slabs
When evaluating the paver patio vs concrete cost, homeowners and contractors often look only at the surface material. However, the final installed price per square foot is dictated by subgrade preparation, labor intensity, and long-term maintenance. In 2026, material and labor inflation have narrowed the gap slightly, but poured concrete remains the budget-friendly baseline, while interlocking pavers command a premium for modularity and aesthetics.
| Cost Factor | Poured Concrete (4-inch) | Interlocking Pavers |
|---|---|---|
| Material (Surface) | $2.50 - $4.00 | $4.00 - $12.00 |
| Base Aggregate & Sand | $1.00 - $1.50 | $2.50 - $4.00 |
| Labor & Equipment | $5.50 - $10.50 | $11.50 - $19.00 |
| Sealing / Finishing | $0.50 - $1.50 (Curing compound) | $1.50 - $3.00 (Polymeric sand & sealant) |
| Total Installed Cost | $9.50 - $17.50 | $19.50 - $38.00 |
While the upfront paver patio vs concrete cost heavily favors poured slabs, evaluating the 20-year lifecycle cost reveals a different financial picture. Concrete requires periodic sealing and eventual crack repair, whereas pavers require joint sand replenishment but offer zero-cost localized repairs.
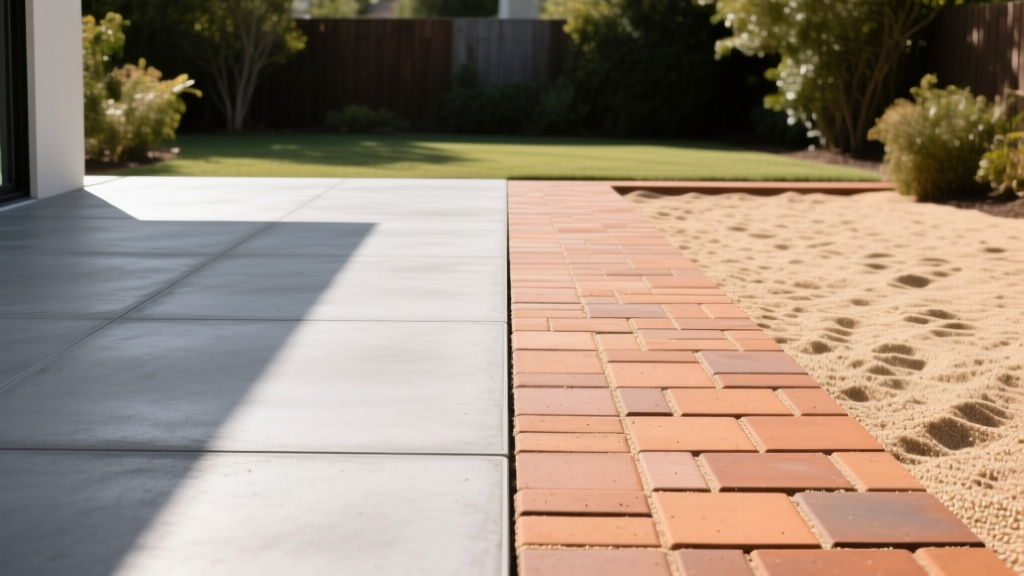
Subgrade and Base Preparation: Where Projects Fail
Both systems rely entirely on a stable subgrade. The most common failure mode in residential hardscaping is inadequate base compaction, leading to differential settling. According to the National Concrete Masonry Association, flexible pavements (pavers) require a thicker, more rigorously compacted aggregate base than rigid pavements (poured concrete) to distribute point loads.
Base Specifications for Poured Concrete
- Depth: 4 inches of compacted 3/4-inch minus crushed stone (ASTM D2940).
- Subgrade: Native soil must be scarified and compacted to 90% Standard Proctor density.
- Vapor Barrier: 10-mil polyethylene sheeting placed over the aggregate to prevent moisture wicking and slab curling.
Base Specifications for Interlocking Pavers
- Depth: 6 to 8 inches of compacted 3/4-inch crushed stone for pedestrian traffic; 10+ inches for vehicular driveways.
- Geotextile Fabric: Mandatory over clay or silt-heavy subgrades to prevent aggregate migration.
- Bedding Layer: Exactly 1 inch of coarse, washed concrete sand (ASTM C33). Never use mason sand or stone dust, which retain moisture and cause frost heave.
Poured Concrete Installation Protocol
A durable concrete patio requires precise mix design and jointing. The American Concrete Institute recommends specific protocols to mitigate random cracking.
- Forming and Reinforcement: Set 2x4 or 2x6 forms with a minimum 1/8-inch per foot slope for drainage. Install 6x6 W1.4xW1.4 welded wire mesh (WWM) or fiber-mesh reinforcement. If using WWM, elevate it on 2-inch concrete dobies so it sits in the upper third of the slab.
- The Mix Design: Order a 3,500 to 4,000 PSI air-entrained mix. Air entrainment (4% to 6% microscopic air bubbles) is non-negotiable in freeze-thaw climates, as it provides internal expansion chambers for freezing water.
- Placing and Screeding: Pour the concrete and strike it off level with the forms using a magnesium screed. Avoid overworking the surface with a float, which pulls excess cement paste (laitance) to the top and weakens the surface crust.
- Control Jointing: Saw-cut control joints to a depth of 25% of the slab thickness (1 inch for a 4-inch slab). Spacing should not exceed 10 feet in any direction, creating panels that are roughly square. Cuts must be made within 6 to 18 hours of placement, depending on ambient temperature.
- Curing: Apply a membrane-forming curing compound or cover with wet burlap for a minimum of 7 days to prevent plastic shrinkage cracking.
Interlocking Paver Installation Protocol
Paver installation is highly labor-intensive but requires less specialized heavy equipment than concrete pouring. Pavers must meet ASTM C936 standards, ensuring a minimum compressive strength of 8,000 PSI and water absorption of less than 5%.
- Edge Restraint: Install rigid, heavy-duty plastic or aluminum edge restraints anchored with 10-inch galvanized steel spikes every 12 inches. Flexible restraints will bow under thermal expansion and lateral loads, causing the perimeter pavers to separate.
- Screeding the Bedding Sand: Use 1-inch steel pipes as screed rails to pull a perfectly level 1-inch bedding sand layer. Do not tamp the bedding sand; it must remain loose to allow the pavers to seat properly.
- Laying the Pavers: Lay pavers tight to one another, maintaining a consistent pattern. Pull from multiple pallets simultaneously to blend color variations inherent in concrete pavers.
- Compaction: Run a low-amplitude plate compactor (minimum 5,000 lbf centrifugal force) over the entire surface with a urethane pad attached to prevent scratching. This vibrates the pavers down into the bedding sand and brings sand up into the joints.
- Jointing Sand: Sweep high-performance polymeric sand into the joints. Mist the surface with a fine spray of water to activate the polymers, which harden to resist weed growth and ant excavation while retaining slight flexibility.
Long-Term Maintenance and Repair Economics
The long-term financial divergence between these two materials becomes apparent in years 5 through 15. The Portland Cement Association notes that while concrete is highly durable, its rigid nature makes it susceptible to environmental stressors that flexible paver systems simply absorb.
Concrete Patio Maintenance Profile
- Sealing: Requires reapplication of a penetrating silane/siloxane sealer every 3 to 5 years ($1.50 - $2.50 per sq ft).
- Crack Repair: Control joints will eventually degrade. Routing and sealing cracks with polyurethane caulk costs roughly $5 to $8 per linear foot.
- Catastrophic Failure: If tree roots or soil subsidence cause a structural fracture or severe differential settling, the affected panel cannot be patched invisibly. The entire section must be demolished, the subgrade re-engineered, and new concrete poured, resulting in a highly visible patchwork repair.
Paver Patio Maintenance Profile
- Joint Maintenance: Polymeric sand degrades over 7 to 10 years. Re-sanding a patio requires pressure washing, drying, and reapplying sand ($1.00 - $2.00 per sq ft).
- Settling Repair: If a section settles due to washout or root growth, the affected pavers are simply unzipped, the base aggregate is regraded and tamped, and the exact same pavers are reinstalled. The repair is 100% invisible and costs only labor time.
- Stain Removal: Oil or grease stains can be addressed by replacing individual pavers, whereas concrete requires harsh chemical strippers or acid etching that alters the surface texture.
Decision Matrix: Which Should You Install?
Use this framework to determine which material aligns with your site conditions, budget, and usage requirements.
| Site Condition / Requirement | Recommended Material | Technical Rationale |
|---|---|---|
| Large, mature trees with aggressive surface roots nearby | Interlocking Pavers | Flexible system can be removed, roots pruned, base regraded, and pavers replaced without visible scarring. |
| Strict budget constraints with large square footage | Poured Concrete | Lower material and labor costs make it the only viable option for expansive areas over 600 sq ft on a tight budget. |
| Heavy vehicular traffic (RVs, loaded trucks) | Poured Concrete (6-inch) | Rigid slab distributes massive point loads better than pavers, which can rut or shift under extreme static weights. |
| Complex curves, radii, and intricate patterns | Interlocking Pavers | Modular units allow for seamless curves without the need for complex, expensive flexible forming systems required for concrete. |
| Poor drainage / High water table sites | Permeable Pavers | Permeable interlocking concrete pavers (PICP) allow water to infiltrate directly into an open-graded base, eliminating runoff. |
Ultimately, the choice between a paver patio and a poured concrete slab hinges on how you weigh initial capital expenditure against long-term adaptability. Poured concrete offers unmatched structural rigidity and lower upfront costs, making it ideal for simple, expansive layouts. Interlocking pavers demand a higher initial investment and rigorous base preparation, but they provide a modular, repairable surface that adapts to shifting soils and complex designs over its multi-decade lifespan.
Written by
Elena RodriguezElena Rodriguez is a civil engineer and technical writer specializing in concrete technology, masonry systems, and ASTM/ACI compliance. She earned her B.S. in Civil Engineering from Texas A&M University and spent a decade at a materials testing laboratory, performing over 2,000 concrete compressive strength tests and masonry prism evaluations. Elena is an ACI-certified Field Testing Technician (Grade I) and a member of ASTM Committee C12 on Natural Building Stone. She currently consults on forensic engineering cases involving concrete failures and moisture intrusion. Based in San Antonio, TX, Elena is a proud member of the Society of Women Engineers (SWE) and coaches her daughter's FIRST Robotics team.
More from Elena Rodriguez
View all
Walls & Panels
Cost Analysis: Light Gauge Steel Framing Advantages and Disadvantages
Evaluate light gauge steel framing advantages and disadvantages through a strict cost analysis lens, comparing material, labor, and lifecycle expenses.
Aug 4, 2026

Walls & Panels
Gypsum Board Types: Exact Specifications, Thickness & Dimensions
Compare standard, Type X, and moisture-resistant gypsum board types. Get exact specifications, thicknesses, dimensions, and ASTM standards for your project.
Aug 4, 2026

Fire Resistance
Best Fire-Resistant Outdoor Decking Materials: 2026 Buyer Guide
Discover the best fire-resistant outdoor decking materials for 2026. Compare Class A PVC, aluminum, and hardwood options for WUI compliance and safety.
Aug 4, 2026