Polished Concrete vs Epoxy Cost: 2026 Installation Guide
Compare polished concrete vs epoxy cost for 2026. This installation guide details pricing, grit sequences, moisture limits, and failure modes.

The Core Divergence: Mechanical Subtractive vs. Chemical Additive
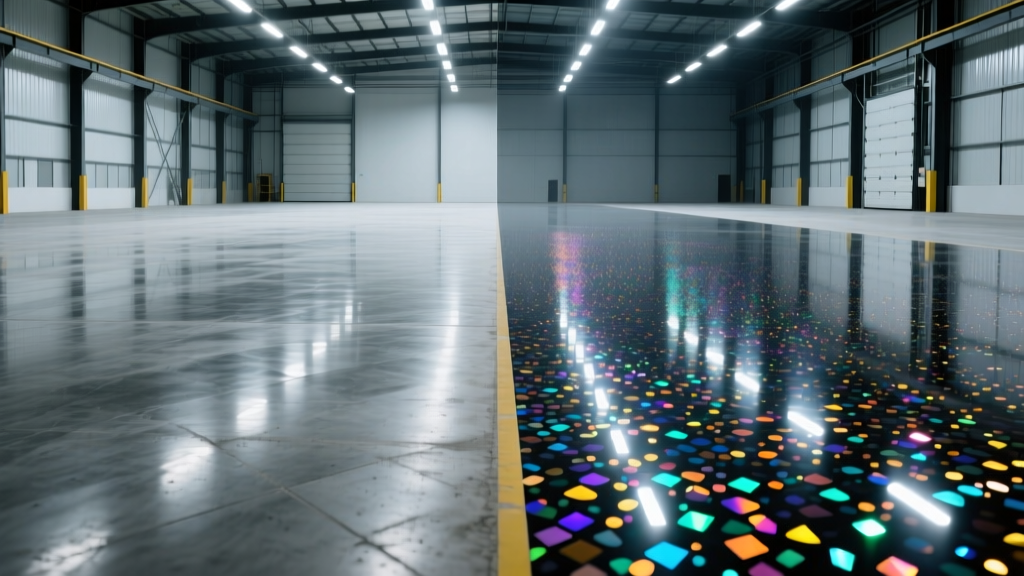
When evaluating flooring systems for commercial, industrial, or high-end residential spaces, the debate between polished concrete and epoxy coatings fundamentally comes down to material philosophy. Polished concrete is a mechanical, subtractive process. You are removing the top layer of cement paste to expose the aggregate, then densifying and burnishing the slab itself. Epoxy flooring is a chemical, additive process. You are profiling the surface to accept a multi-layer build-up of thermosetting polymers, primers, and topcoats.
Understanding this distinction is critical because it dictates not only the upfront budget but the long-term maintenance lifecycle, moisture tolerance, and substrate preparation requirements. Below, we break down the exact 2026 installation costs, step-by-step workflows, and hidden failure modes for both systems.
2026 Cost Breakdown: Polished Concrete vs. Epoxy Installation
The following matrix reflects current 2026 commercial contractor rates for a 5,000 square foot slab in standard condition. Prices fluctuate based on regional labor markets, aggregate exposure levels, and specific chemical builds.
| Cost Factor (Per Sq. Ft.) | Mechanically Polished Concrete | 100% Solids Epoxy + Urethane |
|---|---|---|
| Surface Preparation | $1.00 - $2.50 (Grinding) | $0.75 - $1.50 (Shot Blasting) |
| Primary Application / Labor | $2.50 - $6.00 (Multi-pass grinding) | $1.50 - $3.50 (Squeegee & back-roll) |
| Materials (Chemicals/Resins) | $0.50 - $1.20 (Densifiers & guards) | $1.50 - $4.00 (Epoxy, flake, topcoat) |
| Joint & Edge Detailing | $0.25 - $0.75 | $0.35 - $1.00 |
| Total Estimated Range | $4.25 - $10.45 / sq. ft. | $4.10 - $10.00 / sq. ft. |
Installation Workflow: Mechanically Polished Concrete
A true mechanical polish requires a heavy-duty planetary grinder (e.g., Husqvarna PG 820 or Lavina 30G) weighing over 800 lbs to maintain consistent downward pressure. The process follows a strict grit-progression sequence.
Step 1: Metal Bond Grinding (Grits 30/40/60)
The installer removes the topical cement paste (laitance) using metal-bonded diamond segments. This step establishes the floor's flatness and dictates the level of aggregate exposure. The Concrete Network notes that skipping or rushing this step leads to "ghosting" and uneven light reflection in the final product.
Step 2: Grouting and Repair
If the slab has air voids, bug holes, or minor spalling, a polyurea or lithium-silicate-based grout is troweled across the entire floor to fill the micro-crevices exposed by the metal bond grind.
Step 3: Chemical Densification
A lithium silicate densifier is applied at a coverage rate of 400–600 sq. ft. per gallon. The lithium reacts with the free lime (calcium hydroxide) in the concrete to form calcium silicate hydrate (C-S-H), permanently hardening the surface and preventing future dusting.
Step 4: Resin Bond Honing and Polishing (Grits 100 to 3000)
The installer transitions to resin-bonded diamonds, stepping sequentially through 100, 200, 400, 800, 1500, and optionally 3000 grits. Each step removes the micro-scratches from the previous grit. A topical stain guard (often a fluorinated or siliconate sealer) is applied at the 400 or 800 grit stage and burnished into the pores using a high-speed propane burnisher with a 3000-grit hog-hair pad.
Installation Workflow: Multi-Coat Epoxy Systems
Epoxy installations rely on chemical adhesion rather than mechanical interlocking of the substrate itself. The standard commercial build is a 100% solids epoxy primer, a pigmented body coat with quartz or vinyl flake broadcast, and an aliphatic polyurethane topcoat.
Step 1: Profiling via Shot Blasting
Unlike polishing, epoxy prep requires opening the pores without necessarily removing the surface cream. A walk-behind shot blaster is used to achieve an ICRI Concrete Surface Profile (CSP) of 2 or 3. This creates the microscopic peaks and valleys required for the epoxy to mechanically lock into the slab.
Step 2: Moisture Vapor Testing and Mitigation
Before any resin is mixed, the slab must be tested for Moisture Vapor Transmission Rate (MVTR). If the slab exceeds 3 lbs per 1,000 sq. ft. per 24 hours (via calcium chloride test) or 75% Relative Humidity (via in-situ probe), a moisture-mitigating epoxy primer must be applied. Skipping this step guarantees osmotic blistering and catastrophic delamination within 12 to 18 months.
Step 3: Primer and Body Coat Application
A low-viscosity 100% solids epoxy primer is squeegeed and back-rolled to penetrate the CSP profile. Once tack-free (usually 8-12 hours), the pigmented body coat is applied. If a decorative flake system is specified, vinyl chips are broadcast by hand or air-blown into the wet body coat at a rate of 10 to 40 lbs per 1,000 sq. ft., depending on whether a partial or full broadcast is desired.
Step 4: Scrape, Vacuum, and Topcoat
After curing, the floor is scraped with a flat blade to remove vertically standing flakes, then thoroughly vacuumed. Finally, a two-component aliphatic polyurethane topcoat is applied. This topcoat is non-negotiable for areas with UV exposure, as standard epoxy will amber and chalk when exposed to sunlight.
Hidden Cost Drivers and Edge Case Failures
Budgets for both systems frequently blow up due to three specific edge cases that general contractors often overlook during the bidding phase.
- Control Joint Treatment: Neither system handles dynamic movement joints well. For polished concrete, joints must be filled with a flexible, color-matched polyurea joint filler that cures hard enough to be ground flush but retains enough elasticity to expand. For epoxy, joints are typically filled with an epoxy gel mixed with silica sand. Budget an extra $1.50 to $3.00 per linear foot for joint prep and filling.
- Slab Levelness (FF/FL Numbers): If the existing slab has a dip exceeding 1/8" over 10 feet, polished concrete will result in "birdbaths" (dull, unpolished low spots) because the heavy grinder bridges the gap. Epoxy will pool in the low spot, creating a thick, uneven build that may remain tacky due to improper exothermic curing. Self-leveling underlayment (SLU) remediation adds $2.50 - $4.50 per sq. ft.
- Amine Blush in Epoxy: If 100% solids epoxy is applied in high-humidity, low-temperature environments, the hardener can react with atmospheric moisture and carbon dioxide, forming a waxy, oily film called "amine blush." This prevents the topcoat from adhering. Installers must wash the floor with warm water and a stiff bristle brush between coats if environmental conditions are marginal.
Decision Matrix: Which System Fits Your Facility?
Use the following framework to specify the correct system based on your facility's operational demands.
| Operational Requirement | Polished Concrete | Epoxy / Urethane System |
|---|---|---|
| UV Stability (Sunlight Exposure) | Excellent (No fading or ambering) | Poor to Fair (Requires aliphatic urethane topcoat) |
| Chemical Resistance (Acids/Solvents) | Poor (Acids etch the calcium carbonate) | Excellent (Novolac epoxies resist harsh chemicals) |
| Impact Resistance | Good (Substrate is the wear layer) | Fair (Heavy impacts can chip or crack the coating) |
| Wet Traction (Slip Resistance) | Fair (Can be slick when wet unless textured) | Excellent (Aluminum oxide or quartz can be broadcast) |
| Expected Lifecycle before Major Refurb | 10 - 20+ Years (Requires periodic re-burnishing) | 5 - 10 Years (Requires eventual topcoat re-application) |
Sourcing and Specification Standards
When writing the architectural specifications for your project, avoid generic language. For polished concrete, specify the exact aggregate exposure class (A, B, C, or D) and the final gloss level (measured by a distinctness of image or DOI meter). Reference the American Society of Concrete Contractors (ASCC) guidelines for acceptable flatness tolerances prior to grinding.
For epoxy systems, specify the exact mil thickness for each layer (e.g., 10 mils primer, 20 mils body coat, 4 mils urethane topcoat) and mandate that the installer provides pull-off adhesion test results (ASTM D7234) proving a minimum of 200 psi bond strength to the concrete substrate. Furthermore, review the NIOSH Silica Exposure Guidelines to ensure your contractor's safety and health plan adequately addresses the airborne particulates generated during the mandatory shot-blasting or grinding preparation phases.
Written by
David NakamuraDavid Nakamura is a licensed architect (AIA) and construction technology writer focused on sustainable building methods, mass timber engineering, and high-performance building envelopes. He holds a Master of Architecture from the University of Washington and is a certified Passive House Consultant (CPHC). David spent eight years at the Seattle firm Mithun, where he led the design of three LEED Platinum projects, before founding his own practice specializing in net-zero residential design. He serves on the editorial advisory board of GreenBuilder Magazine and has authored peer-reviewed papers on cross-laminated timber (CLT) connections for the Journal of Structural Engineering. In his spare time, David teaches woodworking at Pratt Fine Arts Center and kayaks the Puget Sound.
More from David Nakamura
View all
Construction Cost
Labor Cost to Build a Deck Per Sq Ft: 2026 Installation Guide
Discover the exact labor cost to build a deck per sq ft in 2026. This installation guide breaks down contractor rates, complexity factors, and hidden fees.
Aug 4, 2026

Construction Cost
How Much Does It Cost to Build a 3 Bedroom House? Financing Guide
Learn exactly how much it costs to build a 3 bedroom house and explore 2026 financing options, construction loan types, and budget frameworks for your build.
Aug 4, 2026

Construction Cost
Cost to Build a Tennis Court: 2026 Guide
How much does it cost to build a tennis court in 2026? Breakdowns for asphalt, concrete, and synthetic surfaces plus fencing and lighting.
Jul 30, 2026