Stamped Concrete vs Non-Slip Surfaces: Slip Resistance & Cost Guide
Compare stamped concrete vs non-slip surfaces for slip resistance, durability, and cost. Expert installation guide with DCOF data and pricing.

The Hidden Liability of Decorative Concrete
Stamped concrete delivers the high-end aesthetic of natural stone or brick at a fraction of the material cost. However, the installation process inherently creates a severe slip hazard. The combination of densified concrete surfaces, smooth polyurethane stamping mats, and the high-gloss acrylic sealers required to enhance color creates a surface that becomes virtually frictionless when wet. For contractors and property owners, understanding the stamped concrete vs non-slip surfaces comparison is critical for mitigating liability and ensuring long-term durability.
The Science of Slip Resistance: DCOF and ASTM Standards
To accurately compare slip resistance, the industry relies on the Dynamic Coefficient of Friction (DCOF). The ANSI A326.3 standard establishes a minimum DCOF of 0.42 for level interior spaces, but exterior wet environments—such as pool decks and exposed patios—require a DCOF of 0.50 or higher to be considered safe.
- Bare, Sealed Stamped Concrete: 0.30 - 0.38 DCOF (High Hazard)
- Stamped Concrete + Polymer Grit Additive: 0.55 - 0.68 DCOF (Safe)
- Stamped Concrete + Broom-Finish Borders: 0.60+ DCOF in transition zones
- Interlocking Concrete Pavers: 0.50 - 0.65 DCOF (Safe)
According to position statements from the American Society of Concrete Contractors (ASCC), achieving adequate slip resistance on decorative concrete requires proactive surface texturing or the integration of anti-slip aggregates into the final sealer coat, as the stamping process itself flattens the natural cream of the concrete.
Stamped Concrete vs Non-Slip Surfaces: Comparison Matrix
When evaluating stamped concrete vs non-slip surfaces, you are generally choosing between modifying the stamped concrete itself or utilizing alternative hardscaping materials. Below is a direct comparison of the most common approaches.
| Surface Type | Slip Resistance (Wet) | Aesthetic Continuity | Installation Complexity | Lifespan Before Major Repair |
|---|---|---|---|---|
| Standard Stamped (No Additive) | Poor (0.30-0.38) | High (Seamless patterns) | Moderate | 15-25 years (Slab) |
| Stamped + Clear Polymer Grit | Excellent (0.55-0.68) | High (Grit is nearly invisible) | Moderate (Requires precise mixing) | 15-25 years (Slab) |
| Stamped + Aluminum Oxide Grit | Superior (0.65+) | Low (Grit is visible/speckled) | High (Requires specialized spray gear) | 15-25 years (Slab) |
| Concrete Pavers (Non-Slip Rated) | Good (0.50-0.65) | Moderate (Visible joints) | High (Requires base prep and sand) | 25-40+ years |
| Poured & Broom Finished Concrete | Excellent (0.60+) | Low (Basic utilitarian look) | Low | 20-30 years |
Installation Guide: Integrating Non-Slip Additives into Stamped Concrete
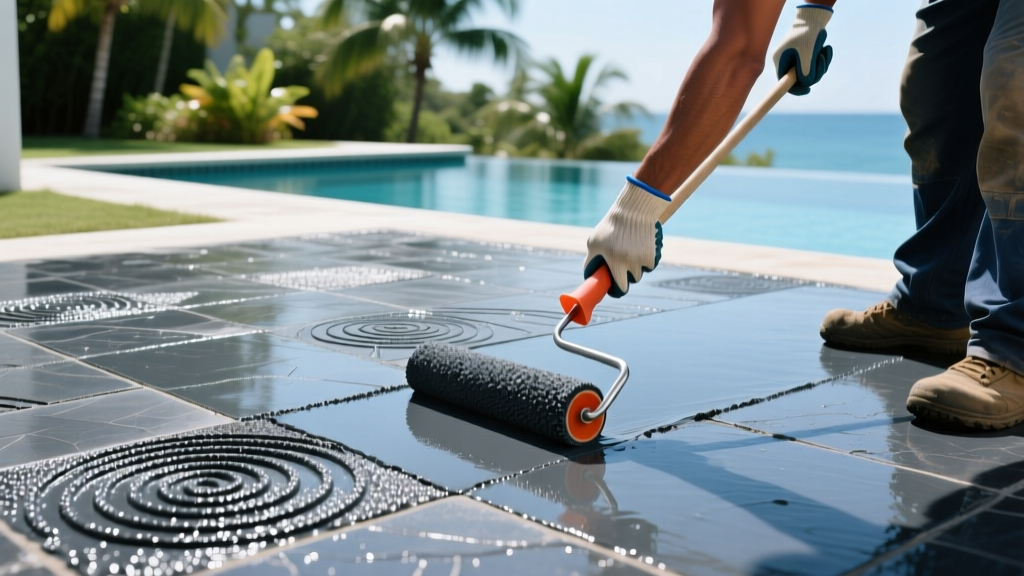
For contractors committed to the stamped aesthetic, integrating a non-slip additive into the sealer is the most cost-effective and visually pleasing method. Follow this precise protocol to ensure even distribution and maximum durability.
- Surface Preparation and Curing: Allow the stamped concrete to cure for a minimum of 28 days. If using a solvent-based acrylic sealer, the slab must be entirely dry. Perform a plastic sheet moisture test (tape a 2x2 foot clear plastic square to the concrete overnight; condensation underneath means the slab is too wet to seal).
- Select the Correct Additive: For residential patios and pool decks, use a clear polymer micronized bead (e.g., H&C SharkGrip or SureCrete SureGrip). These are typically 20-40 mesh and do not alter the color of the stain or sealer. For commercial ramps or high-traffic public walkways, use 60-80 mesh aluminum oxide grit for aggressive traction.
- Mixing Ratios: The standard mix ratio is 1 pound of polymer grit per 5 gallons of sealer. For high-slope areas or commercial pool decks, increase to 1.5 pounds per 5 gallons. Do not exceed 2 pounds per 5 gallons, or the sealer will become cloudy and the grit will clump.
- Agitation Protocol: Polymer grit will settle to the bottom of the bucket within 3 to 5 minutes. You must use a mechanical paint mixer attached to a drill, keeping the sealer in constant motion. If spraying, use a hopper gun with continuous mechanical agitation. If rolling, stir the tray every single pass.
- Application Technique: Apply the first coat of sealer without grit to penetrate the pores and lock in the color. Allow it to tack up (usually 2-4 hours). Apply the second coat with the non-slip additive mixed in. Use a 3/8-inch nap roller for even distribution, rolling in a single direction to avoid streaking the grit.
Durability and Maintenance: What Happens After Year One?
The durability of non-slip stamped concrete is entirely dependent on the sealer system, not the concrete slab itself. The ADA Standards for Accessible Design require that walking surfaces be stable, firm, and slip-resistant, meaning maintenance is a legal necessity for commercial properties.
Advantages of Polymer Grit Systems
- UV-stable additives do not yellow or degrade under direct sunlight.
- Does not alter the structural integrity of the concrete slab.
- Can be stripped and reapplied without grinding the concrete.
Drawbacks and Failure Modes
- Acrylic sealers degrade under UV exposure and foot traffic, requiring re-application every 18 to 36 months.
- If the sealer flakes or peels due to moisture vapor transmission (MVT), the non-slip grit is lost with it.
- Aluminum oxide grit can scratch bare feet on pool decks if applied too heavily.
Cost Breakdown: Bare Stamped vs. Non-Slip Upgrades
Adding slip resistance to stamped concrete is remarkably inexpensive when done during the initial installation, but costly if retrofitting is required later. Below is the current pricing landscape for professional installation.
| Installation Scenario | Material Cost (per sq ft) | Labor Cost (per sq ft) | Total Installed Cost (per sq ft) |
|---|---|---|---|
| Standard Stamped Concrete (No Grip) | $4.50 - $6.00 | $7.50 - $12.00 | $12.00 - $18.00 |
| Stamped + Polymer Grit Additive | $4.80 - $6.40 | $8.00 - $12.50 | $12.80 - $18.90 |
| Stamped + Aluminum Oxide Grit | $5.20 - $7.00 | $9.50 - $14.00 | $14.70 - $21.00 |
| Retrofit: Strip, Clean, and Re-seal with Grip | $1.50 - $2.50 | $3.50 - $5.00 | $5.00 - $7.50 |
Expert Decision Framework: Which System to Choose?
Use this practical decision matrix to determine the exact non-slip specification for your project based on the environment and expected traffic.
Scenario A: Residential Pool Deck
Requirement: High barefoot traction, low visual disruption, moderate traffic.
Solution: Stamped concrete with a light broadcast of clear polymer micronized beads (1 lb per 5 gallons) in a water-based polyurethane sealer. Water-based sealers remain cooler under bare feet than solvent-based acrylics.
Scenario B: Commercial Restaurant Patio
Requirement: High heel and shoe traction, heavy foot traffic, frequent cleaning with degreasers.
Solution: Stamped concrete with a medium broadcast of aluminum oxide grit (1.5 lbs per 5 gallons) sealed with a high-solids, chemical-resistant polyaspartic or epoxy-urethane topcoat. Standard acrylics will dissolve under commercial degreasers.
Scenario C: Steep Driveway or ADA Ramp
Requirement: Maximum tire and wheelchair grip, strict ADA compliance.
Solution: Avoid stamping mats entirely on the incline. Pour a heavy broom-finished concrete surface or use exposed aggregate. If the stamped aesthetic is strictly mandated by the client, use deep-texture stamping mats (like 1.5-inch deep slate) combined with an aggressive aluminum oxide grit sealer system.
Written by
James ThorntonJames Thornton is a construction industry veteran with 25 years of hands-on experience in wood framing, lumber grading, and residential building codes. He started as a framing carpenter in rural Oregon, earned his ICC Residential Building Inspector certification, and eventually became a senior plan reviewer for the City of Portland Bureau of Development Services. James holds a B.S. in Wood Science & Technology from Oregon State University and is a certified lumber grader through the West Coast Lumber Inspection Bureau (WCLIB). He has inspected over 3,000 residential construction sites and authored the city's internal guide on advanced framing techniques (2x6 at 24" O.C.). James lives in Bend, OR, where he builds custom timber-frame cabins and competes in lumberjack sports.
More from James Thornton
View all
Insulation
Best Home Insulation Materials: Complete 2026 Guide
Compare top home insulation materials for 2026. Find R-values, installed costs per square foot, and best uses for fiberglass, spray foam, and mineral wool.
Aug 4, 2026

Sustainable Building
Certify Your Green Building Material for LEED and WELL
Step-by-step guide to certifying a green building material for LEED v5 and WELL v2. Master EPDs, HPDs, and VOC limits for 2026 project specifications.
Aug 4, 2026

Stone & Masonry
Veneer Stacked Stone Panels: Interior Design & Style Showcase
Discover how veneer stacked stone panels transform interiors. Explore modern design profiles, material pairings, and technical installation specs.
Aug 4, 2026