Stamped Concrete vs Paver Patio Repair: Troubleshooting Guide
Compare stamped concrete vs paver patio repair costs, troubleshooting steps, and maintenance realities to fix cracks, sinking, and sealer hazing.

The Core Dilemma: Monolithic Slabs vs. Modular Systems
When homeowners and contractors weigh stamped concrete vs paver patio installations, the conversation usually centers on upfront aesthetics and initial installation costs. However, the true cost of ownership reveals itself years later during the troubleshooting and repair phase. The fundamental difference in repairability stems from their structural nature: stamped concrete is a monolithic, rigid slab that transfers stress into cracking, while a paver patio is a flexible, modular system that accommodates ground movement but suffers from joint degradation and base settlement.
Understanding the specific failure modes of each material is critical for property managers, landscape architects, and homeowners planning long-term exterior maintenance. This guide breaks down the exact troubleshooting protocols, 2026 material costs, and specialized repair techniques required to restore both surfaces to their original condition.
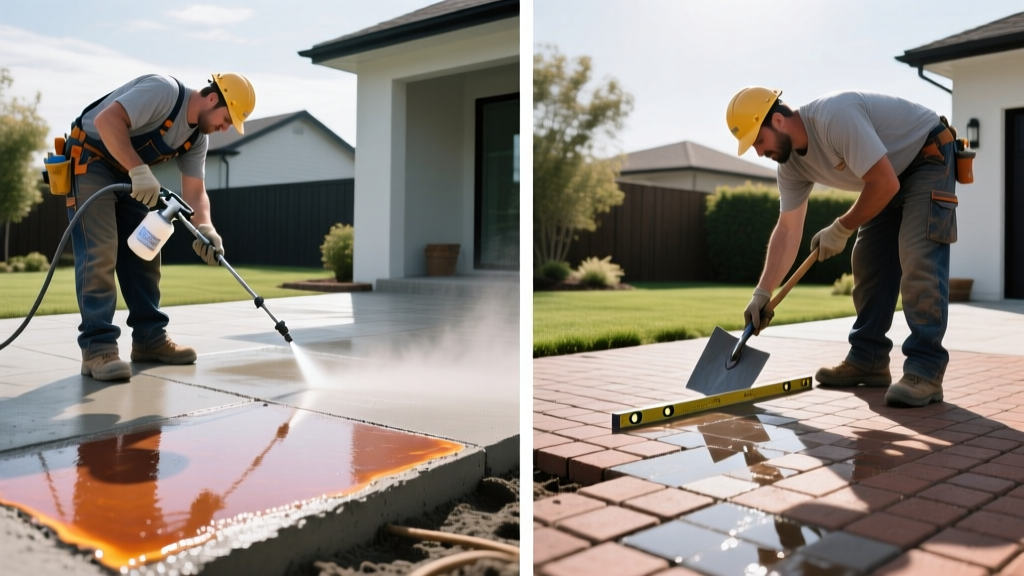
Stamped Concrete: Troubleshooting & Repair Matrix
Stamped concrete relies heavily on its protective sealer and color hardeners to maintain its appearance. According to guidelines from the American Concrete Institute (ACI), surface defects in decorative concrete are often misdiagnosed as structural failures when they are actually cosmetic sealer or curing issues. Below is a diagnostic matrix for the most common stamped concrete failures.
| Symptom | Primary Cause | Repair Protocol | Est. Cost (2026) |
|---|---|---|---|
| White, cloudy hazing | Moisture trapped under acrylic sealer | Xylene solvent bath and re-roll | $0.75 - $1.25 / sq ft |
| Flaking or peeling sealer | UV degradation or over-application | Chemical stripping and resealing | $2.50 - $4.00 / sq ft |
| Hairline cracks (<1/8") | Plastic shrinkage during curing | Color-matched caulking or slurry | $4.00 - $6.00 / lin ft |
| Structural cracks (>1/4") | Subgrade settlement or tree roots | Epoxy injection or slab replacement | $15.00+ / lin ft |
Fixing Sealer Delamination and White Hazing
White hazing is the most frequent complaint with stamped concrete. It occurs when water-based or solvent-based acrylic sealers (like SuperSeal 30 or SureCrete Super 20) are applied to a slab that still holds internal moisture, or when rain hits the surface before the sealer fully cross-links. The trapped moisture turns the acrylic milky.
Addressing Shrinkage vs. Structural Cracks
Not all cracks require slab replacement. Plastic shrinkage cracks (typically less than 1/8-inch wide and shallow) are cosmetic. To repair these, use a diamond-blade crack chaser to widen the fissure into a 'V' shape, clean it with compressed air, and fill it with a color-matched, self-leveling polyurethane sealant like Sikaflex Concrete Fix. For structural cracks exceeding 1/4-inch that feature vertical displacement (faulting), the subgrade has failed. Mudjacking (polyurethane foam injection) can lift the sunken section back to grade, but the crack must still be routed and sealed to prevent water infiltration from freezing and exacerbating the heave.
Paver Patios: Troubleshooting & Repair Matrix
Interlocking concrete pavers bypass the cracking issue entirely because the joints act as expansion and contraction buffers. However, as the National Concrete Masonry Association (NCMA) notes, flexible pavements are highly susceptible to subgrade erosion, edge restraint failure, and joint sand degradation. Troubleshooting a paver patio requires diagnosing the base before addressing the surface.
| Symptom | Primary Cause | Repair Protocol | Est. Cost (2026) |
|---|---|---|---|
| Localized sinking/puddling | Washed-out bedding sand or base | Remove pavers, re-compact base, screed | $8.00 - $12.00 / sq ft |
| Perimeter pavers spreading | Edge restraint failure or spike pull-out | Install rigid restraint with 10" steel spikes | $6.00 - $9.00 / lin ft |
| Weeds and ant infestations | Polymeric sand washout or degradation | Pressure wash, dry, apply new polymeric sand | $1.50 - $2.50 / sq ft |
| White crust on pavers | Efflorescence (soluble salts migrating) | Efflorescence cleaner and wait for natural stop | $0.50 - $1.00 / sq ft |
Base Settlement and Edge Restraint Failure
If a paver patio is sinking near the house or spreading outward at the edges, the issue is almost never the pavers themselves—it is the base or the restraint. A proper modular patio requires 4 to 6 inches of mechanically compacted angular aggregate (3/4-inch minus crushed stone) topped with 1 inch of coarse, sharp concrete sand. If rounded pea gravel or stone dust was used instead of angular aggregate, the base will naturally shift under load.
To repair a sunken section, carefully lift the affected pavers using two flathead screwdrivers. Excavate the compromised bedding sand and check the aggregate base. If the base is soft, add 3/4-inch minus gravel and compact it with a vibratory plate compactor (minimum 5,000 lbs of centrifugal force). Re-screed the bedding sand using 1-inch PVC pipes as guides, and relay the pavers. For edge spreading, remove the failing plastic edging and install a rigid system like SnapEdge or Perma-Edge, securing it with 10-inch galvanized steel landscape spikes driven every 6 inches.
Polymeric Sand Washout and Hazing
Polymeric sand (such as Techniseal HP or Alliance Gator) binds the joints to prevent weeds and washout. However, improper activation is a massive source of contractor callbacks. If the sand is over-watered during activation, the polymers wash to the surface and cure into a stubborn white haze. Conversely, under-watering leaves the sand loose, allowing heavy rain to wash it out entirely.
Long-Term Maintenance Cost Comparison (10-Year Projection)
When deciding between stamped concrete vs paver patio surfaces for a new build or renovation, the 10-year maintenance trajectory heavily influences the total cost of ownership. While stamped concrete has a lower initial material cost, its mandatory resealing schedule alters the long-term math.
| Cost Factor | Stamped Concrete (1,000 sq ft) | Paver Patio (1,000 sq ft) |
|---|---|---|
| Initial Installation (Avg) | $16,000 - $22,000 | $20,000 - $28,000 |
| Year 3 Maintenance (Sealing/Sand) | $2,000 (Reseal required) | $400 (Spot sand repair) |
| Year 7 Maintenance | $2,000 (Reseal & crack fill) | $1,800 (Full sand replacement) |
| 10-Year Estimated Total Cost | $20,000 - $26,000 | $22,200 - $30,200 |
Decision Framework: When to Repair vs. Replace
Troubleshooting outdoor hardscapes requires knowing when a repair is a viable stopgap versus throwing good money after bad. Use this framework to make the final call:
- Repair Stamped Concrete When: The cracks are isolated and under 1/4-inch wide, the subgrade feels solid underfoot (no hollow sounds when tapped with a rubber mallet), and the surface damage is limited to sealer hazing or UV fading.
- Replace Stamped Concrete When: Multiple intersecting structural cracks have created faulting (one side of the crack is higher than the other by more than 1/4-inch), or if tree roots have caused severe upward heaving that cannot be corrected via polyurethane foam lifting.
- Repair Paver Patios When: The damage is localized (sinking near a downspout), edge restraints have simply pulled loose, or joint sand has degraded. The modular nature of pavers means 95% of issues are highly localized and easily fixed without heavy machinery.
- Replace Paver Patios When: The entire patio exhibits a 'rollercoaster' effect, indicating a catastrophic failure of the subgrade (e.g., the base was installed over uncompacted topsoil or organic clay). If the base is fundamentally flawed, re-leveling the pavers is a temporary fix that will fail again after the next freeze-thaw cycle.
Written by
Priya KapoorPriya Kapoor is a real estate market analyst and construction economics researcher with expertise in housing affordability, development feasibility, and infrastructure investment. She holds a Master of Regional Planning from Cornell University and previously worked as a senior analyst at CBRE's Investment Properties group, where she modeled returns for $4B in mixed-use development pipelines. Priya now runs an independent research practice advising developers, municipalities, and REITs on construction cost forecasting and market timing. She publishes the quarterly "BuildMat Market Pulse" report tracking material price indices across 12 commodity categories. Based in Austin, TX, Priya serves on the board of Habitat for Humanity Austin and is a marathon runner.
More from Priya Kapoor
View all
Construction Cost
Cost to Build a 1600 Sq Ft Home in 2026: Full Breakdown
Accurate 2026 cost to build a 1600 sq ft home—material, labor, and regional pricing breakdowns included. Plan your budget with real-time estimates.
Aug 11, 2026

Wood & Lumber
Name the Types of Wood for Pressure Treatment and Preservation
Learn how to name the types of wood best suited for pressure treatment. Compare species treatability, chemical retention levels, and 2026 preservation costs.
Aug 4, 2026

Stone & Masonry
Stone Veneer Suppliers Lindenhurst: 2026 Cost Analysis
Analyze 2026 stone veneer costs in Lindenhurst, NY. Compare local supplier pricing, delivery fees, and Suffolk County installation labor rates.
Aug 4, 2026