Concrete Brick vs Clay Brick Repair: Troubleshooting Failures
Diagnose and fix masonry failures. Learn the key differences in troubleshooting and repairing concrete brick vs clay brick cracks, efflorescence, and spalling.
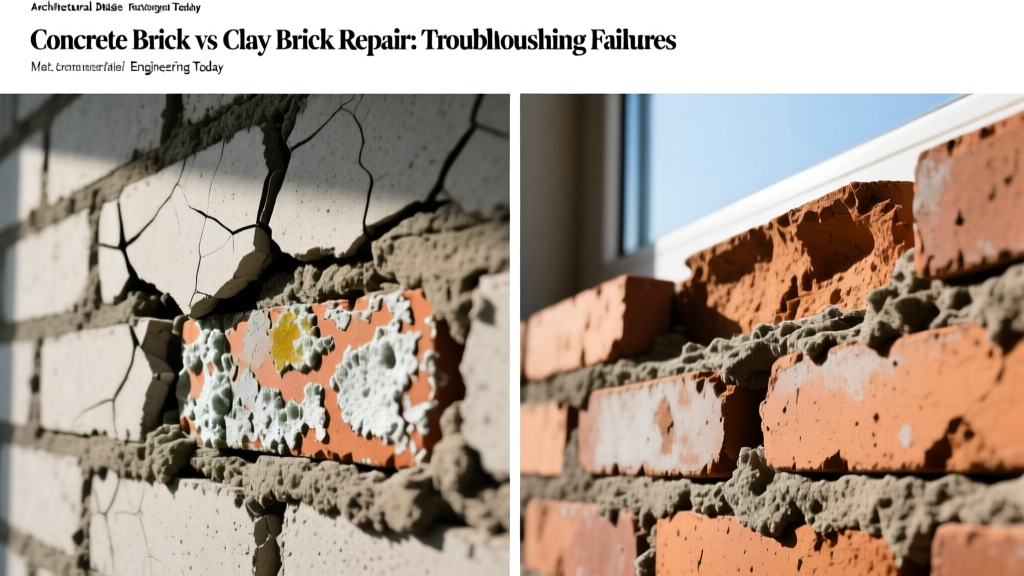
The Diagnostic Matrix: Identifying Your Masonry
Troubleshooting masonry failures begins with accurate material identification. Contractors frequently misdiagnose structural cracks and spalling because they treat concrete brick and clay brick as interchangeable. They are not. Their chemical compositions, porosity levels, and volumetric behaviors are fundamentally opposed. Before ordering patching compounds or repointing mortar, verify your masonry type using the diagnostic matrix below.
| Diagnostic Feature | Clay Brick (Fired) | Concrete Brick (CMU Face Brick) |
|---|---|---|
| Acoustic Tap Test | High-pitched, ceramic 'clink' | Dull, low-frequency thud |
| Chipped Edge Inspection | Uniform color throughout; smooth fracture | Exposed aggregate (sand/stone); granular fracture |
| Water Absorption Rate | Low to moderate (2-8% by weight) | High (10-15% by weight) |
| Standard Dimensions | Modular: 3 5/8" x 2 1/4" x 7 5/8" | Often matches modular, but metric sizes are common |
| Core Holes | Usually 3 small, uniform circular holes | Often 2 large, rectangular or oval frogs/cores |
Volumetric Movement: Why Your Wall is Cracking
The most critical distinction in concrete brick vs clay brick repair is understanding how each material reacts to moisture and temperature. They move in opposite directions, which dictates the type of structural joints required and the root cause of corner cracking.
Clay Brick: Irreversible Moisture Expansion
When clay bricks exit the kiln, they are completely dry. Upon exposure to atmospheric moisture, they undergo irreversible expansion. According to the Brick Industry Association (BIA) Technical Notes, clay masonry can expand between 0.02% and 0.09% over its lifespan. If a clay brick wall lacks properly spaced expansion joints (typically every 20 to 30 feet), the compressive stress will cause the bricks to buckle or push the mortar out, resulting in vertical shear cracks or corner blowouts.
Concrete Brick: Drying Shrinkage
Concrete bricks are manufactured with high moisture content. As they cure and dry in the wall, they shrink—typically between 0.05% and 0.10%. If a concrete brick wall is built without control joints every 15 to 20 feet, the tensile stress of shrinkage will tear the masonry apart, manifesting as stepped cracking along mortar beds or vertical splitting through the bricks themselves.
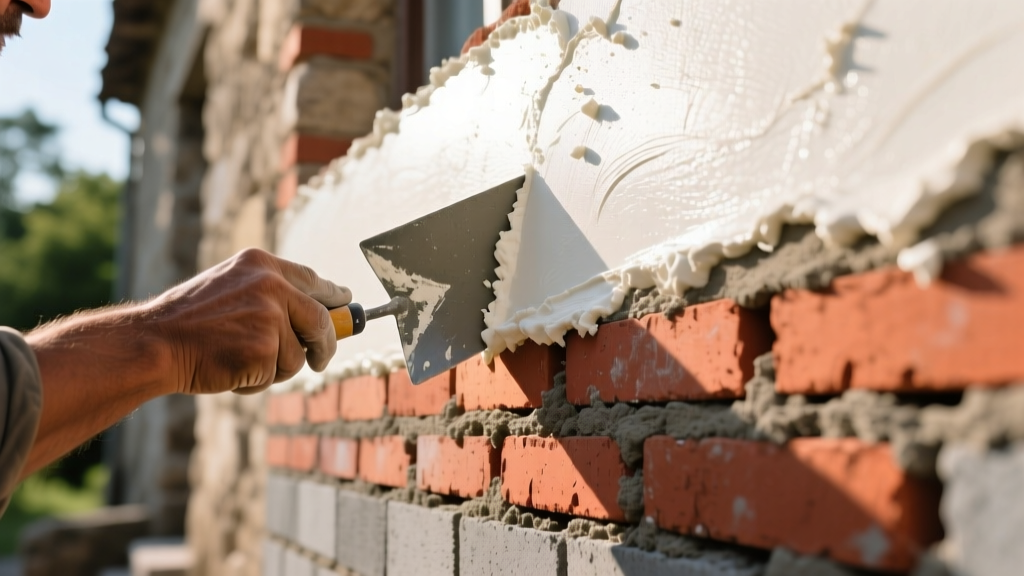
Efflorescence and Chemical Cleaning Protocols
White, powdery stains on masonry are efflorescence—soluble salts brought to the surface by migrating moisture. The troubleshooting and cleaning protocols for concrete brick vs clay brick differ drastically due to their chemical tolerances.
The Muriatic Acid Trap
A common and costly mistake in masonry repair is applying standard muriatic (hydrochloric) acid washes to all brick types.
- Clay Brick: Can tolerate diluted muriatic acid (1 part acid to 10 parts water) to remove severe efflorescence and mortar smears, provided the brick is pre-wetted to prevent acid absorption into the brick body.
- Concrete Brick: NEVER use muriatic acid on concrete brick. The acid attacks the Portland cement paste binding the aggregate. This results in a rough, pitted surface that exposes the internal sand and stone, permanently ruining the brick's aesthetic and accelerating future freeze-thaw spalling.
Corrective Cleaning Solutions
For concrete brick efflorescence, rely on mechanical removal (stiff natural-bristle brushing) followed by specialized, non-acidic cleaners like Prosoco SureKlean VanaTrol or a mild solution of white vinegar and water. Always address the moisture intrusion source—such as failed coping flashings or clogged weep holes—before cleaning, or the efflorescence will return within weeks.
Repointing and Mortar Compatibility (ASTM C270)
Spalling (the flaking or peeling of the brick face) is rarely a defect in the brick itself; it is almost always caused by incompatible repair mortar. When water enters the wall and freezes, it must escape. If the repointing mortar is harder and less permeable than the brick, the moisture is trapped, and the freeze-thaw cycle will blow the face off the brick.
The National Park Service (NPS) Preservation Brief 2 emphasizes that repair mortar must always be softer and more permeable than the masonry unit. Consult the ASTM C270 standard for mortar selection:
| Mortar Type | Compressive Strength | Best Application | Avoid Using On |
|---|---|---|---|
| Type O | 350 psi | Historic, soft clay brick; interior non-loadbearing | Exterior concrete brick; below-grade |
| Type N | 750 psi | General exterior clay and concrete brick above grade | Severe freeze-thaw zones with high saturation |
| Type S | 1,800 psi | Concrete brick below grade; retaining walls; high lateral loads | Soft, historic clay brick (will cause spalling) |
| Type M | 2,500 psi | Heavy structural loads; below-grade foundations | Any standard face brick veneer |
Step-by-Step Repointing Execution
- Rake the Joints: Remove deteriorated mortar to a depth of 2 to 2.5 times the joint width (typically 3/4" to 1" deep). Use a diamond-blade angle grinder with extreme caution to avoid scoring the brick edges.
- Pre-Wet the Substrate: Both clay and concrete bricks will rapidly suck moisture out of fresh mortar, preventing proper hydration and causing shrinkage cracks. Spray the joints with water until damp (no standing water) 2 hours before pointing.
- Pack in Lifts: Apply the mortar in 1/4" layers. Compact each layer with a pointing iron before applying the next to eliminate voids.
- Tool the Joint: Strike the joint with a convex jointer when the mortar is 'thumbprint hard' to compress the surface and create a weather-resistant seal.
Patching Spalled Concrete Brick
While spalled clay brick must be cut out and replaced, spalled concrete brick can often be patched if the structural core remains intact. For 2026 repairs, polymer-modified, shrinkage-compensated patching compounds are the industry standard.
2026 Repair Cost Estimates
Budgeting for masonry troubleshooting requires understanding the labor-intensive nature of the work. The following table outlines average national costs for professional repairs in 2026. Prices fluctuate based on regional labor rates and scaffolding requirements.
| Repair Procedure | Unit of Measure | Average 2026 Cost Range | Primary Cost Driver |
|---|---|---|---|
| Diagnostic Moisture Testing (Infrared/Borescope) | Per Project | $350 - $600 | Equipment calibration and reporting |
| Tuckpointing / Repointing (Type N or S) | Per Sq. Ft. of Wall | $14.00 - $22.00 | Scaffolding setup and joint raking depth |
| Single Brick Replacement (Cut out and relay) | Per Brick | $35.00 - $55.00 | Precision cutting and color-matching mortar |
| Efflorescence Cleaning (Chemical wash) | Per Sq. Ft. of Wall | $3.50 - $6.00 | Severity of staining and containment |
| Control/Expansion Joint Retrofit | Per Linear Ft. | $28.00 - $45.00 | Diamond blade masonry sawing and sealant |
Final Diagnostic Checklist
Before signing a repair contract, ensure the masonry contractor has explicitly identified whether the substrate is concrete brick or clay brick. Ask them to specify the ASTM C270 mortar type they intend to use and verify it aligns with the material's permeability requirements. For further technical specifications on concrete masonry tolerances and shrinkage controls, consult the National Concrete Masonry Association (NCMA) Resource Center. Proper material identification is the single most effective step in ensuring your masonry repair survives the next freeze-thaw cycle.
Written by
Marcus ChenMarcus Chen is a licensed structural engineer (PE) and building materials analyst with over 12 years of experience across residential, commercial, and industrial construction. He holds a Master of Science in Civil Engineering from UC Berkeley and spent six years at Thornton Tomasetti before transitioning to independent consulting and technical writing. Marcus specializes in material selection for seismic-prone regions, concrete reinforcement strategies, and lifecycle cost analysis. His work has been cited by the American Concrete Institute (ACI) and the Structural Engineers Association of California (SEAOC). When he is not on a job site or at his desk, you will find him hiking the Sierra Nevada or restoring a 1920s craftsman bungalow in Oakland, CA.
More from Marcus Chen
View all
Construction Cost
How Much Did the Eiffel Tower Cost to Build?
How much did the Eiffel Tower cost to build in 1889? We adjust for inflation and compare its budget to modern skyscraper construction.
Aug 4, 2026
Fire Resistance
What Is a Fire Resistant Material? Testing & Certification Guide
Discover what is a fire resistant material through ASTM and UL testing. Learn how fire ratings, certifications, and assemblies work in construction.
Aug 4, 2026

Construction Cost
How Much Did the Burj Khalifa Cost to Build?
How much did the Burj Khalifa cost to build? We break down the $1.5B project and extract 5 money-saving strategies for your next build.
Jul 30, 2026