Dry Pour Concrete vs Wet Mix: Structural Installation Guide
Master the installation differences in dry pour concrete vs wet mix. Learn when to use zero-slump dry-tamp versus plastic wet-pour for structural integrity.

The Rheological Divide: Slump and Workability
The terms 'dry pour' and 'wet pour' represent fundamentally different rheological states of cementitious mixtures, dictating entirely distinct installation methodologies. In structural engineering and professional masonry, 'wet pour' refers to plastic concrete with a measurable slump, while 'dry pour' technically refers to zero-slump, dry-tamp concrete. However, in consumer DIY contexts, 'dry pour' is frequently misapplied to describe the practice of dumping unhydrated bagged concrete mix into an excavation and adding water post-placement. Understanding the technical distinction between these states is critical for preventing catastrophic structural failures, frost heave, and premature spalling in 2026 construction projects.
ASTM C143 Standard: The slump test measures concrete consistency. Wet-pour structural concrete typically exhibits a 4-inch to 6-inch slump, allowing it to flow around rebar and consolidate under vibration. Zero-slump (dry-tamp) concrete retains its shape when the slump cone is removed, requiring intense mechanical compaction to achieve structural density.
Wet-Pour Installation: Structural Slabs and Footings
Wet-pour concrete is the standard for monolithic slabs, continuous footings, and suspended decks. Its plasticity allows it to encapsulate steel reinforcement and fill complex formwork. According to the National Ready Mixed Concrete Association (NRMCA), proper placement of wet-pour concrete relies on maintaining the correct water-to-cement (w/c) ratio—typically between 0.40 and 0.50 for high-strength applications—while utilizing chemical admixtures like polycarboxylate ether (PCE) superplasticizers to maintain workability without adding excess water.
Step-by-Step Wet Pour Execution
- Formwork and Vapor Retardation: Install engineered forms and lay a minimum 15-mil polyethylene vapor barrier over a 4-inch capillary break of clean gravel to prevent subgrade moisture migration.
- Reinforcement Placement: Suspend #4 or #5 epoxy-coated rebar on plastic chairs, ensuring a minimum 2-inch clear cover from the subgrade to prevent corrosion-induced spalling.
- Placement and Consolidation: Discharge the concrete via chute or boom pump. Use a 1.5-inch internal pencil vibrator operating at 10,000 to 15,000 RPM. Insert the vibrator vertically every 18 inches, penetrating the previous lift by 6 inches to eliminate cold joints and honeycombing.
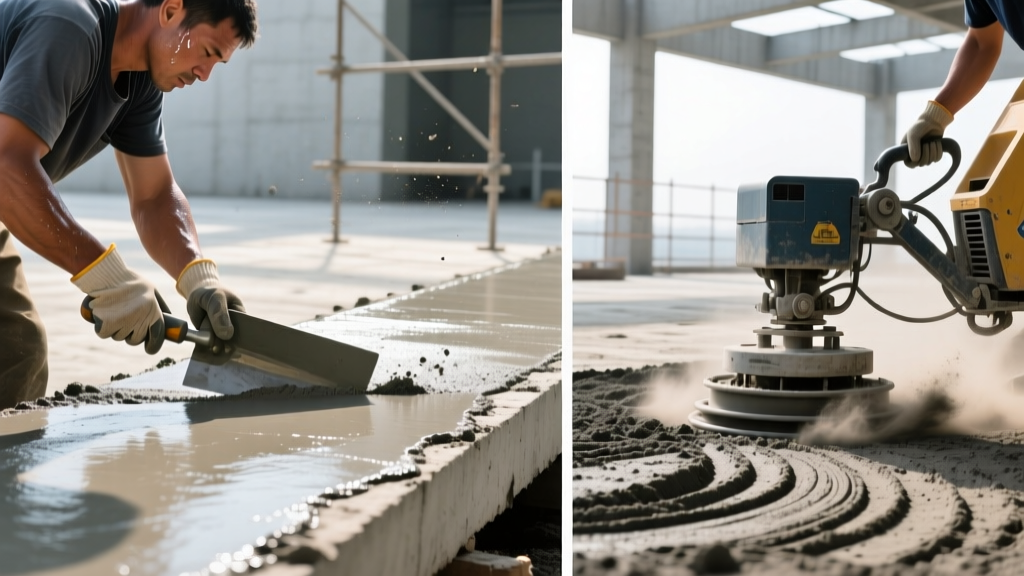
- Screeding and Finishing: Strike off the surface with a laser screed or manual straightedge. Follow with a bull float to embed aggregate, then use a ride-on or walk-behind power trowel (equipped with 36-inch or 46-inch pans) once the concrete can support a worker's weight with only a 1/4-inch indentation.
Common Wet-Pour Failure Modes
- Plastic Shrinkage Cracking: Caused by rapid surface evaporation exceeding the bleed water rise rate. Mitigate with evaporation retardants or windbreaks.
- Segregation: Occurs when the mix is over-vibrated or dropped from heights exceeding 5 feet, causing heavy aggregate to settle and cement paste to rise.
- Scaling and Spalling: Results from finishing the surface while bleed water is still present, trapping a weak layer of water and fines at the top.
Dry-Tamp (Dry Pour) Installation: Compaction-Dependent Applications
True dry-tamp concrete (zero-slump) is utilized in specific hardscape and precast applications where formwork is impractical or where immediate load-bearing capacity is required without a prolonged curing wait. It is heavily relied upon for interlocking concrete paver bases, retaining wall block cores, and underground utility pipe bedding.
Paver Base and Pipe Bedding Execution
For paver installations, a 4-inch to 6-inch layer of zero-slump, open-graded concrete base is screeded to the precise grade. A Wacker Neuson or similar reversible plate compactor makes multiple overlapping passes to achieve 95% Proctor density. The mechanical vibration forces the angular aggregate into a tight interlock, while the minimal water content (just enough to hold a snowball shape when squeezed) allows the cement to hydrate slowly, creating a rigid, frost-resistant sub-base that prevents paver settling.
The 'Dry Pour' Fence Post Method: An Engineering Critique
The most common consumer search regarding 'dry pour concrete' relates to setting fence posts by dumping dry, unmixed bagged concrete into an excavated hole and pouring water over the top. While heavily marketed by hardware stores for its speed, structural engineers and the Quikrete Project Guides strongly advise against this method for load-bearing or tall privacy fences, particularly in expansive clay soils or regions with deep frost lines.
Why the 'Dump and Wet' Method Fails
When dry powder is layered with water in a confined hole, the water cannot evenly penetrate the mass. This creates 'dry pockets' of unhydrated cement at the core, surrounded by a weak, overly saturated outer shell. Furthermore, the cylindrical shape of the hole acts as a perfect sleeve for frost heave; when the surrounding clay freezes and expands, it grips the straight concrete cylinder and pushes it upward. The correct installation requires a wet-mix concrete collar poured into a bell-shaped excavation that extends 6 inches below the local frost line, providing an inverted anchor that resists upward hydrostatic and frost pressures.
Comparative Matrix: Dry Pour vs Wet Mix Performance Data
| Feature | Wet-Pour (Plastic Concrete) | Dry-Tamp (Zero-Slump) | DIY 'Dump & Wet' (Unmixed) |
|---|---|---|---|
| Slump (ASTM C143) | 4 to 6 inches | 0 inches | N/A (Variable/Unpredictable) |
| Placement Method | Chute, pump, internal vibration | Screed, heavy plate compaction | Gravity drop, manual stirring |
| Compressive Strength | 3,000 to 5,000+ PSI (28-day) | 2,500 to 4,000 PSI (if compacted) | < 1,500 PSI (highly compromised) |
| Primary Applications | Slabs, footings, foundations, walls | Paver bases, pipe bedding, precast | Lightweight mailboxes (not recommended) |
| 2026 Avg. Material Cost | $145 - $165 per cubic yard (delivered) | $7.50 - $9.00 per 80lb bag | $6.50 - $8.00 per 50lb fast-set bag |
Curing Protocols and Hydration Failures
The hydration of Portland cement is an exothermic chemical reaction that requires sustained moisture. The Portland Cement Association (PCA) mandates that concrete be kept continuously moist for a minimum of 7 days to achieve adequate strength development and surface durability.
For wet-pour installations, curing is achieved by applying a membrane-forming curing compound (ASTM C309) immediately after final finishing, or by continuous wet-curing using saturated burlap and 6-mil polyethylene sheeting. Failure to cure wet-pour concrete results in a weak, dusty surface prone to rapid carbonation and freeze-thaw scaling.
For dry-tamp installations, the curing paradigm is inverted. Because the mix contains minimal water, the hydration process relies on drawing ambient moisture from the surrounding subgrade or from subsequent surface watering. If dry-tamp concrete is placed over a highly absorbent, dry subgrade without pre-dampening the soil, the subgrade will wick the limited moisture out of the cement matrix before hydration can occur, resulting in a friable, failed base layer. Always mist the subgrade prior to placing zero-slump concrete to ensure the cement retains the water necessary for the chemical reaction.
Final Structural Directives
Selecting between dry pour concrete vs wet mix is not a matter of preference, but a strict function of structural load, formwork geometry, and environmental exposure. Reserve wet-pour, properly vibrated plastic concrete for all structural foundations, slabs, and post anchors. Utilize zero-slump dry-tamp concrete exclusively for mechanically compacted hardscape bases and utility bedding. Never compromise the water-to-cement ratio or bypass mechanical consolidation in an attempt to save time; the long-term cost of replacing heaved slabs or collapsed retaining walls far exceeds the initial investment in proper placement equipment and ready-mix delivery.
Written by
David NakamuraDavid Nakamura is a licensed architect (AIA) and construction technology writer focused on sustainable building methods, mass timber engineering, and high-performance building envelopes. He holds a Master of Architecture from the University of Washington and is a certified Passive House Consultant (CPHC). David spent eight years at the Seattle firm Mithun, where he led the design of three LEED Platinum projects, before founding his own practice specializing in net-zero residential design. He serves on the editorial advisory board of GreenBuilder Magazine and has authored peer-reviewed papers on cross-laminated timber (CLT) connections for the Journal of Structural Engineering. In his spare time, David teaches woodworking at Pratt Fine Arts Center and kayaks the Puget Sound.
More from David Nakamura
View all
Construction Cost
Labor Cost to Build a Deck Per Sq Ft: 2026 Installation Guide
Discover the exact labor cost to build a deck per sq ft in 2026. This installation guide breaks down contractor rates, complexity factors, and hidden fees.
Aug 4, 2026

Construction Cost
How Much Does It Cost to Build a 3 Bedroom House? Financing Guide
Learn exactly how much it costs to build a 3 bedroom house and explore 2026 financing options, construction loan types, and budget frameworks for your build.
Aug 4, 2026

Construction Cost
Cost to Build a Tennis Court: 2026 Guide
How much does it cost to build a tennis court in 2026? Breakdowns for asphalt, concrete, and synthetic surfaces plus fencing and lighting.
Jul 30, 2026