Troubleshooting Defects Across Different Types of Polished Concrete
Diagnose and repair defects specific to different types of polished concrete, including cream finishes, exposed aggregate, and dyed slabs.

Polished concrete is not a monolithic flooring system. The troubleshooting and repair protocols for a Level 1 cream polish differ fundamentally from a Level 4 heavily exposed aggregate finish. Misdiagnosing the specific polish type and aggregate exposure level leads to catastrophic aesthetic failures during spot repairs, often resulting in visible halos, mismatched gloss levels, and accelerated wear.
According to the Concrete Polishing Council (CPC), polished concrete is categorized by both aggregate exposure (Classes A through D) and gloss levels (Levels 1 through 4). Repairing a micro-scratch on a Class A cream polish requires a completely different abrasive sequence and chemical approach than fixing a pop-out on a Class C salt-and-pepper floor. This guide details the exact failure modes and repair protocols for each primary type of polished concrete.
Diagnostic Matrix: Matching Defects to Polish Types
Before initiating any repair, identify the exact classification of the existing floor. The matrix below maps the four primary CPC aggregate exposure classes to their most frequent field failures.
| Polish Class | Aggregate Exposure | Typical Grit Stop | Primary Defects & Failures | Core Repair Challenge |
|---|---|---|---|---|
| Class A (Cream) | None (Cement Paste) | 100 - 400 Grit | Tire scuffs, micro-scratching, alkaline etching | Blending resin scratches without cutting into aggregate |
| Class B (Fine) | Fine Sand | 400 - 800 Grit | Localized delamination, minor pop-outs | Color-matching epoxy to the fine sand matrix |
| Class C (Medium) | Medium Aggregate | 800 - 1500 Grit | Aggregate fracturing, grout line separation | Routing and replacing individual stones seamlessly |
| Class D (Large) | Large Aggregate | 1500 - 3000 Grit | Deep spalling, lippage, stone displacement | Grinding high spots without shattering adjacent stones |
Troubleshooting Cream Polishes (Class A)
Cream polishes rely entirely on the cement paste. Because the paste is softer than aggregate, it is highly susceptible to alkaline etching from improper cleaning chemicals and micro-scratching from silicate sand tracked in from exterior entries.
Fixing Micro-Scratches and Dulling
When a cream polish loses its gloss or exhibits fine scratching, do not use metal-bond diamonds to re-cut the floor. Metal bonds will aggressively tear the soft cement paste, exposing fine aggregate and permanently altering the floor's classification from Class A to Class B. Instead, use transitional hybrid pads (such as 400-grit resin or specialized maintenance pads like the HTC Twister system) running at 300 to 350 RPM on a high-speed burnisher. Follow this by reapplying a penetrating lithium silicate densifier (e.g., PROSOCO Consolideck LS) to chemically harden the calcium silicate hydrate matrix before the final burnish.
Removing Tire Scuffs and Rubber Marks
Tire scuffs on cream polishes are often mistaken for deep scratches. These are typically plasticizer transfers from forklift or cart wheels. Use a neutral-pH, high-alkaline degreaser specifically formulated for polished concrete. Avoid acidic cleaners entirely; acids will etch the cement paste, creating dull, white spots that require a full mechanical re-polish to fix.
Resolving Pop-Outs in Salt-and-Pepper (Class B & C) Finishes
Salt-and-pepper finishes expose the fine to medium aggregate. If the original slab was poured with a high water-to-cement ratio or finished with excess water on the surface, the top 1/8 inch can delaminate over time, leading to aggregate pop-outs.
The Routing and Epoxy Injection Protocol
The International Concrete Repair Institute (ICRI) guidelines for surface spall repair dictate that loose material must be entirely removed before patching. For polished concrete, this means routing out the pop-out with a V-shaped diamond bit to create a mechanical lock. Fill the void with a low-viscosity, UV-stable polyaspartic or high-build epoxy filler (such as Metzger/McGuire Spalldex 100). Crucially, you must tint the epoxy to match the specific color of the surrounding cement matrix, not the aggregate. Once cured, grind the patch flush using a 50-grit metal bond, then step through the exact resin progression used on the original floor (typically 100, 200, 400, and 800 grit) to blend the gloss.
When spot-grinding a repair on a salt-and-pepper floor, the localized grinding will often leave a visible 'halo' or dull ring around the patch. To prevent this, always feather your grinding passes outward by at least 12 inches into the surrounding field, stepping down the pressure on your grinder as you move away from the repair center.
Fixing Fractured Stones in Exposed Aggregate (Class D)
Class D floors expose large aggregate (3/4 inch or larger). Heavy point-loads from pallet jacks or steel-wheeled carts can fracture the protruding stones. You cannot invisibly glue a fractured stone back together; the fracture line will always refract light differently than the solid stone.
The only permanent repair is complete stone replacement. Use a handheld angle grinder with a diamond blade to carefully score a perimeter around the damaged stone, then use a chisel to pop the stone out. Clean the void with compressed air and prime it with a concrete bonding agent. Fill the void with a color-matched, high-build methyl methacrylate (MMA) mortar or a specialized aggregate-replacement epoxy. Trowel it slightly proud of the surface, allow it to cure fully, and then re-grind the area starting with a 30-grit metal bond to flatten the patch before moving through the resin sequence.
Color Correction for Dyed and Stained Polished Concrete
Acetone-based dyes are frequently used to add color to polished concrete. However, they lack UV stability and are prone to fading near storefront windows or skylights. Furthermore, improper application can lead to blotchy absorption.
Stripping and Re-Dyeing Faded Areas
To repair UV-faded dye, you must first strip the existing topical guard coat. Use an alkaline stripper and a black scrubbing pad on a low-speed floor machine. Once the guard is removed and the slab is neutralized and dried, reapply the acetone dye. To ensure even absorption and prevent lap marks, apply the dye using a pump-up sprayer and immediately back-roll it with a microfiber mop. After the dye dries (typically 2-4 hours), apply a fresh coat of a UV-stable polyaspartic sealer or a specialized penetrating guard to lock in the color and provide UV resistance.
The 5-Step Localized Spot Repair Framework
For generalized localized damage across any polish type, follow this strict sequential framework to ensure structural integrity and aesthetic blending:
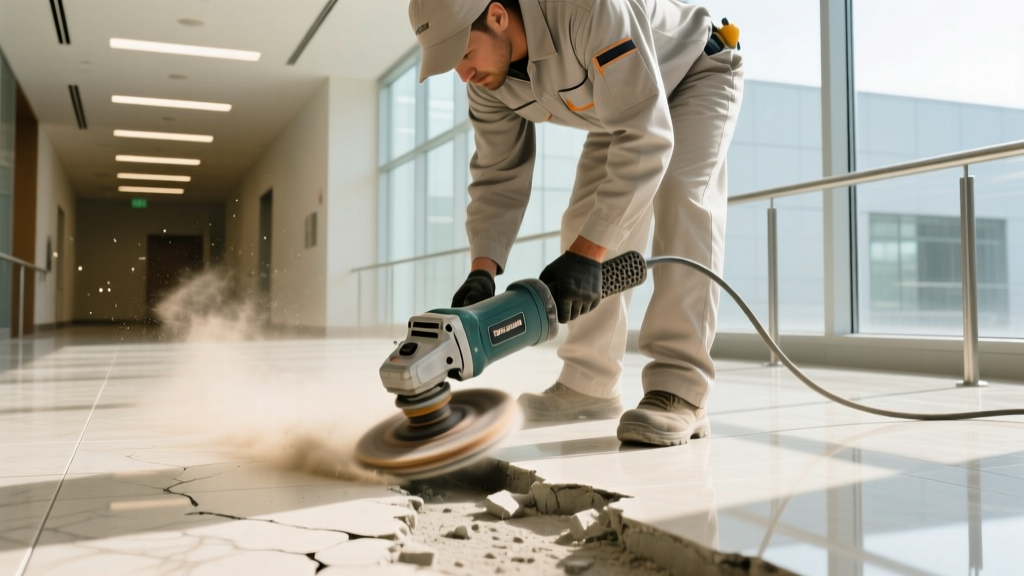
- Isolate and Route: Use a handheld grinder with a dust shroud and HEPA vacuum to route out all friable, cracked, or spalled material until you reach solid, sound concrete.
- Prime and Fill: Apply a moisture-tolerant epoxy primer to the void. Fill with a rapid-curing, tinted polyaspartic or MMA mortar, overfilling the void by approximately 1/16 inch.
- Coarse Flattening: Once cured, use a 30- or 50-grit metal-bond diamond segment on a planetary grinder to knock the patch flush with the surrounding floor. Keep the grinder moving to avoid creating a dip.
- Resin Blending: Transition to resin pads. Start two grits lower than the floor's final finish (e.g., if the floor is an 800-grit finish, start the patch at 200-grit). Use overlapping, circular passes, feathering out 18 inches into the surrounding floor.
- Densify and Guard: Apply a lithium silicate densifier to the repaired area to ensure the patch hardness matches the field. Finish with the exact topical guard or burnishing cream used on the rest of the slab.
Guard Coat Delamination: The MVER Factor
A common troubleshooting scenario across all types of polished concrete is the peeling or flaking of topical guard coats. This is almost always caused by ignoring the Moisture Vapor Emission Rate (MVER). If a topical acrylic or polyurethane guard is applied to a slab emitting more than 3 to 5 lbs of moisture vapor per 1,000 square feet per 24 hours (as measured by an ASTM F1869 calcium chloride test), the hydrostatic pressure will blister and delaminate the guard.
To repair this, the failing guard must be chemically stripped or mechanically scarified. Before reapplying any topical product, the slab must be treated with a penetrating silane/siloxane water repellent or a specialized moisture-mitigating epoxy primer. For high-MVER slabs, abandon topical guards entirely and rely solely on penetrating lithium silicate densifiers and burnishable maintenance creams, which do not form a surface film and are immune to hydrostatic blistering.
Written by
Sarah WhitfieldSarah Whitfield is a chartered quantity surveyor (MRICS) and construction cost analyst with 15 years of experience in material pricing, procurement strategy, and project budgeting. She earned her degree in Construction Management from the University of Reading (UK) and has worked on projects ranging from $2M custom homes to $180M mixed-use developments across North America and Europe. Sarah currently leads cost estimating for BuildMat Insight, maintaining a proprietary database of 4,000+ material price points updated quarterly. She is a frequent contributor to RSMeans cost data panels and has presented at the International Cost Engineering Council (ICEC) congress. Based in Denver, CO, Sarah is an avid trail runner and volunteer mentor for Women in Construction.
More from Sarah Whitfield
View all
Wood & Lumber
What Are the Different Types of Wood? A Builder's Guide
Compare structural softwoods, finish hardwoods, and engineered lumber. Analyze Janka ratings, MOE values, and 2026 pricing for construction.
Aug 4, 2026

Walls & Panels
Steel Framing vs Wood Framing: Corrosion and Moisture Defense
Compare steel framing vs wood framing for moisture resistance. Learn about galvanized coatings, condensation risks, and corrosion protection strategies.
Jul 21, 2026

Stone & Masonry
How to Cut Stone Veneer: Wet Saw vs Grinder Comparison
Compare the best tools for cutting stone veneer. We review wet saws, angle grinders, and chop saws to help you achieve clean, chip-free cuts.
Jul 21, 2026