Troubleshooting and Repairing Different Types of Polished Concrete Floors
Diagnose and repair defects across grind-and-seal, burnished, and dyed polished concrete floors with expert restoration protocols and cost data.

Polished concrete is frequently marketed as a zero-maintenance flooring solution, but facility managers and contractors know the reality is far more complex. When defects arise, the repair protocol depends entirely on the specific installation method used. Misdiagnosing the floor type leads to catastrophic repair failures—such as applying a topical urethane over a mechanically burnished surface, which permanently ruins the floor's optical clarity. This guide provides a technical diagnostic framework for troubleshooting and repairing the primary types of polished concrete floors, utilizing current 2026 industry standards and chemical restoration protocols.
Diagnostic Matrix: Matching Defects to Floor Types
Before deploying diamond tooling or chemical strippers, you must identify the original installation method. The American Society of Concrete Contractors (ASCC) Polished Concrete Council categorizes these systems by their mechanical and chemical processing steps. Use the matrix below to map the visible defect to the underlying floor type and root cause.
| Visible Defect | Primary Floor Type | Root Cause | Repair Complexity |
|---|---|---|---|
| Yellowing/Peeling Film | Grind-and-Seal (Topical) | UV degradation of acrylic/polyurethane; moisture vapor transmission (MVT) blistering. | High (Requires full chemical strip and recoat) |
| Loss of Gloss / Hazing | Mechanically Polished (Burnished) | Micro-scratching from abrasive grit; improper densifier application; acidic cleaning etching. | Medium (Requires resin re-honing) |
| Color Fading / Bleaching | Dyed / Stained Polished | UV exposure on non-UV-stable acetone dyes; alkaline efflorescence pushing out water-based stains. | Medium (Requires color matching and re-dyeing) |
| Aggregate Pop-Outs | Universal (Heavy Exposure) | Sub-surface rebar corrosion; reactive aggregate (ASR); freeze-thaw spalling in unsealed pores. | High (Requires routing, patching, and re-polishing) |
Mechanically Polished (Burnished) Floors: Restoring Lost Gloss
True mechanically polished concrete relies on a multi-step grinding process using progressively finer diamond abrasives, combined with a penetrating chemical densifier. There is no topical coating. When these floors lose their reflectivity, the issue is almost always micro-scratching in the uppermost 1/16th of an inch of the cement paste, or the depletion of the calcium silicate hydrate (C-S-H) gel matrix due to harsh cleaning chemicals.
The 800-Grit Rule for Micro-Scratches
If a burnished floor looks dull but feels smooth to the touch, the surface has likely been etched by acidic cleaners (pH below 6.0) or scratched by unfiltered dust during routine sweeping.
- Step 1: Clean the floor with an alkaline degreaser (pH 9.0 to 10.0) to remove embedded oils.
- Step 2: Run a planetary grinder equipped with 800-grit transitional hybrid diamonds. Do not drop below 800-grit, or you will expose fresh, un-densified concrete pores.
- Step 3: Apply a secondary coat of lithium silicate densifier (minimum 15% solids content) at a rate of 400 to 600 square feet per gallon. Lithium molecules are smaller than sodium or potassium silicates, allowing deeper penetration into the micro-pores created by the 800-grit pass.
- Step 4: Burnish with 1500-grit and 3000-grit resin pads to re-establish the optical clarity and specular reflection.
Never apply a topical guard (like a spray-on polyurethane or acrylic) to a mechanically polished floor to 'restore shine.' While it provides a temporary high-gloss wet look, it will inevitably scuff, wear unevenly in traffic lanes, and require a complete, expensive chemical strip-down within 12 to 18 months. Always restore the mechanical polish using resin diamonds.
Grind-and-Seal Systems: Fixing Topical Coating Failures
Grind-and-seal floors are ground to a lower grit (typically 100 to 200 metal bond) and then sealed with a topical film-forming coating, such as an aliphatic polyurethane or a high-solids acrylic. These are the most common 'types of polished concrete floors' found in retail and residential spaces due to lower initial costs, but they carry the highest long-term maintenance burden.
Addressing Moisture Vapor Transmission (MVT) Blistering
If the topical sealer is bubbling or delaminating, the root cause is rarely the coating itself; it is sub-slab moisture. According to guidelines referenced by the International Concrete Repair Institute (ICRI), applying a non-breathable urethane over a slab with an MVT rate exceeding 3 to 5 lbs per 1,000 square feet per 24 hours (per ASTM F1869) will trap hydrostatic pressure, causing the coating to blister and peel.
The Repair Protocol:
- Strip the failing coating using a soy-based or dibasic ester (DBE) chemical stripper. Avoid caustic strippers, as they alter the concrete's pH and inhibit the adhesion of the new sealer.
- Perform a quantitative calcium chloride test (ASTM F1869) or an in-situ relative humidity probe test (ASTM F2170).
- If MVT is high, apply a two-part epoxy moisture mitigation primer (such as a 100% solids moisture vapor barrier) before re-applying the aliphatic polyurethane topcoat.
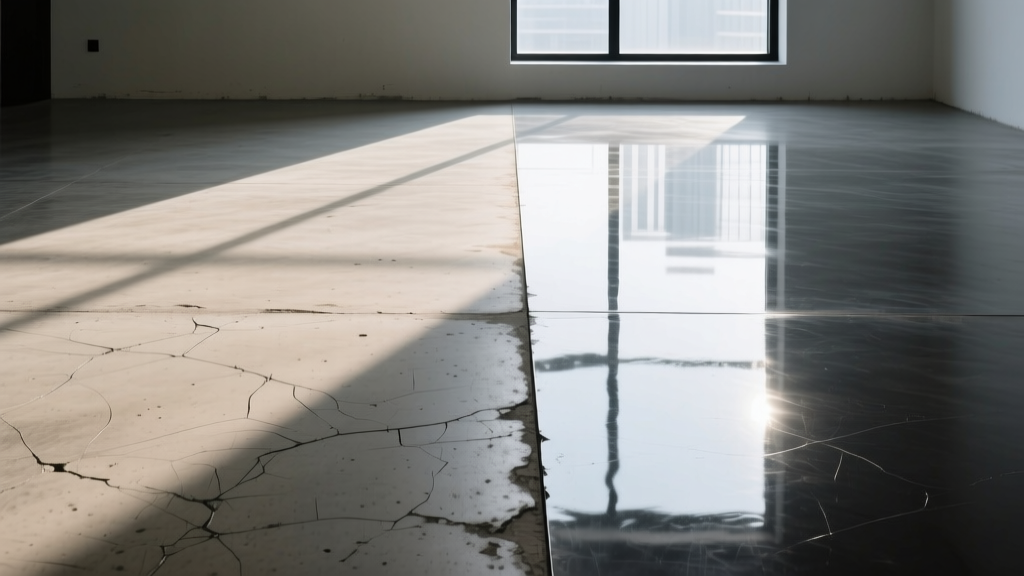
Dyed and Stained Polished Concrete: Chemical & UV Damage
Color integration adds a layer of complexity to troubleshooting. It is critical to distinguish between concrete dyes (typically acetone or water-based penetrating colorants) and acid stains (which chemically react with calcium hydroxide in the slab).
UV Fading in Acetone Dyes
Acetone-based dyes offer vibrant, opaque colors but are notoriously susceptible to UV degradation. If a dyed floor near a storefront window is fading to a chalky grey or pale brown, the dye molecules have broken down under ultraviolet exposure.
The Fix: You cannot simply spray more dye over the faded area; it will result in a dark, overlapping halo. You must mechanically hone the floor down to 400-grit resin to remove the UV-degraded paste layer, re-apply a UV-stable water-based dye or a micronized pigment suspension, and re-densify and burnish the surface. For future prevention, specify UV-stable polyaspartic topcoats over dyed floors in sunlit areas.
Universal Structural Defects: Aggregate Pop-Outs and Spalling
Regardless of the polishing method, exposed aggregate floors are prone to pop-outs—small, cone-shaped fractures where a piece of aggregate has broken away from the surface matrix. This is often caused by chert (a porous, reactive aggregate) absorbing moisture and expanding, or by sub-surface rebar corrosion (rust jacking).
For shallow pop-outs (less than 1/4 inch deep), use a rapid-setting, lithium-based polymer-modified cementitious patching compound. Do not use standard epoxy mortars for shallow patches on polished floors; epoxy has a different refractive index than concrete and will appear as a dark, glossy blemish once polished.
- Route out the pop-out with a 4-inch diamond cup wheel to create clean, vertical edges.
- Vacuum the cavity and dampen it with water (do not leave standing water).
- Trowel in the polymer-modified patching compound, striking it off slightly above the surrounding surface.
- Once cured (typically 2 to 4 hours), re-integrate the patch into the floor by running through the metal bond (40/80 grit) and resin bond (up to 3000 grit) sequences.
2026 Restoration Cost Breakdown
Budgeting for polished concrete repair requires an understanding of the labor-intensive nature of diamond tooling. The table below outlines average commercial restoration costs in 2026, assuming a minimum project size of 2,000 square feet. Smaller areas will incur higher per-square-foot mobilization fees.
| Repair Protocol | Average Cost (per Sq. Ft.) | Estimated Downtime |
|---|---|---|
| Mechanical Re-Honing (800 to 3000 Grit) + Densifier | $2.50 - $4.00 | 12 - 24 Hours |
| Grind-and-Seal Full Strip and Recoat (Urethane) | $3.50 - $5.50 | 48 - 72 Hours (includes cure time) |
| Dye Color Correction and Re-Burnishing | $4.00 - $6.50 | 24 - 36 Hours |
| Targeted Pop-Out Routing and Patching (per incident) | $75.00 - $125.00 flat | 4 Hours per patch |
Preventative Maintenance: The pH 7 to 9 Mandate
The vast majority of troubleshooting calls for polished concrete are the direct result of improper janitorial practices. The calcium silicate hydrate (C-S-H) gel that gives mechanically polished concrete its hardness and shine is highly vulnerable to acidic attack.
Facility managers must mandate the use of neutral or slightly alkaline floor cleaners with a pH strictly between 7.0 and 9.0. Cleaners containing citrus extracts, phosphoric acid, or hydrochloric acid (often sold as 'heavy duty tile and grout cleaners') will chemically dissolve the densified surface layer, leaving a permanent, chalky white etch mark that can only be removed by mechanical re-honing. Furthermore, auto-scrubbers must be fitted with soft bristle brushes or red buffering pads; black or green stripping pads will instantly destroy a 3000-grit burnished finish.
Written by
Sarah WhitfieldSarah Whitfield is a chartered quantity surveyor (MRICS) and construction cost analyst with 15 years of experience in material pricing, procurement strategy, and project budgeting. She earned her degree in Construction Management from the University of Reading (UK) and has worked on projects ranging from $2M custom homes to $180M mixed-use developments across North America and Europe. Sarah currently leads cost estimating for BuildMat Insight, maintaining a proprietary database of 4,000+ material price points updated quarterly. She is a frequent contributor to RSMeans cost data panels and has presented at the International Cost Engineering Council (ICEC) congress. Based in Denver, CO, Sarah is an avid trail runner and volunteer mentor for Women in Construction.
More from Sarah Whitfield
View all
Wood & Lumber
What Are the Different Types of Wood? A Builder's Guide
Compare structural softwoods, finish hardwoods, and engineered lumber. Analyze Janka ratings, MOE values, and 2026 pricing for construction.
Aug 4, 2026

Walls & Panels
Steel Framing vs Wood Framing: Corrosion and Moisture Defense
Compare steel framing vs wood framing for moisture resistance. Learn about galvanized coatings, condensation risks, and corrosion protection strategies.
Jul 21, 2026

Stone & Masonry
How to Cut Stone Veneer: Wet Saw vs Grinder Comparison
Compare the best tools for cutting stone veneer. We review wet saws, angle grinders, and chop saws to help you achieve clean, chip-free cuts.
Jul 21, 2026