Top Types of Stamped Concrete: Mix Designs, Patterns, and Costs
Discover the top types of stamped concrete, including optimal mix designs, PSI requirements, popular patterns, and 2026 installation costs.

The Core Types of Stamped Concrete Patterns
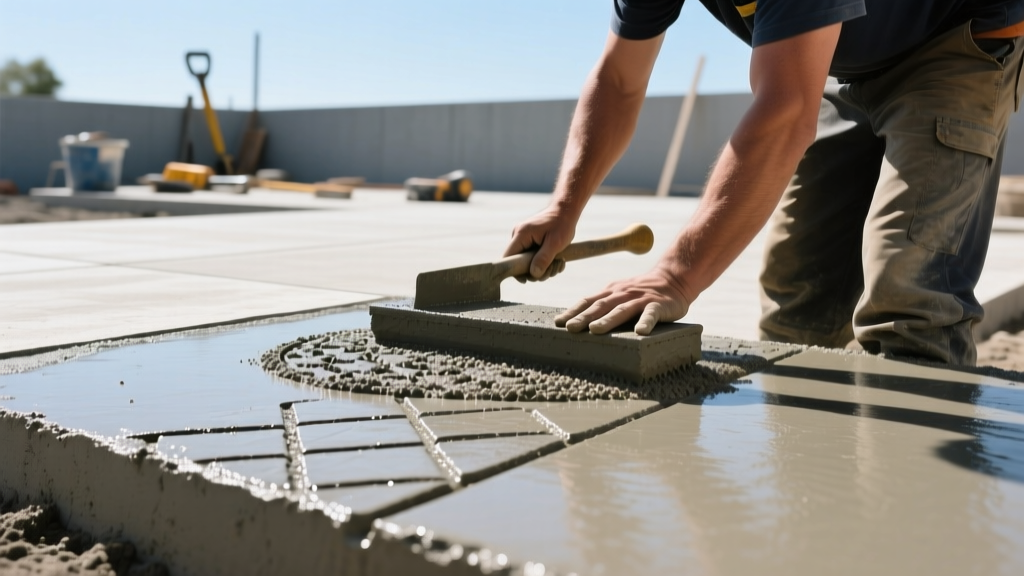
Stamped concrete derives its aesthetic versatility from polyurethane stamping mats that impart texture and pattern into the surface paste before initial set. When evaluating the different types of stamped concrete, contractors and designers categorize them by their geometric structure and depth of impression, which directly dictates the required mix design and placement strategy.
1. Structured and Grid Patterns (Ashlar, Brick, Cobblestone)
Grid patterns feature rigid, repeating geometric lines with deep, distinct grout joints. Ashlar slate and running bond brick are the most common. Because the stamping tools have rigid edges that must align perfectly, the concrete must possess high plasticity but resist lateral spreading. These patterns require a mix with a slightly lower slump to prevent the heavy mats from sinking too deeply and obliterating the crisp joint lines.
2. Random and Seamless Patterns (Slate, Flagstone, Fieldstone)
Seamless textures utilize overlapping mats without rigid grout lines, creating a natural, randomized stone appearance. The edges of these mats are feathered to blend into one another. Because there are no deep structural joints to displace the concrete, the mix can tolerate a slightly higher slump, allowing for easier troweling and a smoother surface paste before the mats are applied.
3. Linear and Deep-Relief Patterns (Wood Plank, Boardwalk)
Wood plank stamping mimics timber decking, requiring deep, aggressive textures to simulate wood grain and plank separations. This is the most demanding pattern type. The deep relief displaces a significant volume of concrete. If the mix is too wet, the displaced concrete will surge up over the plank edges, ruining the illusion. Wood plank stamping demands a stiff, low-slump mix and aggressive vibration to ensure the paste fills the deep grain crevices without bleeding.
Mix Design Specifications by Pattern Type
The Portland Cement Association emphasizes that decorative concrete requires stricter batch tolerances than standard flatwork. A standard 4000 PSI driveway mix with 3/4-inch aggregate and a 5-inch slump will fail catastrophically when stamped. The aggregate will tear the surface, and the high water content will cause the stamp mats to sink, blurring the pattern.
| Pattern Category | Target PSI | Max Aggregate Size | Ideal Slump | Critical Admixture |
|---|---|---|---|---|
| Grid (Ashlar/Brick) | 4,000 PSI | 3/8" Pea Gravel | 4.0" - 4.5" | Mid-range Water Reducer |
| Random (Seamless Slate) | 3,500 - 4,000 PSI | 3/8" or 1/2" | 4.5" - 5.0" | Polycarboxylate HRWR |
| Deep-Relief (Wood Plank) | 4,000 - 4,500 PSI | 3/8" Pea Gravel | 3.5" - 4.0" | HRWR + Retarder (Hot Weather) |
The Role of Polycarboxylate Admixtures
Modern stamped concrete relies heavily on Polycarboxylate ether-based High-Range Water Reducers (HRWR). Unlike older naphthalene-based superplasticizers, polycarboxylates provide high flowability without inducing severe segregation or bleeding. This allows the batch plant to drop the water-cement ratio to 0.40 or lower, achieving high early strength while maintaining the buttery surface paste required for crisp stamping.
Color Integration: Surface Paste vs. Integral
The visual depth of stamped concrete relies on a two-tier color system. Relying solely on integral color (pigment mixed into the truck) results in a flat, monochromatic appearance and leaves the surface vulnerable to wear.
- Color Hardeners (Surface): Broadcast onto the wet concrete and troweled in, color hardeners are a blend of cement, graded silica aggregates, and iron-oxide pigments. They increase the surface compressive strength to over 6,000 PSI and provide the primary base color. Brands like Brickform and Solomon Colors offer hardeners that penetrate up to 1/8-inch into the slab.
- Antiquing Release Agents: A secondary, contrasting color applied as a powder or liquid before stamping. This prevents the polyurethane mats from sticking to the concrete while lodging in the grout lines and texture crevices to create a multi-dimensional, natural stone look.
Reinforcement and Jointing Strategies
Stamped concrete is not immune to the tensile stresses that cause cracking; it merely hides them differently. According to guidelines from the American Society of Concrete Contractors (ASCC), control joints in stamped concrete must be planned to align with the pattern's natural grout lines.
Saw-Cutting vs. Tooled Joints
For grid patterns like Ashlar, a standard grooving tool can be run along the stamped joint lines. However, for seamless slate or wood plank patterns, saw-cutting is mandatory. Saw cuts should be executed within 12 to 18 hours of placement—late enough that the blade doesn't ravel the edges, but early enough to relieve tensile stress before thermal contraction causes random cracking. Use a dry-cut diamond blade with a 1/8-inch kerf to minimize the visual footprint of the joint.
2026 Cost Breakdown by Pattern Complexity
Pricing for stamped concrete varies significantly based on the pattern type, number of colors, and site accessibility. The following ranges reflect national averages for residential installations in 2026, encompassing materials, labor, and equipment.
| Tier | Pattern & Color Profile | Cost per Sq. Ft. | Best Application |
|---|---|---|---|
| Basic | Single seamless pattern, 1 color hardener, 1 release | $12 - $16 | Large patios, pool decks |
| Mid-Range | Grid pattern, 2-color hardener blend, contrasting release, saw cuts | $17 - $24 | Driveways, walkways, courtyards |
| High-End | Deep-relief wood plank or custom stone, 3+ colors, hand-staining, borders | $25 - $35+ | Luxury outdoor living spaces, commercial facades |
Curing and Sealing Protocols
Traditional wet curing (burlap and water) is strictly prohibited for stamped concrete, as it will wash away the antiquing release agent and mottle the color hardener. Instead, contractors must rely on chemical curing and sealing.
- Initial Cure (Day 1-2): Immediately after stamping and detailing the edges, apply a spray-applied, membrane-forming curing compound (such as a resin-based or acrylic cure). This traps the bleed water to ensure proper cement hydration without disturbing the surface.
- Wash-Off (Day 3-5): Once the slab has achieved sufficient strength, the excess powdered release agent is washed off using a pressure washer and a mild detergent, leaving approximately 20% of the release in the deep pores to maintain the antiqued contrast.
- Final Seal (Day 14-28): Apply a solvent-based acrylic sealer (20-25% solids). Solvent-based sealers penetrate deeper and enhance the color more effectively than water-based alternatives. For high-traffic areas like driveways, incorporate an anti-slip additive (like aluminum oxide or polymer grit) into the second coat to mitigate the inherent slipperiness of sealed, textured concrete.
Mastering the various types of stamped concrete requires treating the process as a precise chemical and structural discipline rather than a purely aesthetic one. By matching the exact slump, aggregate size, and admixture profile to the specific stamp mat geometry, contractors can deliver surfaces that are both visually indistinguishable from natural materials and structurally engineered to endure decades of environmental stress.
Written by
Sarah WhitfieldSarah Whitfield is a chartered quantity surveyor (MRICS) and construction cost analyst with 15 years of experience in material pricing, procurement strategy, and project budgeting. She earned her degree in Construction Management from the University of Reading (UK) and has worked on projects ranging from $2M custom homes to $180M mixed-use developments across North America and Europe. Sarah currently leads cost estimating for BuildMat Insight, maintaining a proprietary database of 4,000+ material price points updated quarterly. She is a frequent contributor to RSMeans cost data panels and has presented at the International Cost Engineering Council (ICEC) congress. Based in Denver, CO, Sarah is an avid trail runner and volunteer mentor for Women in Construction.
More from Sarah Whitfield
View all
Wood & Lumber
What Are the Different Types of Wood? A Builder's Guide
Compare structural softwoods, finish hardwoods, and engineered lumber. Analyze Janka ratings, MOE values, and 2026 pricing for construction.
Aug 4, 2026

Walls & Panels
Steel Framing vs Wood Framing: Corrosion and Moisture Defense
Compare steel framing vs wood framing for moisture resistance. Learn about galvanized coatings, condensation risks, and corrosion protection strategies.
Jul 21, 2026

Stone & Masonry
How to Cut Stone Veneer: Wet Saw vs Grinder Comparison
Compare the best tools for cutting stone veneer. We review wet saws, angle grinders, and chop saws to help you achieve clean, chip-free cuts.
Jul 21, 2026