Wood Deck vs Concrete Patio: Installation Guide & Cost Breakdown
Compare the installation processes, site prep requirements, curing timelines, and 2026 costs of building a wood deck versus a concrete patio.

The Structural Reality: Elevated Framing vs. Monolithic Slabs
Choosing between a wood deck and a concrete patio extends far beyond aesthetic preference; it fundamentally dictates your site preparation, structural engineering, and labor timeline. A wood deck is an elevated, dynamic structural frame that must resist lateral wind loads, vertical live loads (typically 40-60 psf), and frost heave. A concrete patio is a monolithic, rigid slab-on-grade that relies entirely on subgrade compaction and soil bearing capacity to prevent differential settlement and cracking.
This installation guide breaks down the exact construction methodologies, material specifications, and 2026 cost metrics for both systems, providing a decision framework for contractors and advanced DIYers.
Pre-Installation Site Assessment Matrix
Before breaking ground, evaluate your site conditions. The physical characteristics of your lot will often make the decision for you by rendering one option prohibitively expensive.
| Site Variable | Wood Deck Viability | Concrete Patio Viability |
|---|---|---|
| Soil Type | Excellent for expansive clays if footings bypass the active zone. | Poor for expansive clays unless engineered with structural voids or deep grade beams. |
| Slope / Grade | Highly adaptable. Stepped footings and tall posts handle slopes up to 45 degrees. | Requires extensive cut-and-fill retaining walls for slopes exceeding 5%. |
| Frost Line Depth | Requires deep excavation (e.g., 32-48 inches in Northern zones) for footings. | Slab-on-grade is generally exempt from frost-depth footing requirements if properly drained. |
| Tree Root Proximity | Helical piers can be installed between major root systems with minimal disruption. | Excavating a 6-inch subgrade will sever surface roots, risking tree health and slab voids. |
Phase 1: Excavation and Subgrade Preparation
Wood Deck: Precision Pier Excavation
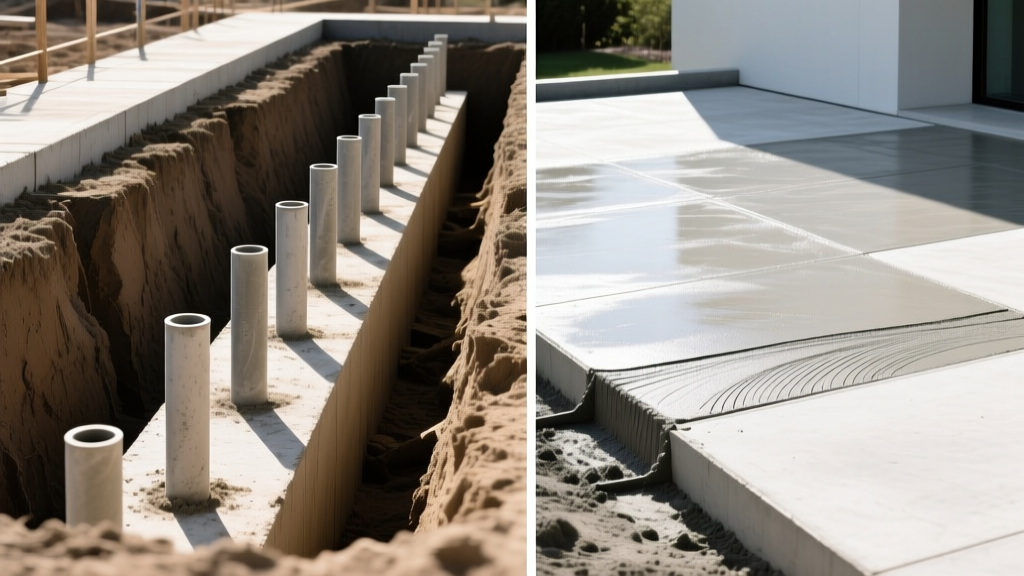
Deck installation begins with layout and pinpoint excavation. Using batter boards and mason lines, map the exact locations of the support posts. For a standard 12x16 foot deck, you will typically dig 6 to 8 individual holes. According to the American Wood Council's prescriptive deck guidelines, these holes must extend at least 6 inches below the local frost line to prevent frost jacking. In Zone 5, this means digging 38-inch deep holes with a minimum diameter of 12 inches. For sites with high water tables or poor bearing soils, bypass traditional sonotubes and opt for helical piers (like the Diamond Pier DP-50), which are driven into the ground using hydraulic torque, eliminating the need for concrete curing and wet excavation.
Concrete Patio: Broad-Area Subgrade Compaction
A concrete patio requires removing the topsoil across the entire footprint. For a standard 4-inch thick slab, excavate to a depth of 8 to 10 inches to accommodate a 4-to-6-inch compacted aggregate base. The subgrade must be compacted to a minimum 95% Standard Proctor density. Failure to achieve this density is the primary cause of corner settling and structural cracking. Install a 10-mil polyethylene vapor barrier directly over the compacted gravel to prevent the subgrade from absorbing moisture out of the wet concrete mix, which weakens the surface paste and causes scaling.
Never pour concrete directly onto a dry, unsealed dirt subgrade. The soil will act as a sponge, pulling bleed water out of the mix prematurely. Always use a minimum 10-mil poly sheet, and tape all seams with 4-inch moisture-resistant tape.
Phase 2: Structural Foundation and Reinforcement
Wood Deck: Ledger Boards and Post Bases
The most critical failure point in deck construction is the ledger board connection to the house. Use 1/2-inch hot-dipped galvanized or stainless steel lag screws spaced according to the joist span. Crucially, install continuous Z-flashing behind the house wrap and over the ledger board to prevent water intrusion into the rim joist, which leads to catastrophic wood rot. For the foundation, pour 4000 PSI concrete into sonotubes and embed heavy-duty galvanized post bases (e.g., Simpson Strong-Tie ZMAX series) while the concrete is still plastic. Keep the wooden post elevated 1 inch above the concrete base to prevent wicking and end-grain rot.
Concrete Patio: Reinforcement and Joint Planning
Concrete possesses high compressive strength but low tensile strength. To control cracking, reinforce the slab. For residential patios, 6x6 inch W1.4xW1.4 welded wire mesh (WWM) placed in the upper third of the slab is standard. For heavier loads or poor soils, upgrade to #4 (1/2-inch) rebar tied in a 24-inch grid. The Portland Cement Association mandates that control joints be tooled or saw-cut to a depth of 25% of the slab thickness (1 inch for a 4-inch slab) and spaced at intervals no greater than 10 feet in any direction. These joints force the concrete to crack in a straight, hidden line rather than randomly across the surface.
Phase 3: The Build and Curing Timeline
The installation timelines for these two materials differ drastically. Wood framing allows for immediate loading and finishing, whereas concrete requires strict moisture management and curing periods.
| Project Phase | Wood Deck (Pressure-Treated) | Concrete Patio (Broom Finish) |
|---|---|---|
| Day 1 | Layout, dig footings, pour concrete piers. | Excavate footprint, install forms, spread and compact gravel base. |
| Day 2 | Install ledger board, set posts, frame beams and joists. | Lay vapor barrier, tie rebar/wire mesh, schedule ready-mix truck. |
| Day 3 | Install decking boards, cut edges, begin railing posts. | Pour, screed, float, and broom-finish concrete. Cut control joints. |
| Day 4-7 | Complete railings, stairs, and hardware inspection. | Keep slab continuously moist (burlap or curing compound) for 7 days. |
| Usability | Fully usable immediately upon hardware inspection. | Foot traffic at 3 days; furniture at 7 days; full cure at 28 days. |
2026 Material and Labor Cost Breakdown
Costs fluctuate based on regional labor rates and material availability. The following table reflects national averages for a standard 400-square-foot rectangular installation in 2026, assuming level terrain and standard soil conditions.
| Material System | Material Cost (per sq ft) | Labor Cost (per sq ft) | Total Installed Cost (per sq ft) |
|---|---|---|---|
| Concrete Patio (Broom Finish) | $5.50 - $7.50 | $6.00 - $9.00 | $11.50 - $16.50 |
| Concrete Patio (Stamped) | $9.00 - $14.00 | $12.00 - $18.00 | $21.00 - $32.00 |
| Wood Deck (#2 PT Pine) | $8.00 - $12.00 | $15.00 - $22.00 | $23.00 - $34.00 |
| Composite Deck (e.g., Trex) | $18.00 - $26.00 | $18.00 - $28.00 | $36.00 - $54.00 |
Do not order standard 3000 PSI mix for an exterior patio. Specify a 4000 PSI air-entrained mix with 4-6% microscopic air bubbles. This air-entrainment provides microscopic expansion chambers that prevent the surface from spalling and scaling during freeze-thaw cycles in cold climates.
Common Installation Failure Modes
Wood Deck: Lateral Sway and Ledger Rot
Decks that lack proper diagonal bracing or blocked joists will sway laterally when loaded. To prevent this, install solid wood blocking between joists at mid-span and use structural screws to secure the blocking. Furthermore, ledger rot remains the number one cause of deck collapse. If the Z-flashing is omitted or installed incorrectly, capillary action will draw water into the end-grain of the ledger and the house rim joist, compromising the structural integrity of the home itself within 3 to 5 years.
Concrete Patio: Plastic Shrinkage and Edge Slumping
Plastic shrinkage cracks occur when the surface of the concrete dries faster than the bleeding water can rise to the top, typically on hot, windy days. To mitigate this, apply a monomolecular evaporation retardant during finishing. Another common failure is edge slumping, caused by removing the wooden forms too early. Forms must remain in place for a minimum of 24 to 48 hours. Removing them after 4 hours to 'save time' will result in the edges of the slab sagging under their own weight, creating a permanent trip hazard and a weakened perimeter.
Final Verdict: Which System Should You Install?
Select a concrete patio if your site is relatively flat, you require a zero-maintenance surface, and your budget prioritizes lower initial installation costs. Concrete is the undisputed choice for supporting heavy, concentrated loads like hot tubs, masonry outdoor kitchens, or large fire pits without requiring complex structural engineering.
Select a wood or composite deck if your property features a significant slope, you need to span over poor soil conditions or tree roots, or you require an elevated platform to capture a view. While the initial labor and material costs are higher, modern composite decking eliminates the annual sealing and staining requirements of traditional pressure-treated lumber, narrowing the long-term maintenance gap between the two materials.
Written by
Priya KapoorPriya Kapoor is a real estate market analyst and construction economics researcher with expertise in housing affordability, development feasibility, and infrastructure investment. She holds a Master of Regional Planning from Cornell University and previously worked as a senior analyst at CBRE's Investment Properties group, where she modeled returns for $4B in mixed-use development pipelines. Priya now runs an independent research practice advising developers, municipalities, and REITs on construction cost forecasting and market timing. She publishes the quarterly "BuildMat Market Pulse" report tracking material price indices across 12 commodity categories. Based in Austin, TX, Priya serves on the board of Habitat for Humanity Austin and is a marathon runner.
More from Priya Kapoor
View all
Construction Cost
Cost to Build a 1600 Sq Ft Home in 2026: Full Breakdown
Accurate 2026 cost to build a 1600 sq ft home—material, labor, and regional pricing breakdowns included. Plan your budget with real-time estimates.
Aug 11, 2026

Wood & Lumber
Name the Types of Wood for Pressure Treatment and Preservation
Learn how to name the types of wood best suited for pressure treatment. Compare species treatability, chemical retention levels, and 2026 preservation costs.
Aug 4, 2026

Stone & Masonry
Stone Veneer Suppliers Lindenhurst: 2026 Cost Analysis
Analyze 2026 stone veneer costs in Lindenhurst, NY. Compare local supplier pricing, delivery fees, and Suffolk County installation labor rates.
Aug 4, 2026