Regular Concrete vs Stamped Concrete: Installation & Cost Guide
Compare regular vs stamped concrete installation. Expert guide covering mix designs, reinforcement, finishing steps, jointing, and 2026 cost ranges.

Core Material Differences Before the Pour
The divergence between regular (broom-finished) concrete and stamped concrete begins long before the ready-mix truck arrives. While both require a minimum compressive strength of 4,000 PSI for exterior flatwork, the mix design nuances dictate the success of the final finish.
For stamped applications, contractors frequently add a retarder to the mix. This slows the initial set, providing a larger working window to apply color hardeners and align stamping mats without risking cold joints or crusting.
Site Prep and Reinforcement Strategies
Subgrade preparation remains identical for both: a minimum 4-inch base of compacted crushed aggregate achieving 95% Standard Proctor density. However, reinforcement strategies diverge significantly due to the physical demands of the finishing process.
Regular Concrete Reinforcement
- Standard: 6x6 W1.4xW1.4 Welded Wire Mesh (WWM) or #3 rebar spaced at 18 inches on center.
- Placement: WWM must be pulled to the upper third of the slab during the pour. Because finishing regular concrete requires minimal walking on the wet slab, WWM stays properly positioned when pulled up with a rake or hook.
Stamped Concrete Reinforcement
- Standard: #3 or #4 rebar tied in a 16-inch grid.
- Placement: Stamping requires workers to walk directly on the wet concrete to manipulate texture skins and stamping mats. If WWM is used, the workers' weight inevitably pushes the mesh to the bottom of the slab, rendering it useless for shrinkage crack control. Rebar chaired securely at 1.5 inches from the subgrade prevents this displacement.
The Pour and Strike-Off Phase
Placing and striking off the concrete is nearly identical for both methods. Laser screeds or manual screeds are used to strike the concrete to the top of the forms. A bullfloat is immediately passed over the surface to embed the aggregate and push bleed water to the surface. Critical rule for both: Never add water to the surface during finishing, as this drastically increases the water-cement ratio at the surface, leading to scaling and dusting.
Regular Concrete Finishing Workflow
The regular concrete finishing process relies on mechanical manipulation of the surface paste to create a uniform, slip-resistant texture.
- Wait for Bleed Water: Allow all bleed water to evaporate. Working the surface while bleed water is present traps water under the paste, guaranteeing surface delamination.
- Floating: Use a magnesium hand float or power float to open the pores and level minor imperfections.
- Brooming: Drag a stiff-bristled concrete broom across the surface perpendicular to the primary direction of travel to create traction ridges.
- Edging and Jointing: Run an edger along all forms and sawcut control joints to a depth of 25% of the slab thickness (1 inch for a 4-inch slab) within 12 to 24 hours.
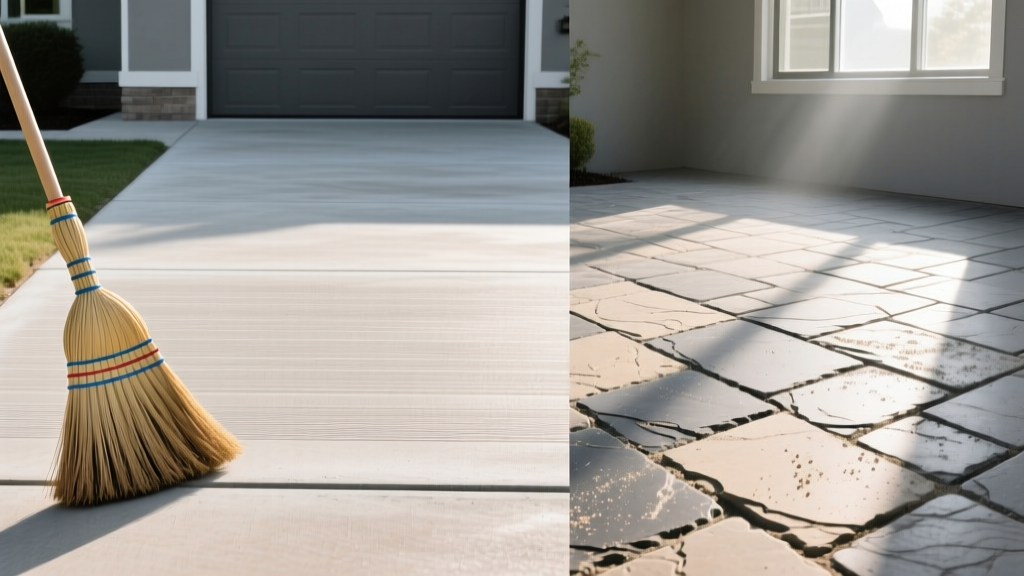
Stamped Concrete Finishing Workflow
Stamped concrete replaces the broom finish with a multi-step chemical and mechanical texturing process. This requires specialized materials like dry-shake color hardeners and antiquing release agents.
Step 1: Color Hardener Application
Once the bleed water evaporates and the concrete can support weight, broadcast a dry-shake color hardener (such as Brickform Dry-Shake) by hand. Apply approximately 1 lb per square foot for light colors and up to 1.5 lbs for dark colors. Allow it to absorb moisture from the slab, then trowel it smooth. A second broadcast pass is often required to ensure 100% coverage and a uniform color depth of roughly 1/8 inch.
Step 2: Release Agent and Stamping
Broadcast a powdered antiquing release agent across the surface. This prevents the polyurethane stamping mats from bonding to the wet color hardener while imparting a secondary contrasting color into the recessed grout lines. Workers then step onto the concrete, aligning the interlocking stamp mats and tamping them down with a heavy polyurethane tamper. Flexible texture skins are used along the edges and walls where rigid mats cannot fit.
Comparison Matrix: Installation Variables
| Variable | Regular (Broom) Concrete | Stamped Concrete |
|---|---|---|
| Average Installed Cost (2026) | $8.00 - $12.00 / sq ft | $15.00 - $25.00 / sq ft |
| Crew Size | 3 to 4 finishers | 5 to 7 finishers |
| Finishing Window | Standard (2-3 hours) | Extended (requires retarder) |
| Control Joint Strategy | Standard sawcut grid | Hidden in grout lines or zip-strips |
| Surface Thickness Added | None | ~1/8 inch (color hardener) |
Jointing Strategies: The Hidden Aesthetic Challenge
Control joints are mandatory to control random shrinkage cracking, but they present a massive aesthetic challenge for stamped concrete.
- Regular Concrete: Joints are sawcut in a standard grid pattern (typically 10x10 feet for a 4-inch slab) without regard to visual aesthetics.
- Stamped Concrete: Contractors must plan the stamp layout so that sawcuts fall directly inside the recessed "grout lines" of the stone or brick pattern. Alternatively, flexible zip-strips can be driven into the wet concrete during the pour and removed later, creating a joint that is completely invisible to the casual observer.
Curing and Sealing Protocols
The curing phase is where improper material selection frequently ruins stamped concrete installations.
After 28 days of curing, regular concrete is often left unsealed or treated with a basic silane/siloxane penetrating water repellent. Stamped concrete requires a topical solvent-based acrylic sealer (typically 20-25% solids) to lock in the UV pigments, enhance the color contrast, and provide a wet-look sheen. This sealer must be reapplied every 2 to 3 years, adding to the long-term maintenance cost.
Common Failure Modes to Avoid
- Crusting on Stamped Slabs: Applying color hardener before the bleed water has fully evaporated traps moisture, causing the hardener to crust and flake off after curing.
- Stamp Slipping: Over-applying the powdered release agent acts as a dry lubricant, causing the stamping mats to slide when tamped, resulting in blurred, double-stamped pattern edges.
- Efflorescence: Failing to wait the full 28 days before applying a non-breathable topical sealer on stamped concrete traps residual moisture and soluble salts, resulting in white, cloudy efflorescence beneath the sealer film.
Choosing between regular and stamped concrete is ultimately a balance between budget and aesthetic ambition. While regular concrete offers a utilitarian, low-maintenance surface at a fraction of the cost, stamped concrete provides the high-end look of natural masonry, provided the contractor strictly adheres to the specialized mix designs, reinforcement protocols, and chemical finishing steps outlined by the American Society of Concrete Contractors.
Written by
Sarah WhitfieldSarah Whitfield is a chartered quantity surveyor (MRICS) and construction cost analyst with 15 years of experience in material pricing, procurement strategy, and project budgeting. She earned her degree in Construction Management from the University of Reading (UK) and has worked on projects ranging from $2M custom homes to $180M mixed-use developments across North America and Europe. Sarah currently leads cost estimating for BuildMat Insight, maintaining a proprietary database of 4,000+ material price points updated quarterly. She is a frequent contributor to RSMeans cost data panels and has presented at the International Cost Engineering Council (ICEC) congress. Based in Denver, CO, Sarah is an avid trail runner and volunteer mentor for Women in Construction.
More from Sarah Whitfield
View all
Wood & Lumber
What Are the Different Types of Wood? A Builder's Guide
Compare structural softwoods, finish hardwoods, and engineered lumber. Analyze Janka ratings, MOE values, and 2026 pricing for construction.
Aug 4, 2026

Walls & Panels
Steel Framing vs Wood Framing: Corrosion and Moisture Defense
Compare steel framing vs wood framing for moisture resistance. Learn about galvanized coatings, condensation risks, and corrosion protection strategies.
Jul 21, 2026

Stone & Masonry
How to Cut Stone Veneer: Wet Saw vs Grinder Comparison
Compare the best tools for cutting stone veneer. We review wet saws, angle grinders, and chop saws to help you achieve clean, chip-free cuts.
Jul 21, 2026