Cinder Block vs Concrete: Pro Wall Installation Guide
Compare cinder block vs concrete wall installation. Explore CMU masonry steps, poured formwork, 2026 costs, and structural reinforcement.

When planning a masonry or foundation project, the debate of cinder block vs concrete often centers on structural integrity and cost. However, from an installation perspective, the two materials demand entirely different skill sets, equipment, and site logistics. Before breaking ground, contractors and DIYers must understand the precise workflows required for each method to avoid catastrophic structural failures or blown budgets.
The Terminology Reality Check: CMU vs. Poured Concrete
First, a critical clarification for modern construction: true "cinder blocks"—manufactured using coal cinders and ash—have been obsolete since the mid-20th century. When builders today discuss cinder block vs concrete, they are actually comparing Concrete Masonry Units (CMUs) against poured cast-in-place concrete. Standard weight CMUs (ASTM C90) are composed of Portland cement, sand, and gravel, weighing between 35 and 40 pounds per 8x8x16-inch block. Poured concrete walls utilize a fluid 3,000 to 4,000 PSI mix poured into temporary formwork. The installation methodologies for these two systems diverge immediately at the footing stage.
Foundation and Footing Preparation
Both CMU and poured concrete walls require a continuous strip footing that extends below the local frost line. However, the preparation of that footing differs significantly.
CMU Footing Prep
For a block wall, the footing must be perfectly level and precisely dimensioned. Because CMUs are modular (nominally 16 inches long, 8 inches high), the footing length should ideally be a multiple of 16 inches to minimize cutting blocks. Vertical rebar dowels are not strictly required for non-load-bearing garden walls, but structural basement walls require #4 or #5 vertical rebar spaced 32 to 48 inches on center, grouted into the block cores.
Poured Concrete Footing Prep
Poured walls require a heavily reinforced footing. A continuous grid of horizontal rebar (#4 or #5) is tied within the footing trench, with vertical dowels extending upward into the wall cavity. These vertical dowels must be bent to match the wall's profile and tied to the wall's vertical rebar grid before the forms are closed.
CMU Block Wall Installation Workflow
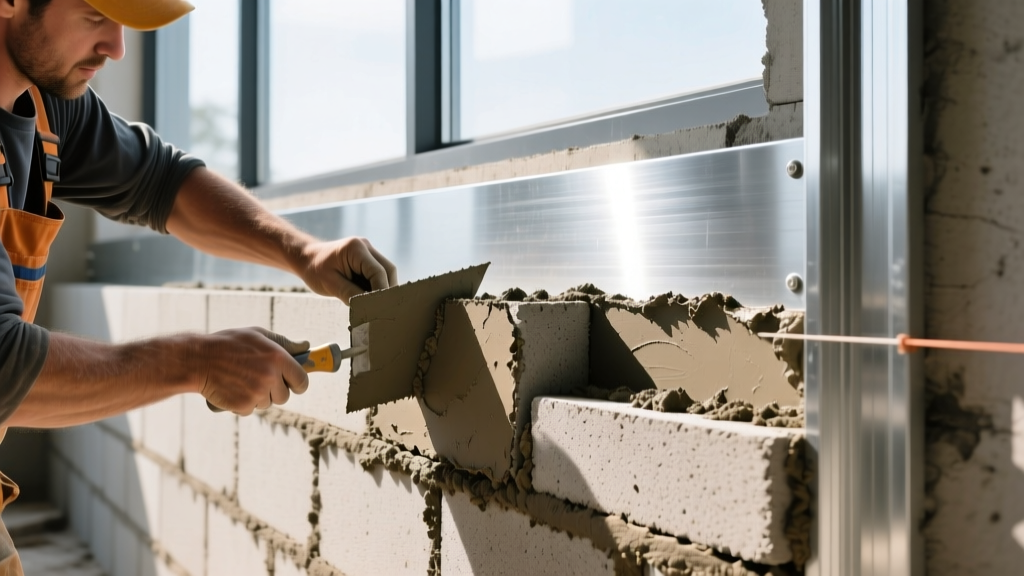
Building a CMU wall is a methodical, course-by-course process that relies heavily on the mason's skill with a trowel and level.
- Dry Layout and Snapping Lines: Lay out the first course of blocks without mortar to verify dimensions. Snap chalk lines on the footing to guide the outer edges of the wall.
- Mixing Type S Mortar: For below-grade or load-bearing walls, use Type S mortar (ASTM C270), which provides high compressive strength (minimum 1,800 PSI) and excellent lateral bond strength. Avoid Type N for structural foundations.
- Laying the Leads (Corners):strong> Build up the corners of the wall first, 3 to 4 courses high. Use a plumb bob, a 4-foot spirit level, and a mason's line to ensure the corners are perfectly plumb and square.
- Running the Course: Stretch a mason's line between the leads. Butter the flanges of the blocks with mortar and lay them along the line. Maintain a strict 3/8-inch mortar joint thickness.
- Tooling the Joints: Once the mortar has set slightly (thumbprint hard), use a concave jointer to compress and seal the joints. This concave profile is critical for shedding water on exterior walls.
- Grouting and Reinforcement: For structural walls, drop vertical rebar into the hollow cores and fill them with high-slump grout, vibrating the cells to eliminate air pockets.
Poured Concrete Wall Installation Workflow
Poured concrete installation is less about manual dexterity and more about heavy equipment logistics, formwork engineering, and fluid dynamics.
- Formwork Assembly: Modern contractors use modular aluminum form systems (such as Symons or Peri). These panels are bolted and pinned together over the footing. Wood forms are occasionally used for custom curves but are cost-prohibitive for standard straight runs.
- Rebar Tying and Snap Ties: A continuous grid of rebar is tied inside the forms. Snap ties (metal rods with plastic cones) are inserted through the forms to hold the panels apart at the exact wall thickness (usually 8 or 10 inches) and resist the immense hydrostatic pressure of the wet concrete.
- The Pour and Vibration: Ready-mix trucks deliver 3,500 PSI concrete. The mix is poured in 3-foot lifts. A mechanical concrete vibrator must be inserted into each lift to consolidate the mix and prevent honeycombing (voids left by trapped air).
- Stripping and Curing: After 24 to 48 hours, the forms are struck (removed). The snap ties are snapped off below the surface, leaving small dimples that must be patched with hydraulic cement.
Installation Cost & Labor Matrix
When evaluating cinder block vs concrete, installation costs vary wildly based on site access, wall height, and local labor rates. The table below reflects national averages for 2026 residential foundation installations (8-foot high walls).
| Metric | CMU Block Wall | Poured Concrete Wall |
|---|---|---|
| Material Cost (per sq. ft.) | $3.50 - $5.00 | $4.00 - $6.50 |
| Labor Cost (per sq. ft.) | $8.00 - $12.00 | $6.00 - $10.00 |
| Total Installed Cost (per sq. ft.) | $11.50 - $17.00 | $10.00 - $16.50 |
| Equipment Needs | Mortar mixer, scaffolding, hand tools | Crane/forklift for forms, concrete pump truck |
| Installation Speed (1,000 sq ft) | 5 - 8 Days | 2 - 3 Days |
While CMU materials are cheaper, the intense manual labor drives up the total installed cost. Poured concrete benefits from rapid installation times, reducing overall site overhead and labor hours, though it requires expensive heavy machinery and form rentals. According to data published by the Portland Cement Association, poured concrete foundations have largely overtaken CMU in new residential construction due to these speed advantages and superior lateral load resistance.
Waterproofing and Structural Reinforcement
The installation workflow does not end when the wall is built; below-grade waterproofing is where many installations fail.
CMU Waterproofing
Block walls are highly porous due to the mortar joints. Before applying a waterproofing membrane, a CMU wall must be parged—coated with a 1/2-inch layer of surface-bonding cement or Portland cement plaster. This creates a smooth, continuous surface. Once cured, a peel-and-stick modified bitumen membrane or a liquid-applied polyurethane coating is rolled over the parging. Skipping the parging step will cause the membrane to bridge over the mortar joints and eventually tear under hydrostatic backfill pressure.
Poured Concrete Waterproofing
Poured walls have no mortar joints, offering a naturally smoother surface. After patching the snap-tie dimples, a liquid-applied elastomeric membrane can be sprayed or rolled directly onto the concrete. The National Concrete Masonry Association (NCMA) provides extensive technical notes detailing how proper joint tooling and surface preparation dictate the long-term moisture resistance of masonry structures, but poured concrete inherently requires less surface prep for membrane adhesion.
Project Decision Framework
Use this framework to determine which installation method fits your specific project parameters:
- Choose CMU Block Installation If: You are building a short retaining wall (under 4 feet), a garden boundary, or an above-grade garage wall. CMU is also the mandatory choice if site access prevents the entry of ready-mix concrete trucks or heavy formwork cranes, as blocks can be hand-carried to remote sites.
- Choose Poured Concrete Installation If: You are pouring a full residential basement, building in an area with high seismic activity, or dealing with expansive clay soils. Poured walls offer superior tensile strength and resist the lateral pressure of wet soil far better than unreinforced block.
- Choose Insulated Concrete Forms (ICFs) If: You need above-grade walls with built-in thermal insulation. ICFs combine the poured concrete installation method with permanent foam forms, yielding an R-value of 22+ without additional framing.
Ultimately, the choice between cinder block (CMU) and poured concrete hinges on site logistics, local labor availability, and structural engineering requirements. By aligning your installation strategy with the physical realities of the site, you ensure a wall system that remains plumb, dry, and structurally sound for decades.
Written by
Elena RodriguezElena Rodriguez is a civil engineer and technical writer specializing in concrete technology, masonry systems, and ASTM/ACI compliance. She earned her B.S. in Civil Engineering from Texas A&M University and spent a decade at a materials testing laboratory, performing over 2,000 concrete compressive strength tests and masonry prism evaluations. Elena is an ACI-certified Field Testing Technician (Grade I) and a member of ASTM Committee C12 on Natural Building Stone. She currently consults on forensic engineering cases involving concrete failures and moisture intrusion. Based in San Antonio, TX, Elena is a proud member of the Society of Women Engineers (SWE) and coaches her daughter's FIRST Robotics team.
More from Elena Rodriguez
View all
Walls & Panels
Cost Analysis: Light Gauge Steel Framing Advantages and Disadvantages
Evaluate light gauge steel framing advantages and disadvantages through a strict cost analysis lens, comparing material, labor, and lifecycle expenses.
Aug 4, 2026

Walls & Panels
Gypsum Board Types: Exact Specifications, Thickness & Dimensions
Compare standard, Type X, and moisture-resistant gypsum board types. Get exact specifications, thicknesses, dimensions, and ASTM standards for your project.
Aug 4, 2026

Fire Resistance
Best Fire-Resistant Outdoor Decking Materials: 2026 Buyer Guide
Discover the best fire-resistant outdoor decking materials for 2026. Compare Class A PVC, aluminum, and hardwood options for WUI compliance and safety.
Aug 4, 2026