Rubberized Deck Coating Materials: Selection & Application Guide
Discover the best rubberized deck coating materials for wood and concrete. Compare costs, top brands, and step-by-step application techniques.

The Science Behind Rubberized Deck Coatings
Rubberized deck coatings, technically classified as elastomeric or high-solids polymeric membranes, are engineered to bridge substrate gaps, resist hydrostatic pressure, and flex with thermal expansion. Unlike penetrating oil sealers that merely repel water at the surface level, these coatings cure into a continuous, monolithic membrane ranging from 15 to 40 mils thick. This thickness allows them to span hairline cracks in concrete and accommodate the dimensional movement of wood framing without tearing.
- Ideal For: Plywood subfloors, concrete patios with minor cracking, flat decks over conditioned living spaces, and high-traffic commercial walkways.
- Avoid On: Pressure-treated lumber installed less than 6 months ago (high moisture entrapment risk), composite/PVC decking (adhesion failure), and surfaces with ponding water exceeding 48 hours.
Polyurethane vs. Acrylic vs. Silicone Bases
Not all rubberized deck coating materials share the same chemical backbone. Selecting the correct resin chemistry is the most critical factor in preventing premature coating failure.
Aliphatic Polyurethane
Aliphatic polyurethanes offer the highest abrasion resistance and UV stability. Because their molecular structure resists UV degradation, they do not chalk or yellow over time. They are the mandatory choice for high-foot-traffic wooden decks. However, they require strict moisture limits during application and usually demand a solvent-based or specialized water-based primer.
Acrylic Copolymers (Elastomeric Acrylics)
Water-based acrylics are highly breathable, allowing trapped moisture vapor to escape from the substrate. According to the USDA Forest Products Laboratory, wood substrates require coatings that permit vapor transmission to prevent rot. Acrylics are excellent for concrete patios and low-traffic wooden decks but lack the tensile strength to withstand heavy furniture dragging or stiletto heels.
100% Silicone
Silicone coatings provide unparalleled UV resistance and water repellency. They are predominantly used on flat roofs or pedestrian decks over living spaces where absolute waterproofing is required. Their primary drawback is poor adhesion to previously coated surfaces and a high material cost.
Top Rubberized Deck Coating Materials Compared
The following matrix evaluates industry-leading products based on their technical data sheets (TDS) and field performance metrics.
| Brand / Product | Base Chemistry | Dry Film Thickness (DFT) | Est. Cost per Gallon | Best Application Scenario |
|---|---|---|---|---|
| Liquid Rubber Polyurethane Deck Coating | Aliphatic Polyurethane | 20 - 30 mils | $95 - $120 | High-traffic wood decks, commercial walkways |
| Ames Super Elastomeric | Acrylic Copolymer | 15 - 20 mils | $65 - $85 | Concrete patios, low-traffic residential decks |
| GacoDeck | Polyurethane / Silicone Hybrid | 25 - 40 mils | $130 - $160 | Flat decks over living spaces, balcony waterproofing |
| Duradek Vinyl (Alternative Membrane) | PVC (Sheet, not liquid) | 60 mils | $8 - $12 / sq ft | New construction, requiring professional heat-welding |
Cost Breakdown: Material and Labor Estimates
Budgeting for a rubberized coating system requires accounting for the entire assembly, not just the topcoat. A standard 400-square-foot deck serves as the baseline for these 2026 estimates.
- Substrate Preparation (Cleaning, Sanding, Repair): $0.75 - $1.50 per sq. ft.
- Primer Application: $0.40 - $0.80 per sq. ft.
- Base and Topcoat Materials: $1.50 - $3.50 per sq. ft. (Assuming 2 coats at 50 sq. ft. per gallon coverage).
- Detailing (Seam tape, reinforcing fabric, caulking): $0.25 - $0.50 per sq. ft.
- Total DIY Material Cost: $2.90 - $6.30 per sq. ft.
- Professional Installation (Labor + Materials): $7.50 - $14.00 per sq. ft.
Manufacturers often claim 100 sq. ft. per gallon. This is a theoretical spread rate at 16 mils wet thickness. In real-world applications on rough-sawn wood or broom-finished concrete, expect coverage to drop to 50-60 sq. ft. per gallon to achieve the necessary 20+ mils dry film thickness. Always purchase 20% more material than the theoretical math suggests.
Step-by-Step Application Protocol for Maximum Adhesion
The Association for Materials Protection and Performance (AMPP) notes that up to 80% of coating failures are directly attributed to inadequate surface preparation. Follow this strict protocol to ensure a 10-to-15-year service life.
Phase 1: Substrate Preparation and Moisture Testing
For wood substrates, use a pin-type moisture meter. The wood must read below 15% moisture content (MC). If the wood is above 15%, the coating will trap vapor, leading to osmotic blistering. For concrete substrates, perform a calcium chloride test (ASTM F1869); vapor emission must not exceed 3 lbs per 1,000 sq. ft. per 24 hours. The American Concrete Institute (ACI) provides comprehensive guidelines on moisture mitigation for concrete slabs prior to membrane application.
Power wash the surface using a 15-degree tip at 2,500 PSI to remove mill scale, dirt, and oxidized wood fibers. Allow 48 to 72 hours of direct sunlight for drying.
Phase 2: Priming and Detailing
Apply the manufacturer-specified primer. For plywood, an acrylic-based primer penetrates the grain and seals the surface. For concrete, an epoxy or silane-based primer is often required to block alkalinity and vapor drive.
Once the primer is tack-free, detail all critical junctions. Apply a heavy bead of polyurethane sealant at all inside corners, railing post bases, and wall-to-deck transitions. Embed a 4-inch polyester reinforcing fabric into a wet layer of the base coating over all seams and fastener heads. This fabric acts as rebar, preventing the membrane from splitting when the substrate shifts.
Phase 3: Base and Topcoat Application
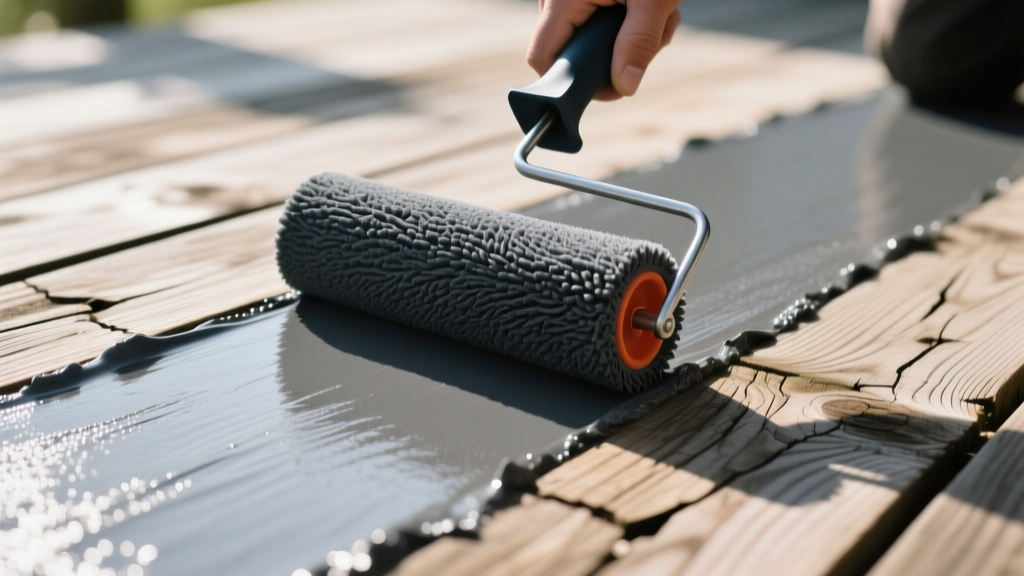
Use a 3/4-inch nap roller cover. Pour the material directly onto the deck and spread it using a squeegee to ensure an even thickness, then immediately back-roll with the roller to push the material deep into the substrate pores and eliminate pinholes.
Apply the base coat and allow it to cure (typically 12-24 hours depending on humidity). Apply the topcoat perpendicular to the direction of the base coat to ensure complete, uniform coverage. If using an aliphatic polyurethane, broadcast a polymer anti-slip aggregate (like aluminum oxide or pumice) into the wet topcoat to achieve a slip-resistant surface, especially critical for ADA-compliant commercial ramps.
Common Failure Modes and Troubleshooting
Understanding how rubberized deck coating materials fail allows you to prevent costly rework.
- Osmotic Blistering: Caused by applying the coating over damp wood or uncured concrete. The sun heats the deck, vaporizing the trapped moisture. The vapor expands, pushing the flexible membrane upward into bubbles. Fix: Cut the blisters, dry the substrate with a heat gun, patch with reinforcing fabric, and recoat.
- Chalking and Chalking: Occurs when an aromatic polyurethane (meant for indoor or buried use) is applied in direct UV sunlight. The resin breaks down, leaving a chalky residue. Fix: Power wash the chalk away and apply a UV-stable aliphatic polyurethane topcoat.
- Delamination at Edges: Happens when the coating is not wrapped over the deck edge and down the fascia by at least 2 inches. Water wicks up the end-grain of the plywood, destroying the bond from underneath. Fix: Always terminate the membrane 2 inches down the vertical fascia board.
Maintenance and Longevity Expectations
A properly installed rubberized deck coating system will last 10 to 15 years on residential decks and 5 to 8 years on heavy commercial applications. Maintenance is minimal but non-negotiable. Clean the surface bi-annually with a pH-neutral detergent and a soft-bristle broom. Avoid harsh chemical de-icers in winter; use calcium magnesium acetate (CMA) instead of sodium chloride, which can degrade the polymer matrix over time. Inspect the perimeter flashings and railing post bases every spring, reapplying sealant and a localized topcoat wherever the membrane shows signs of thinning or mechanical damage.
Written by
Elena RodriguezElena Rodriguez is a civil engineer and technical writer specializing in concrete technology, masonry systems, and ASTM/ACI compliance. She earned her B.S. in Civil Engineering from Texas A&M University and spent a decade at a materials testing laboratory, performing over 2,000 concrete compressive strength tests and masonry prism evaluations. Elena is an ACI-certified Field Testing Technician (Grade I) and a member of ASTM Committee C12 on Natural Building Stone. She currently consults on forensic engineering cases involving concrete failures and moisture intrusion. Based in San Antonio, TX, Elena is a proud member of the Society of Women Engineers (SWE) and coaches her daughter's FIRST Robotics team.
More from Elena Rodriguez
View all
Walls & Panels
Cost Analysis: Light Gauge Steel Framing Advantages and Disadvantages
Evaluate light gauge steel framing advantages and disadvantages through a strict cost analysis lens, comparing material, labor, and lifecycle expenses.
Aug 4, 2026

Walls & Panels
Gypsum Board Types: Exact Specifications, Thickness & Dimensions
Compare standard, Type X, and moisture-resistant gypsum board types. Get exact specifications, thicknesses, dimensions, and ASTM standards for your project.
Aug 4, 2026

Fire Resistance
Best Fire-Resistant Outdoor Decking Materials: 2026 Buyer Guide
Discover the best fire-resistant outdoor decking materials for 2026. Compare Class A PVC, aluminum, and hardwood options for WUI compliance and safety.
Aug 4, 2026