How Much Does It Cost to Build a Patio Cover? 2026 Design Guide
Discover how much it costs to build a patio cover in 2026. Compare wood, aluminum, and louvered designs with expert planning frameworks and hidden fees.

The True Cost to Build a Patio Cover: Beyond Basic Square Footage
When homeowners ask how much does it cost to build a patio cover, the answer depends entirely on structural complexity, material selection, and local building codes. As of 2026, the national average for a standard 200-square-foot attached patio cover ranges from $4,500 to $12,500. However, high-end custom timber frames or motorized louvered aluminum systems can easily push the budget past $25,000. According to HomeGuide's 2026 construction cost data, material choices account for roughly 40% of the total budget, while labor, site preparation, and permitting consume the remaining 60%.
- Economy (Pressure-Treated Pine Pergola): $2,800 – $4,500
- Mid-Range (Extruded Aluminum Solid Roof): $6,000 – $9,500
- Premium (Motorized Louvered Aluminum): $14,000 – $24,000+
Material Cost Matrix: Wood vs. Aluminum vs. Vinyl
Selecting your primary structural and roofing material is the most significant design decision you will make. Below is a comparative matrix detailing the 2026 market rates, expected lifespans, and maintenance requirements for the three dominant patio cover materials.
| Material Type | Cost per Sq. Ft. (Installed) | Expected Lifespan | Maintenance Profile | Best Use Case |
|---|---|---|---|---|
| Pressure-Treated Pine | $15 – $25 | 15 – 20 years | High (Annual sealing/staining) | Budget pergolas, rustic aesthetics |
| Cedar / Redwood | $35 – $55 | 20 – 30 years | Medium (Bi-annual UV protection) | Exposed timber frames, natural look |
| Extruded Aluminum | $25 – $40 | 30 – 50 years | Low (Occasional washing) | Modern solid roofs, coastal areas |
| Motorized Louvered | $75 – $120 | 20 – 30 years | Low (Mechanical servicing required) | Smart homes, all-weather control |
| Vinyl (PVC) | $20 – $35 | 20 – 25 years | Low (Prone to brittleness in UV) | Simple pergolas, low-budget builds |
Structural Design Choices That Dictate Your Budget
The physical geometry and attachment method of your patio cover will trigger specific engineering requirements that drastically alter the final cost.
Attached vs. Freestanding Configurations
An attached patio cover relies on a ledger board bolted to your home's exterior wall. While this saves money on materials (you only need two front posts instead of four), it requires intensive structural integration. You must install a 2x10 pressure-treated ledger board using 1/2-inch structural lag screws spaced 16 inches on center. To prevent water intrusion and rot, the ledger requires continuous flashing, such as Grace Ice & Water Shield, layered behind the home's existing weather-resistant barrier. Furthermore, the International Residential Code (IRC) mandates the use of tension ties (like Simpson Strong-Tie DTT2Z) to anchor the ledger to the home's interior floor joists, preventing uplift during high winds.
A freestanding patio cover avoids ledger board complications and home-envelope penetrations, making it ideal for homes with brick veneer or fragile exterior cladding. However, it requires double the concrete footings and additional structural beams to span the entire width independently, typically adding 15% to 20% to the material cost.
Roof Pitch and Drainage Engineering
Your desired roof pitch directly limits your roofing material choices, which impacts the budget:
- Standard Pitch (3:12 or steeper): Allows for standard asphalt architectural shingles ($1.50 – $3.00 per sq. ft.) to match your existing home roof.
- Low Slope (2:12 to 3:12): Requires standing seam metal roofing ($9.00 – $14.00 per sq. ft.) or specialized low-profile shingles with ice-and-water underlayment across the entire deck.
- Flat / Minimal Slope (Under 2:12): Mandates a continuous membrane roof like TPO or EPDM rubber ($4.00 – $7.00 per sq. ft.) to prevent water pooling and subsequent structural collapse.
Hidden Costs: Footings, Permits, and Electrical
When planning your budget, contractors often quote the "superstructure" (the visible wood or metal) but exclude site-specific hidden costs. Factor these into your 2026 planning spreadsheet:
- Frost-Depth Footings: In northern climates, footings must extend below the frost line (often 36 to 48 inches deep). Digging and pouring four 12-inch diameter Sonotube footings with 3000 PSI concrete and #4 rebar cages costs between $600 and $1,200 in labor and materials. In southern climates with a 12-inch frost line, this cost drops to roughly $250.
- Engineering Stamps and Permits: If your patio cover exceeds 200 square feet, or if you live in a high-wind zone (Wind Speed > 115 mph), your local building department will require a structural engineer's stamp. Expect to pay $350 to $800 for engineered plans, plus $150 to $400 for the municipal building permit.
- Electrical Integration: Running a dedicated 20-amp underground circuit or tapping into an existing exterior GFCI for ceiling fans, recessed lighting, or motorized louvers adds $500 to $1,500. Trenching and burying PVC conduit at the code-required 18-inch depth is highly labor-intensive.
Planning Framework: Matching Design to Your Budget
Use this decision matrix to align your design ambitions with your financial constraints:
Scenario A: The Budget-Conscious Shade Seeker (Under $5,000)
Opt for a freestanding, pressure-treated pine pergola with an open-lattice roof. Use pre-cast concrete deck blocks instead of poured footings (if local codes allow for non-frost-protected structures under a certain square footage). Stain the wood yourself to save on labor.
Scenario B: The All-Weather Entertainer ($8,000 – $14,000)
Design an attached aluminum patio cover with a solid, insulated polycarbonate or metal roof. Include a integrated K-style gutter system that ties into your home's existing downspouts. Budget for a licensed electrician to install a weatherproof junction box for a smart-ceiling fan.
Scenario C: The Luxury Smart-Patio ($20,000+)
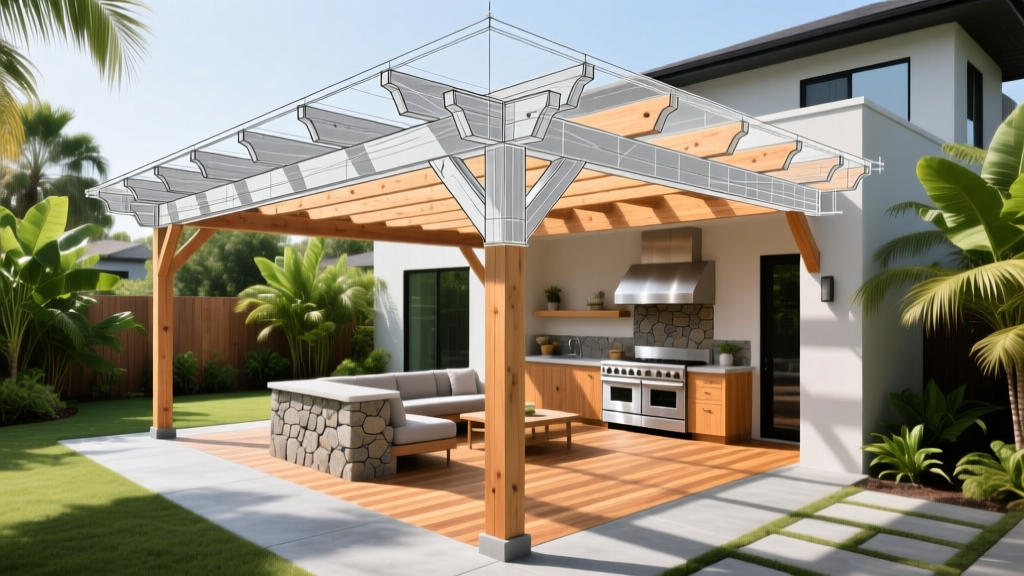
Install a motorized louvered aluminum system (e.g., StruXure or Apollo). These systems feature built-in rain sensors that automatically close the louvers when precipitation is detected. This tier requires heavy-duty 6x6 aluminum posts, reinforced concrete footings to handle the mechanical torque, and dedicated 240V electrical lines for the high-draw motors.
Common Design Mistakes That Inflate Costs
Avoid these frequent planning errors that lead to expensive change orders mid-construction:
- Ignoring Snow Loads: Designing a flat-roof cover in a region with heavy winter snow without upgrading the rafters from 2x6 to 2x8 or 2x10. The cost to retrofit a sagging roof post-construction is triple the cost of upgrading the lumber upfront.
- Improper Post Sizing: Using 4x4 posts for spans wider than 10 feet. 4x4 posts are prone to twisting and warping as they cure. Always specify 6x6 posts for primary load-bearing columns to ensure structural integrity and pass municipal inspections on the first attempt.
- Neglecting HOA Setbacks: Building too close to the property line. If your cover violates local easement or HOA setback rules (typically 5 to 10 feet from the rear property line), you will be forced to pay for demolition and relocation.
Ultimately, understanding how much does it cost to build a patio cover requires looking past the basic material price tags. By meticulously planning your footing depths, structural attachments, and roof drainage systems during the design phase, you can accurately forecast your budget and avoid the costly remediation that plagues poorly planned outdoor projects.
Written by
James ThorntonJames Thornton is a construction industry veteran with 25 years of hands-on experience in wood framing, lumber grading, and residential building codes. He started as a framing carpenter in rural Oregon, earned his ICC Residential Building Inspector certification, and eventually became a senior plan reviewer for the City of Portland Bureau of Development Services. James holds a B.S. in Wood Science & Technology from Oregon State University and is a certified lumber grader through the West Coast Lumber Inspection Bureau (WCLIB). He has inspected over 3,000 residential construction sites and authored the city's internal guide on advanced framing techniques (2x6 at 24" O.C.). James lives in Bend, OR, where he builds custom timber-frame cabins and competes in lumberjack sports.
More from James Thornton
View all
Insulation
Best Home Insulation Materials: Complete 2026 Guide
Compare top home insulation materials for 2026. Find R-values, installed costs per square foot, and best uses for fiberglass, spray foam, and mineral wool.
Aug 4, 2026

Sustainable Building
Certify Your Green Building Material for LEED and WELL
Step-by-step guide to certifying a green building material for LEED v5 and WELL v2. Master EPDs, HPDs, and VOC limits for 2026 project specifications.
Aug 4, 2026

Stone & Masonry
Veneer Stacked Stone Panels: Interior Design & Style Showcase
Discover how veneer stacked stone panels transform interiors. Explore modern design profiles, material pairings, and technical installation specs.
Aug 4, 2026