Pro Installation Techniques for Outdoor Deck Flooring Options
Master installation techniques for top outdoor deck flooring options. Learn hidden fastener systems, thermal gap matrices, and pedestal paver setups.

The Hidden Mechanics of Deck Flooring Installation
Industry post-mortems reveal that nearly 70% of premature deck surface failures stem from improper flooring installation rather than material defects. Selecting premium materials is only half the battle; executing the correct fastening methodology, managing thermal dynamics, and preparing the substructure dictate the lifespan of your outdoor deck flooring options. This guide bypasses generic advice to detail the exact measurements, fastener specifications, and structural preparations required for the four dominant deck flooring categories in 2026.
Pressure-Treated Lumber: Mastering the Traditional Face-Screw
Despite the rise of synthetics, pressure-treated Southern Yellow Pine (SYP) remains a staple. The installation technique varies drastically depending on the moisture content of the lumber at the time of purchase.
Moisture Content and Gap Spacing
- Green / Wet Lumber: Install boards tight against each other (0-inch gap). As the wood acclimates and dries over the first 6 to 12 months, it will shrink, naturally opening a 1/8-inch to 3/16-inch drainage gap.
- KDAT (Kiln-Dried After Treatment): KDAT lumber has already undergone its primary shrinkage. You must install these boards with a strict 1/8-inch gap (the thickness of a 16d nail) to allow for seasonal swelling during high-humidity months.
Fastener Selection and Placement
Never use standard galvanized nails or drywall screws. According to the American Wood Council's DCA-6 Prescriptive Residential Deck Construction Guide, fasteners must be hot-dipped galvanized or stainless steel. For coastal installations within 3,000 feet of saltwater, 316-grade stainless steel is mandatory to prevent rapid corrosion.
Use 3-inch polymer-coated structural screws (e.g., GRK RSS or Simpson Strong-Tie SDWS). Drive two screws per joist, placed 3/4-inch from the board edges. Always pre-drill the ends of the boards within 1 inch of the edge to prevent end-splitting, a common failure point in SYP.
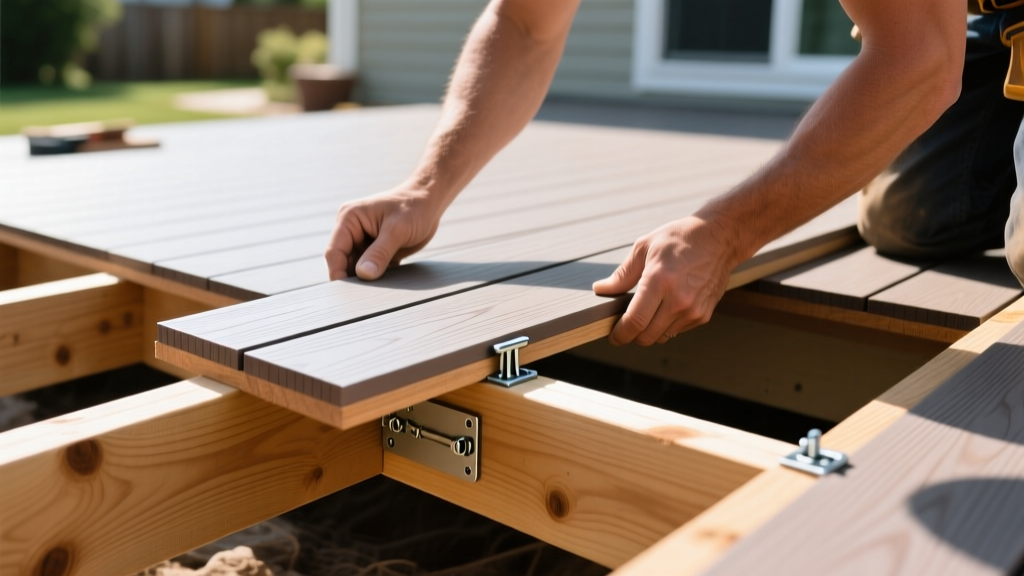
Capped Composite Decking: Hidden Fasteners and Thermal Dynamics
Capped composite boards (like Trex Transcend or TimberTech Legacy) require a paradigm shift from wood installation. These materials do not shrink or swell with moisture, but they do expand and contract linearly with temperature fluctuations.
The Breaker Board Technique
Composite boards expand longitudinally. If a deck run exceeds the standard 16-foot or 20-foot board length, never use a butt joint. Butt joints in composite decking will inevitably gap in winter and buckle in summer. Instead, install a perpendicular "breaker board" to create a clean, intentional transition line that hides the end-to-end expansion gaps.
Hidden Fastener Systems and Thermal Gap Matrix
Universal T-clip hidden fasteners (such as the Trex Hideaway system) lock into the grooved edges of the boards. However, the side-to-side gap is fixed by the clip (usually 3/16-inch), while the end-to-end gap must be calculated based on the ambient temperature during installation.
| Installation Temperature | End-to-End Gap (at 40°F low) | End-to-End Gap (at 0°F low) |
|---|---|---|
| Below 40°F (4°C) | 3/16 inch | 1/4 inch |
| 40°F - 70°F (4°C - 21°C) | 1/8 inch | 3/16 inch |
| Above 70°F (21°C) | 1/16 inch (Tight) | 1/8 inch |
Data synthesized from Trex Company Installation Guidelines and standard composite manufacturing tolerances.
Advanced PVC Decking: Managing Extreme Expansion
Cellular PVC decking (e.g., TimberTech Advanced PVC, Azek) offers superior stain and scratch resistance but possesses the highest coefficient of thermal expansion among synthetic outdoor deck flooring options. PVC can expand up to 1/8-inch per 10 feet of board length for every 40-degree Fahrenheit temperature swing.
Crush vs. Cut Fastening Methodology
When using hidden fasteners for PVC, you must manage longitudinal movement. At the midpoint of a board run, use a standard T-clip. However, at the ends where boards meet a breaker board or fascia, you must use a "crush" clip or manually crush the tab on a standard clip using pliers. This secures the board vertically while allowing it to slide horizontally up to 1/4-inch as temperatures shift.
"If you rigidly lock both ends of a 20-foot PVC board in mid-July, the internal compressive stress will cause the board to buckle upward like a tent pole by November. Always leave a minimum 1/4-inch clearance where the decking meets any fixed vertical surface, such as a house rim joist or brick veneer." — North American Decking and Railing Association (NADRA) Technical Bulletin
Porcelain Pavers: The Floating Pedestal System
For rooftop decks, concrete patios, or high-end outdoor spaces, 3/4-inch thick architectural porcelain pavers installed over an adjustable pedestal system represent the pinnacle of modern deck flooring. This is a completely floating system requiring zero mortar, grout, or mechanical fasteners.
Step-by-Step Pedestal Leveling Protocol
- Slope Calculation: The underlying concrete or membrane must have a minimum slope of 1/4-inch per foot for positive drainage. Use a laser level to map the high and low points of the substrate.
- Pedestal Selection: Select adjustable pedestals (e.g., Buzon PB-01 or Bison Level.it) that cover the height differential between your substrate and the desired finished floor height.
- Slope Compensation: If the substrate is sloped but you want a perfectly level deck surface, attach slope-compensating shims to the base of the pedestals. A 2% slope compensator shim will level a pedestal placed on a 2% sloped roof membrane.
- Paver Placement: Drop the 24x24-inch porcelain pavers onto the pedestal heads. The built-in 1/8-inch spacer tabs automatically create uniform drainage joints. Do not grout these joints; the open grid allows water to flow freely beneath the pavers to the substrate drains.
Critical Failure Modes and Troubleshooting
Even with premium outdoor deck flooring options, specific environmental and installation errors lead to predictable failure modes. Use this diagnostic matrix to identify and prevent structural compromises.
Symptom: Board Cupping (Wood)
Cause: Boards installed "crown down" or insufficient under-deck ventilation causing the top surface to dry faster than the bottom.
Fix: Always install wood boards "crown up" (bark side down). Ensure a minimum 18-inch clearance from the ground to the bottom of the joists for cross-ventilation.
Symptom: Thermal Buckling (Composite/PVC)
Cause: End-to-end gaps were too tight during hot-weather installation, or boards were face-screwed through the center, pinning them to the joist.
Fix: Remove face screws from the field of the board. Transition to hidden fastener clips that allow lateral slide, and recut ends to provide 1/4-inch expansion gaps.
Final Inspection and Load Testing
Before signing off on any deck flooring installation, perform a localized load test. Place a 200-pound concentrated weight in the center of a single board span. For wood and composite, deflection should not exceed L/360 of the span length. For pedestal-mounted porcelain pavers, verify that the pedestal base does not rock or pivot on the substrate. Proper installation transforms standard building materials into a high-performance exterior surface capable of withstanding decades of thermal cycling, moisture exposure, and live loads.
Written by
Elena RodriguezElena Rodriguez is a civil engineer and technical writer specializing in concrete technology, masonry systems, and ASTM/ACI compliance. She earned her B.S. in Civil Engineering from Texas A&M University and spent a decade at a materials testing laboratory, performing over 2,000 concrete compressive strength tests and masonry prism evaluations. Elena is an ACI-certified Field Testing Technician (Grade I) and a member of ASTM Committee C12 on Natural Building Stone. She currently consults on forensic engineering cases involving concrete failures and moisture intrusion. Based in San Antonio, TX, Elena is a proud member of the Society of Women Engineers (SWE) and coaches her daughter's FIRST Robotics team.
More from Elena Rodriguez
View all
Walls & Panels
Cost Analysis: Light Gauge Steel Framing Advantages and Disadvantages
Evaluate light gauge steel framing advantages and disadvantages through a strict cost analysis lens, comparing material, labor, and lifecycle expenses.
Aug 4, 2026

Walls & Panels
Gypsum Board Types: Exact Specifications, Thickness & Dimensions
Compare standard, Type X, and moisture-resistant gypsum board types. Get exact specifications, thicknesses, dimensions, and ASTM standards for your project.
Aug 4, 2026

Fire Resistance
Best Fire-Resistant Outdoor Decking Materials: 2026 Buyer Guide
Discover the best fire-resistant outdoor decking materials for 2026. Compare Class A PVC, aluminum, and hardwood options for WUI compliance and safety.
Aug 4, 2026