Top Portable Gym Divider Options for Open Floor Plans (2026)
Discover the best portable gym divider options for open floor plans. Learn how to protect your flooring and create seamless zones in multi-use spaces.

The Open-Plan Dilemma: Zoning Without Walls
Designing a functional home gym within an open-concept layout requires solving two simultaneous problems: spatial definition and flooring protection. In 2026, the trend of multi-use open floor plans means your heavy lifting zone likely shares sightlines—and square footage—with your living room, home office, or kitchen. Permanent walls are out; flexible zoning is in. However, placing heavy gym equipment and high-impact workout areas adjacent to delicate living spaces introduces complex flooring transition and point-load challenges.
Selecting the right portable gym divider options for open floor plans is not just about visual privacy. It is about managing acoustic transfer, preventing shear forces on luxury vinyl plank (LVP), and executing seamless flooring transitions where the workout zone meets the living zone. This room-by-room guide breaks down exactly how to integrate portable dividers with specific flooring types, ensuring structural integrity and aesthetic continuity.
Room-by-Room Guide: Integrating Dividers and Flooring Transitions
Zone 1: The Living Room Boundary (High-Traffic Transition)
When your gym zone borders a primary living area, the flooring typically transitions from high-density rubber or engineered hardwood to a softer living space surface. The divider here must be mobile to allow for flexible furniture arrangements but stable enough to absorb acoustic shock from dropped weights.
- Recommended Divider: Freestanding acoustic panels with non-marring polyurethane casters (e.g., Versare Room Divider 360). These units feature an NRC (Noise Reduction Coefficient) of 0.65 and weigh approximately 65 lbs per panel.
- Flooring Pairing: 8mm commercial-grade rubber tiles in the gym zone transitioning to 5/8-inch engineered hardwood in the living zone.
- Transition Detail: Use a flush-mount T-molding or a low-profile ramp profile. Because the divider will be rolled across this threshold, avoid raised transition strips exceeding 1/4 inch in height, which can catch caster wheels and tip the panel.
Zone 2: The Home Office / Flex Space (Acoustic & Visual Separation)
Bordering a home office requires strict acoustic control to prevent the sound of clanking iron from disrupting video calls. The divider must act as a sound baffle, while the flooring beneath it must handle the sustained point loads of stationary divider bases without denting.
- Recommended Divider: Ceiling-to-floor tension pole systems with integrated acoustic fabric wraps. Unlike freestanding panels, tension poles use a 6x6 inch base plate that distributes weight vertically.
- Flooring Pairing: Interlocking carpet tiles (Shore A 50 density) in the office, meeting a 3/8-inch cork underlayment topped with bamboo flooring in the gym zone.
- Transition Detail: A Schluter-RENO-T profile is ideal here. According to Schluter Systems, their T-shaped profiles protect tile and stone edges while providing a smooth transition for rolling chairs and foot traffic, accommodating slight height variations between carpet tiles and bamboo.
Zone 3: The Kitchen & Dining Perimeter (Moisture & Impact Protection)
Gym zones adjacent to kitchens face a unique threat matrix: moisture migration from the kitchen and high-impact shock from the gym. The divider here serves as a splash guard and a visual boundary, while the flooring must be entirely impervious to water.
- Recommended Divider: Interlocking polycarbonate or PVC screen systems. These are waterproof, easily wiped down, and can be configured in L-shapes to wrap around a squat rack.
- Flooring Pairing: Large-format porcelain tile (kitchen) transitioning to interlocking PVC gym tiles (workout zone).
- Transition Detail: Because both surfaces are hard and impervious, use a color-matched silicone caulk joint or a flexible aluminum edge profile to allow for independent thermal expansion of the porcelain and PVC tiles.
Comparison Matrix: Portable Divider Types & Flooring Compatibility
| Divider Type | Best Flooring Match | Point Load Risk | Acoustic Rating | Avg. Cost (2026) |
|---|---|---|---|---|
| Freestanding Acoustic Panel | Engineered Hardwood, LVP | Low (Rolling Casters) | High (NRC 0.65+) | $450 - $750 |
| Tension Pole w/ Fabric Wrap | Carpet Tile, Cork, Bamboo | Medium (6x6 Base Plate) | Medium (NRC 0.45) | $200 - $350 |
| Interlocking PVC Screens | Porcelain Tile, PVC Gym Tiles | Low (Distributed Feet) | Low (Visual Only) | $250 - $500 |
| Weighted Base Steel Framing | Poured Concrete, 8mm+ Rubber | High (Concentrated Mass) | Medium (NRC 0.50) | $600 - $900 |
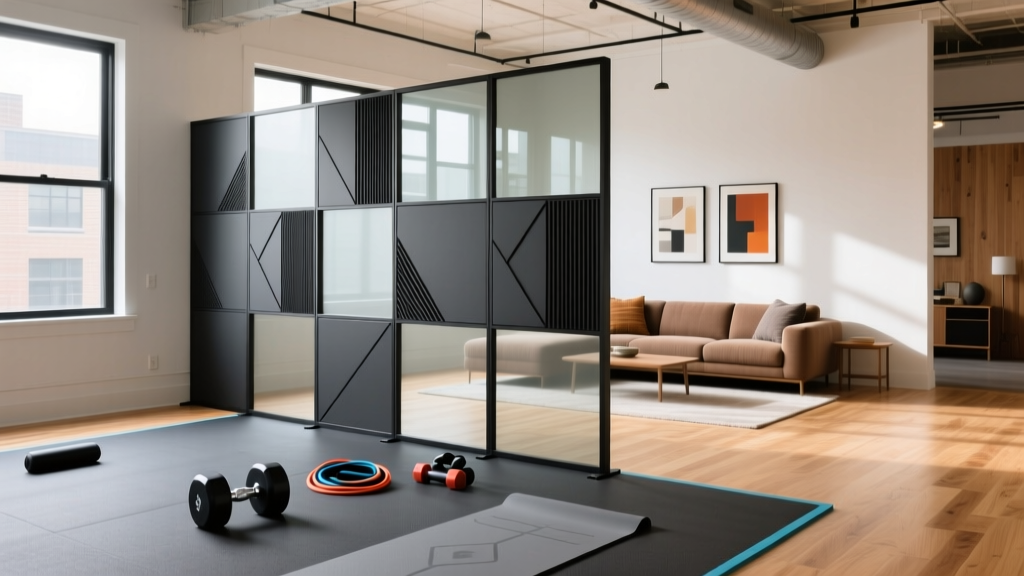
Flooring Protection: Managing Point Loads and Shear Forces
The most common failure mode when integrating portable gym divider options for open floor plans is ignoring the physics of point loads. The National Wood Flooring Association (NWFA) frequently documents cases where sustained, concentrated weight causes permanent compression dents in the wear layers of LVP and the cellular structure of engineered hardwood.
Expert Rule of Thumb: Any divider base exerting more than 15 PSI (pounds per square inch) of sustained pressure on Luxury Vinyl Plank requires a load-distributing neoprene pad. A standard 40lb tension pole with a 2x2 inch base exerts 10 PSI, which is safe. However, if that same pole is bumped and rests on a 1x1 inch corner edge, the pressure spikes to 40 PSI, guaranteeing a dent within 48 hours.
To mitigate shear forces—the lateral dragging motion that occurs when a user leans against a freestanding divider—always specify dividers with locking casters or high-friction rubber feet. If using a freestanding panel on a polished concrete or smooth LVP surface, apply 3M SJ3560 Dual Lock Reclosable Fasteners to the bottom edge of the divider feet to prevent the unit from sliding during vigorous workouts, which can scratch the floor's urethane topcoat.
Subfloor Considerations and Matting Integration
Portable dividers do not exist in a vacuum; they sit on top of gym matting, which sits on the subfloor. When zoning an open plan, the thickness of your gym matting dictates the height of your flooring transition.
- Measure Total Stack Height: If your living room features 3/4-inch solid hardwood, and your gym zone uses a 3/8-inch plywood sub-base topped with 3/8-inch rubber tiles, your total gym height is 3/4-inch. This allows for a perfectly flush transition without the need for ramp profiles.
- Prevent Moisture Trapping: When placing heavy, non-breathable rubber mats under dividers in a ground-level open plan, use a dimpled vapor barrier underneath. This prevents condensation from trapping against the concrete slab, which can lead to mold growth and the degradation of the divider's metal base components.
- Acoustic Decoupling: To stop impact noise from traveling through the floor joists to the rooms below, install a 5mm acoustic underlayment (like cork or recycled rubber) beneath the gym zone flooring before placing your divider. This ensures the divider's base doesn't act as a acoustic bridge transferring vibrations directly to the subfloor.
Sourcing and Maintenance for Long-Term Durability
Maintaining the aesthetic boundary between your gym and living spaces requires regular attention to the divider's contact points. Industry publications like Floor Covering News emphasize that micro-abrasions from dust trapped under divider feet are the leading cause of finish degradation in high-traffic multi-use zones.
Every 90 days, lift the portable dividers and clean the flooring beneath them with a pH-neutral cleaner. Inspect the polyurethane casters for embedded debris (like small pebbles or hardened rubber crumbs) that can act like sandpaper on engineered wood. For tension poles, verify that the ceiling mounts and floor bases have not loosened due to the ambient vibrations of heavy lifting, tightening the internal tension springs to maintain a secure, scratch-free fit.
Written by
Marcus ChenMarcus Chen is a licensed structural engineer (PE) and building materials analyst with over 12 years of experience across residential, commercial, and industrial construction. He holds a Master of Science in Civil Engineering from UC Berkeley and spent six years at Thornton Tomasetti before transitioning to independent consulting and technical writing. Marcus specializes in material selection for seismic-prone regions, concrete reinforcement strategies, and lifecycle cost analysis. His work has been cited by the American Concrete Institute (ACI) and the Structural Engineers Association of California (SEAOC). When he is not on a job site or at his desk, you will find him hiking the Sierra Nevada or restoring a 1920s craftsman bungalow in Oakland, CA.
More from Marcus Chen
View all
Construction Cost
How Much Did the Eiffel Tower Cost to Build?
How much did the Eiffel Tower cost to build in 1889? We adjust for inflation and compare its budget to modern skyscraper construction.
Aug 4, 2026

Fire Resistance
What Is a Fire Resistant Material? Testing & Certification Guide
Discover what is a fire resistant material through ASTM and UL testing. Learn how fire ratings, certifications, and assemblies work in construction.
Aug 4, 2026

Construction Cost
How Much Did the Burj Khalifa Cost to Build?
How much did the Burj Khalifa cost to build? We break down the $1.5B project and extract 5 money-saving strategies for your next build.
Jul 30, 2026