Bitumen Roofing Material Repair: Fixing Flat Roof Leaks
Learn how to diagnose and fix leaks in bitumen roofing material. Expert repair steps for APP and SBS membranes, coating options, and 2026 cost data.

Diagnostic Matrix: Identifying Bitumen Roofing Material Failures
Bitumen roofing material—encompassing both modified bitumen (mod-bit) and built-up roofing (BUR)—remains a dominant choice for low-slope commercial and residential structures. While highly durable, exposure to UV radiation, thermal shock, and ponding water inevitably degrades the membrane. Accurate diagnosis is the prerequisite for effective repair. Misidentifying the failure mode often leads to recurring leaks and wasted material costs.
| Visual Symptom | Root Cause | Required Repair Protocol |
|---|---|---|
| Alligatoring (interconnected cracking) | UV degradation and loss of plasticizers in the asphalt matrix. | Clean, prime, and apply a high-solids elastomeric or aluminum roof coating. |
| Blisters (raised, spongy areas) | Trapped moisture or air between plies expanding under solar heat. | X-cut the blister, allow to dry, apply roofing cement, and embed a fabric patch. |
| Seam Separation | Thermal contraction or inadequate initial torch/adhesive application. | Re-weld (APP) or apply cold-process lap cement and reinforce with mesh (SBS). |
| Punctures and Tears | Foot traffic, dropped tools, or debris impact. | Clean the area, apply a rubberized wet-patch compound, and overlay a mod-bit patch. |
The Critical Distinction: APP vs. SBS Repair Methodologies
Before initiating any repair on bitumen roofing material, you must identify whether the membrane is Atactic Polypropylene (APP) or Styrene-Butadiene-Styrene (SBS). Applying the wrong repair method will result in immediate adhesion failure.
Material Identification Guide
- APP (Plasticized): Melts at higher temperatures (approx. 300°F+). It becomes a liquid when heated and solidifies upon cooling. Repairs typically require a propane torch to fuse new material to the existing membrane. Cold adhesives rarely bond effectively to aged APP without aggressive priming.
- SBS (Rubberized): Contains synthetic rubber, giving it high elasticity and a lower melting point. SBS can be torch-applied, but it is also highly receptive to cold-applied adhesives, rubberized mastics, and self-adhering patches, making it more forgiving for DIY and localized repairs.
According to the Asphalt Roofing Manufacturers Association (ARMA), using a torch on an SBS membrane that has been previously coated with an incompatible cold-adhesive or aluminum paint can cause the coating to ignite or vaporize, creating severe safety hazards. Always test a small, inconspicuous area before applying heat.
Step-by-Step Repair Protocols for Modified Bitumen
1. Fixing Seam Separations and Lap Failures
Seam failures account for nearly 40% of all flat roof leaks. The repair method depends on the membrane type.
- Preparation: Sweep the area clean. Use a wire brush to remove loose gravel, oxidized asphalt, or dirt from the failed lap. Wipe down with a solvent-based cleaner or roof primer (e.g., Sweepsol) to ensure maximum adhesion.
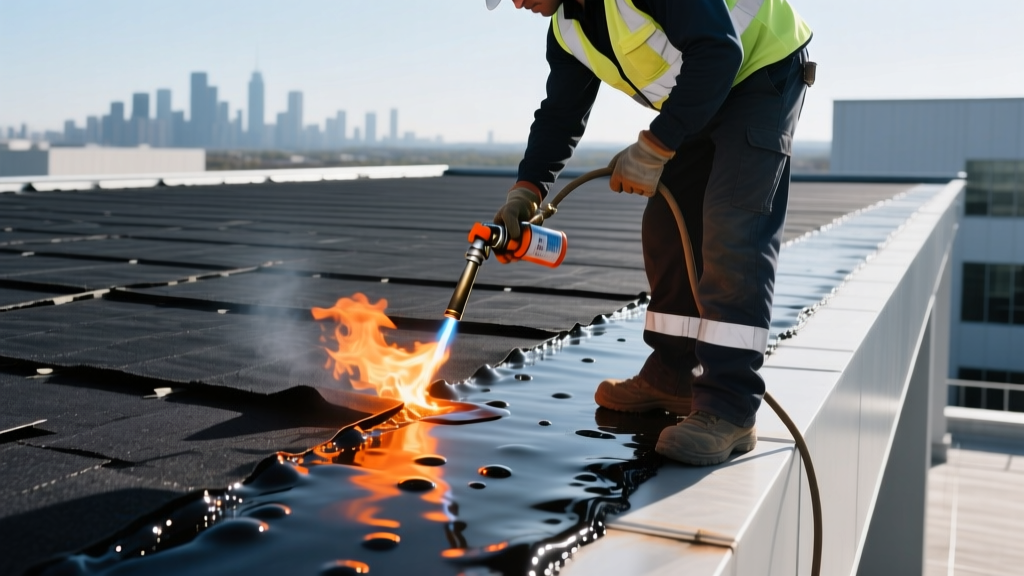
- APP Repair (Torch Method): Lift the separated flap slightly. Run a roofing torch along the underside of the flap and the substrate until the bitumen becomes glossy and liquid. Immediately press the flap down and use a heavy-duty silicone seam roller to apply firm, even pressure. A proper weld will show a 1/4-inch to 1/2-inch bead of melted bitumen squeezing out of the seam edge.
- SBS Repair (Cold Method): Apply a generous layer of SBS-compatible lap cement or rubberized mastic (such as Henry 208R Rubberized Wet Patch) under the flap. Press down firmly and secure the edge with roofing nails spaced 3 inches apart. Cover the nail heads and the entire seam with a secondary layer of mastic, embedding a 4-inch wide polyester reinforcing fabric into the wet compound.
2. Patching Punctures and Structural Tears
For damage penetrating the top ply of the bitumen roofing material, a simple surface dab of tar is insufficient. You must recreate the membrane's structural integrity.
- Cut away any frayed or delaminated edges around the puncture using a sharp roofing hook blade, creating a clean geometric shape (circle or square).
- Apply a base coat of rubberized asphalt mastic extending 3 inches beyond the damage in all directions.
- Cut a piece of matching modified bitumen patch material (or heavy-duty polyester roofing fabric) to fit over the base coat.
- Embed the patch into the wet mastic, ensuring no air bubbles remain.
- Apply a top coat of mastic over the patch, feathering the edges outward to prevent water damming. Allow 24 to 48 hours to cure depending on ambient humidity.
Preventative Maintenance and Protective Coatings
The National Roofing Contractors Association (NRCA) emphasizes that proactive maintenance extends the lifecycle of low-slope bitumen systems by up to 15 years. Once localized repairs are complete, applying a reflective coating shields the asphalt from UV oxidation.
Standard water-based acrylic elastomeric coatings will re-emulsify and wash away if subjected to ponding water (water remaining for more than 48 hours). If your flat roof has poor drainage, you must use a 100% silicone roof coating or a moisture-cure urethane, which remain impervious to standing water.
Recommended Coating Types for Bitumen
- Aluminum Asphalt Coatings: Ideal for BUR and APP systems. The aluminum flakes reflect UV rays and dissipate heat. Coverage is typically 1.5 to 2 gallons per 100 square feet. Requires annual stirring as aluminum settles.
- Silicone Roof Coatings: Premium option for SBS systems. High reflectivity (up to 85% solar reflectance), excellent ponding water resistance, and retains flexibility in sub-zero temperatures. Material cost is higher, but the 20-year lifecycle makes it cost-effective.
- Acrylic Elastomerics: Best for steep-slope mod-bit or roofs with excellent drainage. Highly reflective and easy to apply via airless sprayer, but strictly requires a dry substrate during application.
2026 Cost Breakdown: Repair vs. Professional Intervention
Understanding current market rates helps property managers and homeowners budget accurately. Labor rates for specialized flat roof technicians have stabilized, but material costs for polymer-modified asphalt and solvents have seen incremental increases.
| Repair / Maintenance Task | DIY Material Cost | Professional Service Cost |
|---|---|---|
| Localized Seam Repair (per 10 linear ft) | $35 - $60 | $250 - $400 (Minimum call-out fee) |
| Puncture Patching (per patch) | $20 - $45 | $300 - $500 (Minimum call-out fee) |
| Acrylic Elastomeric Coating (per sq. ft.) | $0.65 - $1.10 | $1.80 - $2.75 |
| 100% Silicone Coating (per sq. ft.) | $1.50 - $2.20 | $3.50 - $5.50 |
| Full Roof Cleaning & Primer Prep | $0.15 - $0.30 | $0.40 - $0.85 |
Decision Framework: When to Replace Instead of Repair
Continuous patching of a failing bitumen roofing material system is a sunk-cost fallacy. Use the following framework to determine if the roof has reached the end of its serviceable life:
The 25% Rule: If more than 25% of the roof surface area requires patching, coating, or seam repair in a single season, the cost of labor and materials will exceed the amortized cost of a full tear-off and replacement.
Additionally, if core cuts reveal that the underlying polyisocyanurate or EPS insulation is saturated with moisture (indicated by a dark, heavy core sample), localized repairs are futile. Trapped moisture will continue to vaporize under solar load, creating new blisters and destroying new patches from underneath. In cases of wet insulation, a complete replacement down to the roof deck is the only structurally sound solution.
For comprehensive specifications on commercial low-slope systems, refer to the GAF Commercial Roofing guidelines, which provide detailed technical data sheets for compatible primers, adhesives, and membrane thicknesses required for warranty-compliant repairs.
Written by
James ThorntonJames Thornton is a construction industry veteran with 25 years of hands-on experience in wood framing, lumber grading, and residential building codes. He started as a framing carpenter in rural Oregon, earned his ICC Residential Building Inspector certification, and eventually became a senior plan reviewer for the City of Portland Bureau of Development Services. James holds a B.S. in Wood Science & Technology from Oregon State University and is a certified lumber grader through the West Coast Lumber Inspection Bureau (WCLIB). He has inspected over 3,000 residential construction sites and authored the city's internal guide on advanced framing techniques (2x6 at 24" O.C.). James lives in Bend, OR, where he builds custom timber-frame cabins and competes in lumberjack sports.
More from James Thornton
View all
Insulation
Best Home Insulation Materials: Complete 2026 Guide
Compare top home insulation materials for 2026. Find R-values, installed costs per square foot, and best uses for fiberglass, spray foam, and mineral wool.
Aug 4, 2026

Sustainable Building
Certify Your Green Building Material for LEED and WELL
Step-by-step guide to certifying a green building material for LEED v5 and WELL v2. Master EPDs, HPDs, and VOC limits for 2026 project specifications.
Aug 4, 2026

Stone & Masonry
Veneer Stacked Stone Panels: Interior Design & Style Showcase
Discover how veneer stacked stone panels transform interiors. Explore modern design profiles, material pairings, and technical installation specs.
Aug 4, 2026