The Essential TPO Roofing Material List for Repairs & Maintenance
Access the definitive TPO roofing material list for commercial repairs. Includes membrane specs, welding tools, fasteners, and prep steps.

Why a Specialized TPO Roofing Material List Matters
Thermoplastic Polyolefin (TPO) dominates the commercial low-slope roofing market due to its heat-weldable seams, UV resistance, and energy-efficient reflectivity. However, when a TPO membrane suffers punctures, seam degradation, or fastener back-out, standard asphalt or EPDM repair products will cause catastrophic chemical failures. TPO lacks the plasticizers found in PVC and the vulcanized rubber properties of EPDM, meaning it requires heat-fused or chemically matched adhesives for repairs. Maintaining a watertight commercial roof requires a precise TPO roofing material list to ensure chemical compatibility, structural pull-out resistance, and long-term membrane integrity.
Never use asphalt-based flashing cements, bitumen tapes, or EPDM splice adhesives on a TPO roof. Petroleum-based solvents will permanently degrade the TPO polymer, causing the membrane to swell, blister, and eventually dissolve. Always verify that cleaners, tapes, and patches are explicitly manufactured for TPO applications.
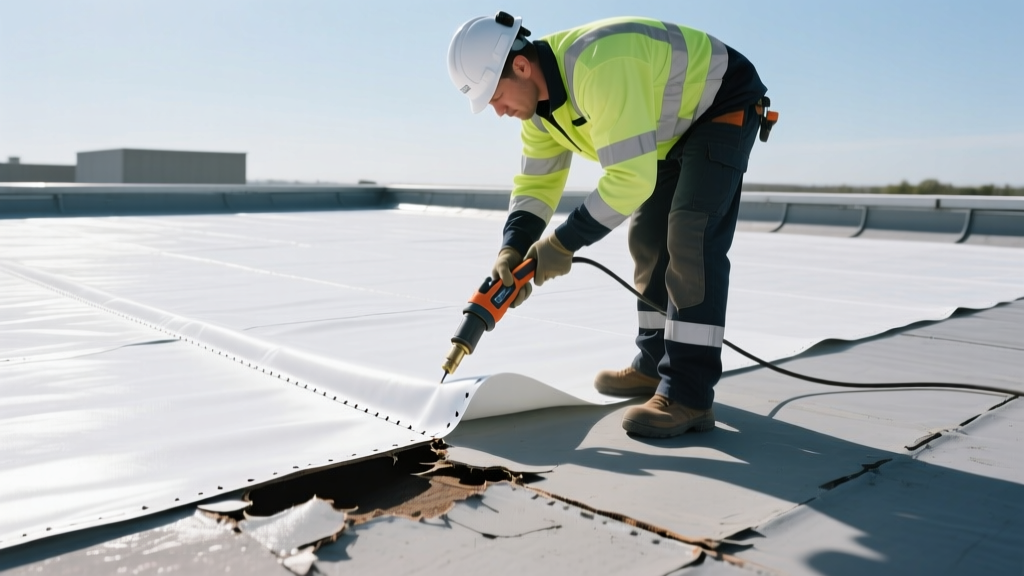
The Core TPO Roofing Material List for Patching & Seam Repair
The foundation of any TPO repair kit revolves around matching the existing membrane's thickness and utilizing heat-activated or TPO-compatible bonding agents. Below are the exact materials required for field patches, pipe boots, and seam remediation.
- TPO Patching Membrane (Unreinforced & Reinforced): For general field repairs over punctures, use a reinforced TPO membrane matching the existing roof's thickness (typically 45-mil, 60-mil, or 80-mil). For inside/outside corners, pipe penetrations, and complex flashing details, you must use unreinforced TPO (usually 60-mil), which can be stretched and heat-formed to conform to 90-degree angles without creating tension points.
- TPO Seam Tape (Field-Applied): For re-welding failed laps or sealing T- joints, use 3-inch to 6-inch wide TPO-coated seam tape. Unlike peel-and-stick tapes used in modified bitumen, TPO seam tape requires a hot air welder to fuse the polymer layers together at the molecular level.
- TPO Surface Cleaner / Prep Solvent: TPO membranes oxidize over time, developing a chalky surface layer that prevents proper adhesion. Use a proprietary TPO surface cleaner (such as Carlisle Splice Wash or GAF TPO Cleaner) or a high-purity isopropyl alcohol (IPA) blend to strip oxidation and environmental pollutants before welding or applying adhesives.
- TPO Lap Sealant (Pourable & Cartridge): Used exclusively for terminating edges, T-joint intersections, and areas where a hot air welder cannot physically reach. Ensure the sealant is a low-VOC, TPO-compatible polyurethane or specialized polymer blend designed to bond to the TPO surface without degrading it.
Fasteners and Plate Specifications for Mechanically Attached Repairs
When repairing loose membrane sections, replacing damaged insulation, or securing perimeter flashings, the mechanical attachment must meet local wind uplift codes (often tested per FM 1-90 or UL 580). The following table outlines the required fastener and plate specifications based on the structural deck type.
| Deck Type | Fastener Specification | TPO Plate Size | Min. Pull-Out Value |
|---|---|---|---|
| Steel Deck (22 ga+) | #14 or #15 Self-Drilling Screw | 3.0" Diameter TPO-Coated | 300+ lbf |
| Structural Concrete | #10 or #12 Concrete Screw (Tapcon) | 3.0" Diameter TPO-Coated | 300+ lbf |
| Wood / OSB Deck | #14 Wood-Grip Threaded Screw | 3.0" Diameter TPO-Coated | 200+ lbf |
| Gypsum / Cementitious | #14 Self-Drilling with Wing Tips | 3.0" Diameter TPO-Coated | 150+ lbf |
Note: Fastener lengths must be calculated to penetrate the structural deck by a minimum of 3/4-inch for steel and wood, or 1-inch for concrete, after passing through the membrane and insulation layers.
Surface Preparation and Heat Welding Tools
A TPO repair is only as strong as the heat weld. Molecular fusion requires precise temperature control, adequate pressure, and correct travel speed. The GAF EverGuard TPO Technical Specifications dictate strict parameters for heat welding to prevent cold joints or membrane burn-through.
- Surface Cleaning: Scrub the repair area and a 3-inch perimeter with TPO cleaner using a clean, lint-free rag. Allow the solvent to flash off completely (usually 2-5 minutes). Do not weld over wet solvent, as trapped vapors will cause post-weld blistering.
- Hot Air Welder Setup: Use an automatic hot air welder (e.g., Leister VARIMAT V2) for long seams, or a handheld welder (e.g., Leister Triac ST) for patches and details. Set the nozzle temperature between 950°F and 1150°F (510°C - 620°C). Ambient temperature and wind speed dictate the exact setting; colder days require higher temperatures and slower travel speeds.
- Seam Rolling: Immediately behind the heat nozzle, apply firm, continuous pressure using a 2-inch hard silicone seam roller for flat laps, or a soft silicone roller for inside corners. The pressure forces the molten TPO polymers to interlock.
- Seam Probing: Once the weld cools (approx. 10-15 seconds), run a blunt-tipped TPO seam probe (often a modified cotter pin with a rounded tip) along the edge of the weld. If the probe catches or dips into a void, the weld is incomplete and requires a target patch.
Troubleshooting Common TPO Repair Failures
Even with the correct TPO roofing material list, environmental factors and technician error can lead to repair failures. Use this diagnostic framework to identify and correct common issues.
1. Cold Welds and Seam Voids
Symptom: The seam probe catches on the edge of the lap, or water infiltrates through microscopic channels in the weld line. Cause: Welder temperature was too low, travel speed was too fast, or insufficient roller pressure was applied. Oxidation on the membrane surface can also prevent fusion. Fix: Clean the failed seam area with TPO solvent. Apply a 4-inch wide TPO seam tape over the void and re-weld using verified temperature settings. Always perform a test weld on a scrap piece of TPO each morning to calibrate the welder to the day's ambient conditions.
2. Fishmouths and Wrinkles
Symptom: A crescent-shaped wrinkle (fishmouth) appears in the seam, creating an open channel for water ingress. Cause: The membrane was not laid flat before welding, or the material expanded/contracted unevenly due to solar heating during installation. Fix: Do not attempt to flatten and re-weld a fishmouth. Use a utility knife to slit the fishmouth open so it lays perfectly flat. Clean the area and apply a 6-inch unreinforced TPO target patch over the slit, heat-welding the perimeter to encapsulate the repair.
3. Membrane Shrinkage and Flashing Pull-Off
Symptom: The TPO membrane pulls away from parapet walls, curbs, or HVAC penetrations, exposing the underlying substrate. Cause: Improper detailing during original installation, lack of termination bar securement, or using reinforced membrane for complex flashing details (reinforced membranes cannot stretch and will pull back under thermal tension). Fix: Install a termination bar mechanically fastened to the wall. Clean the existing membrane and weld a strip of unreinforced TPO flashing from the termination bar down to the field membrane, ensuring a continuous water-shedding lap. Seal the top edge of the termination bar with TPO-compatible lap sealant.
Expert Insight on Reflectivity Maintenance: According to the U.S. Department of Energy Cool Roof Guidelines, maintaining the solar reflectance index (SRI) of a white TPO roof is critical for energy efficiency. When executing repairs, ensure that all patching materials and seam tapes are bright white and match the existing membrane's reflectivity. Darker repair materials or incompatible sealants will create thermal hotspots that accelerate localized membrane degradation and increase building cooling loads.
Cost Expectations for TPO Repair Materials
Budgeting for TPO maintenance requires an understanding of both material costs and specialized equipment investments. While a basic patch kit is relatively inexpensive, the tools required for proper fusion represent a significant capital expenditure.
- TPO Membrane & Tape: Reinforced TPO membrane costs approximately $1.50 to $2.50 per square foot. Pre-applied or field-applied TPO seam tape averages $40 to $75 per 50-foot roll, depending on width.
- Cleaners & Sealants: A gallon of proprietary TPO surface cleaner ranges from $60 to $90. TPO lap sealant cartridges cost $15 to $25 each.
- Equipment: A professional-grade handheld hot air welder (e.g., Leister Triac ST) costs between $800 and $1,200. Automatic walk-behind welders (e.g., Leister VARIMAT) range from $4,500 to $7,000. For facility managers overseeing multiple properties, owning this equipment pays for itself within three to four major repair cycles compared to hiring specialized contractors for minor seam remediation.
By strictly adhering to this specialized TPO roofing material list and utilizing precise heat-welding protocols, facility managers and roofing professionals can extend the service life of a TPO roof system by 10 to 15 years, preventing premature tear-offs and preserving the roof's energy-efficient properties.
Written by
James ThorntonJames Thornton is a construction industry veteran with 25 years of hands-on experience in wood framing, lumber grading, and residential building codes. He started as a framing carpenter in rural Oregon, earned his ICC Residential Building Inspector certification, and eventually became a senior plan reviewer for the City of Portland Bureau of Development Services. James holds a B.S. in Wood Science & Technology from Oregon State University and is a certified lumber grader through the West Coast Lumber Inspection Bureau (WCLIB). He has inspected over 3,000 residential construction sites and authored the city's internal guide on advanced framing techniques (2x6 at 24" O.C.). James lives in Bend, OR, where he builds custom timber-frame cabins and competes in lumberjack sports.
More from James Thornton
View all
Insulation
Best Home Insulation Materials: Complete 2026 Guide
Compare top home insulation materials for 2026. Find R-values, installed costs per square foot, and best uses for fiberglass, spray foam, and mineral wool.
Aug 4, 2026

Sustainable Building
Certify Your Green Building Material for LEED and WELL
Step-by-step guide to certifying a green building material for LEED v5 and WELL v2. Master EPDs, HPDs, and VOC limits for 2026 project specifications.
Aug 4, 2026

Stone & Masonry
Veneer Stacked Stone Panels: Interior Design & Style Showcase
Discover how veneer stacked stone panels transform interiors. Explore modern design profiles, material pairings, and technical installation specs.
Aug 4, 2026